Review of nanoblock Hello Kitty Kimono NBCC_215

Hello Kitty Kimono build and box

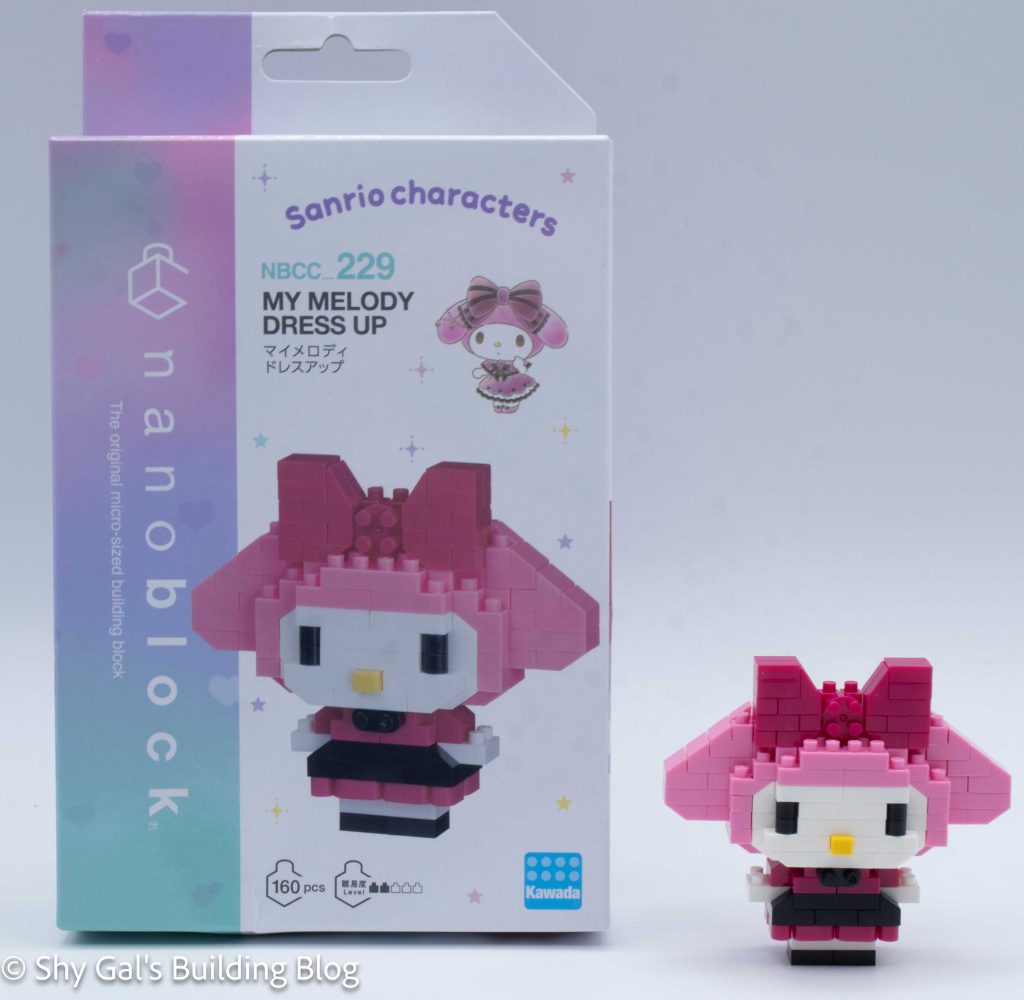
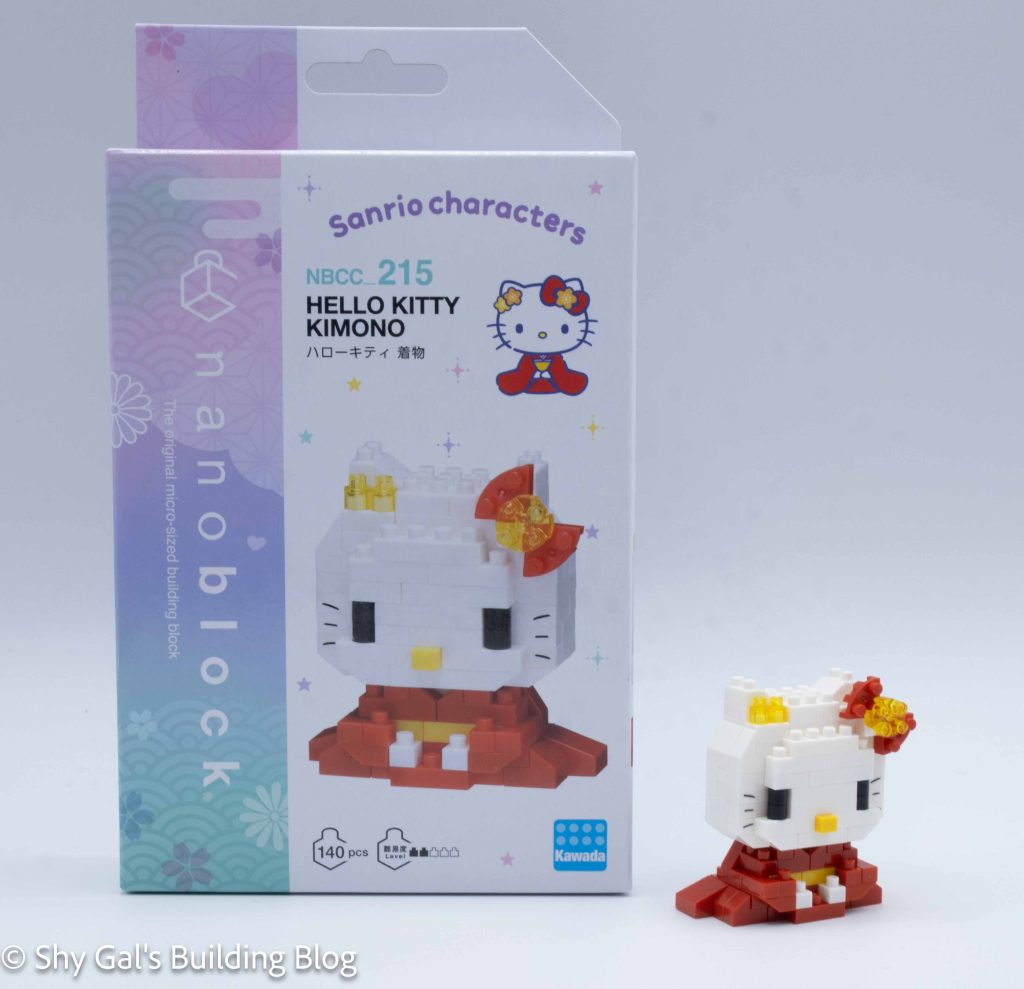
This post is a review of the nanoblock Hello Kitty Kimono build. Hello Kitty Kimono is part of the nanoblock Character collection. Wondering what else is part of the Character collection? Click here for a list.

Number: NBCC_215

Number of Pieces: 140

Difficulty Rating: 2/5

Hello Kitty Kimono build front view

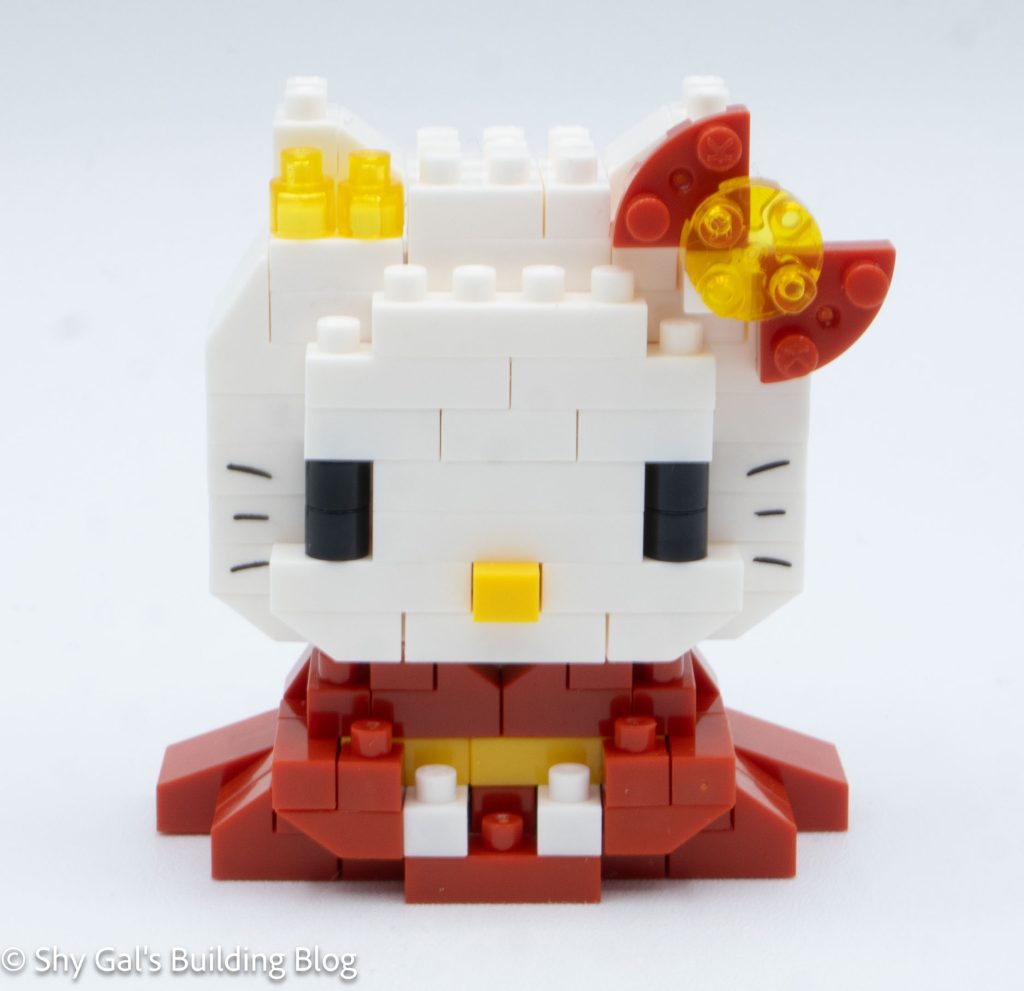
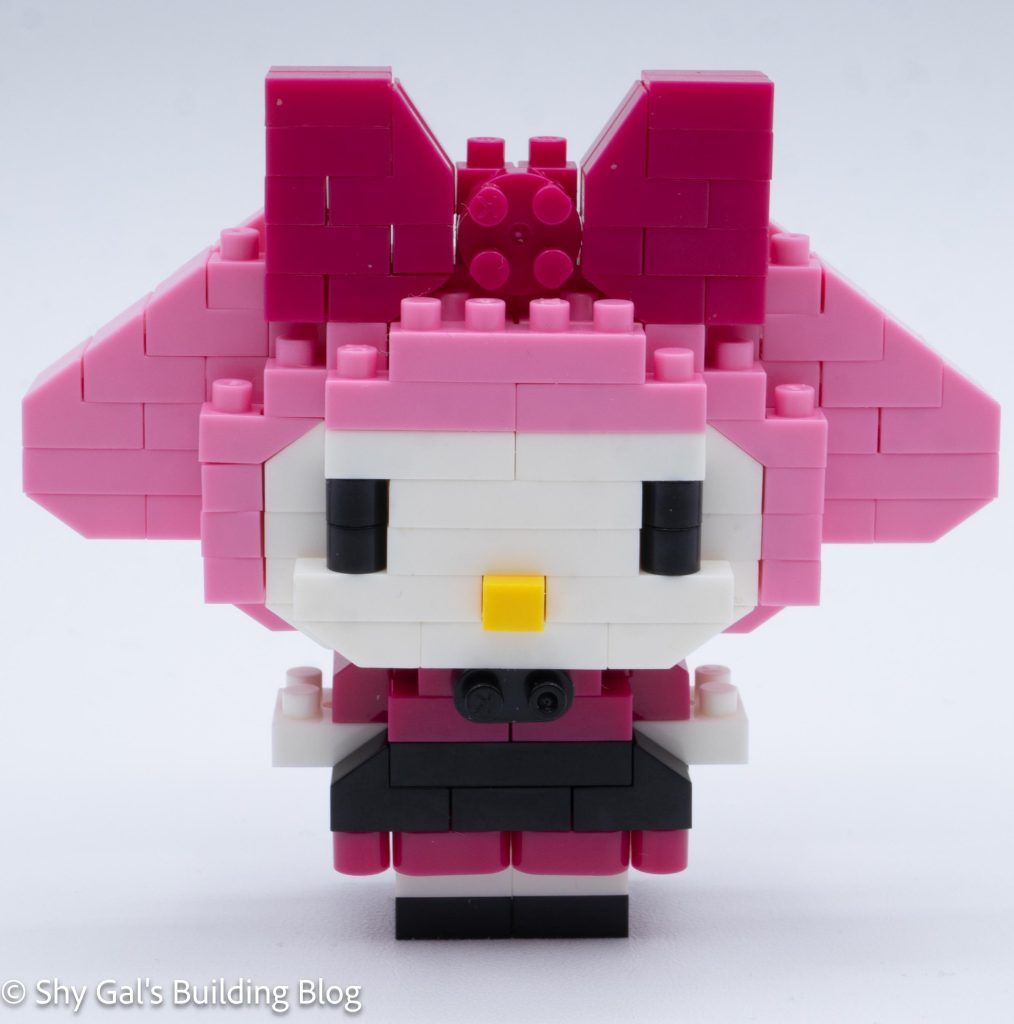
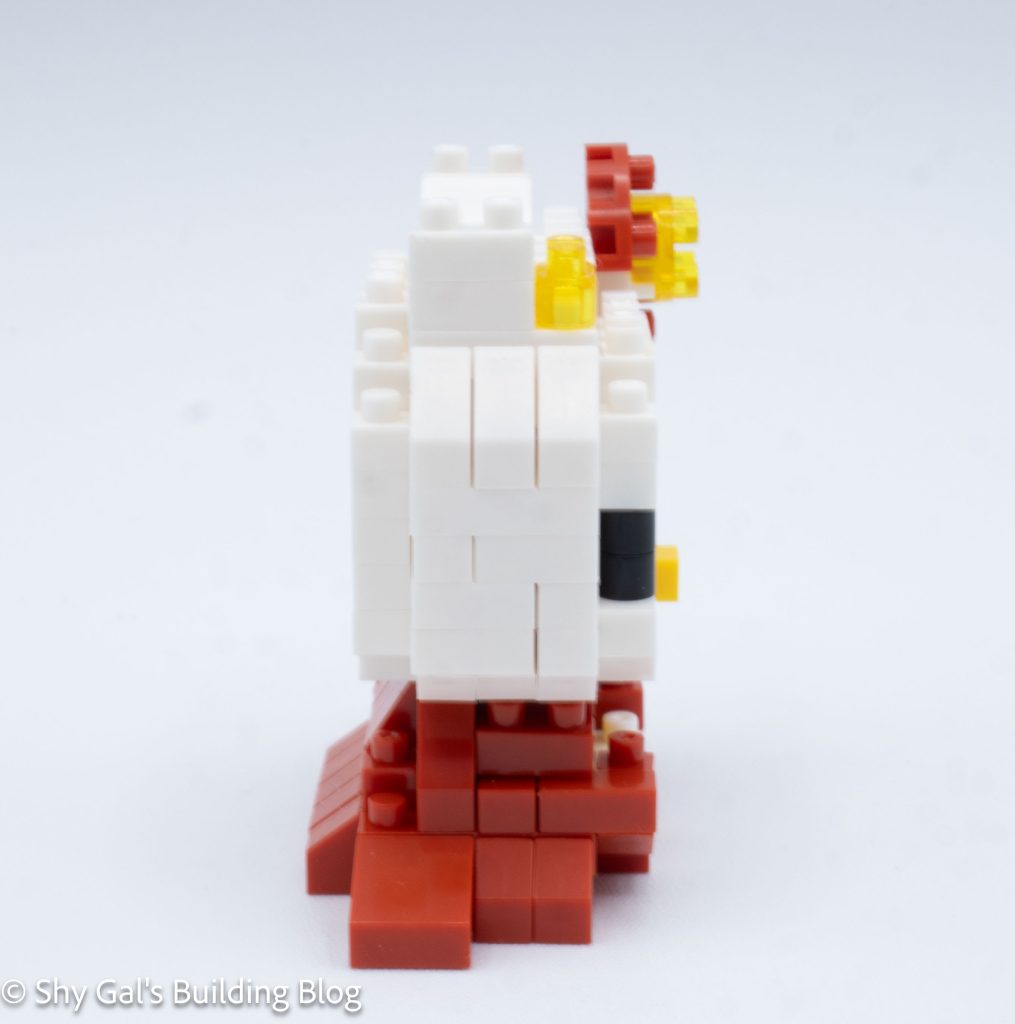
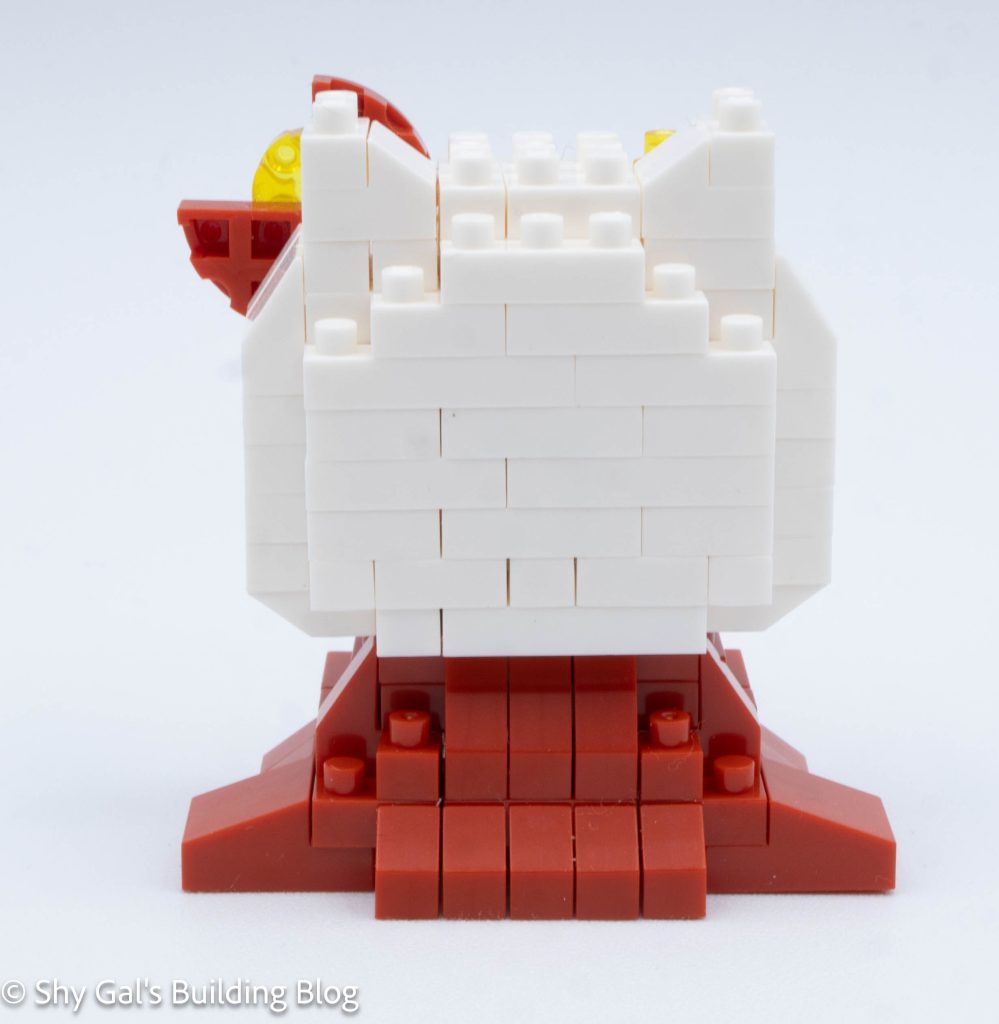
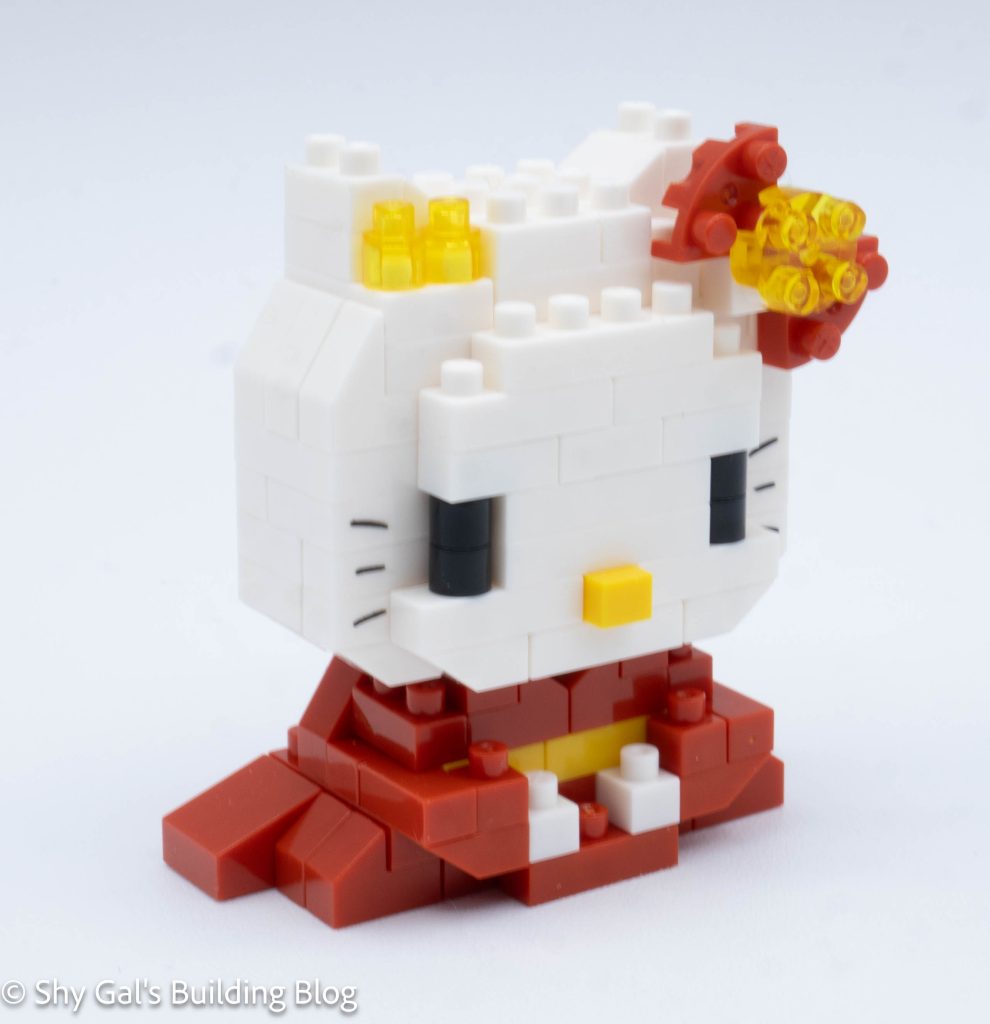
This build has 2 major sections. There is the head and the body.

The first step is to build the head. The first step is to build 2 sections for the base of the head. The 2 sections are connected to create the base.

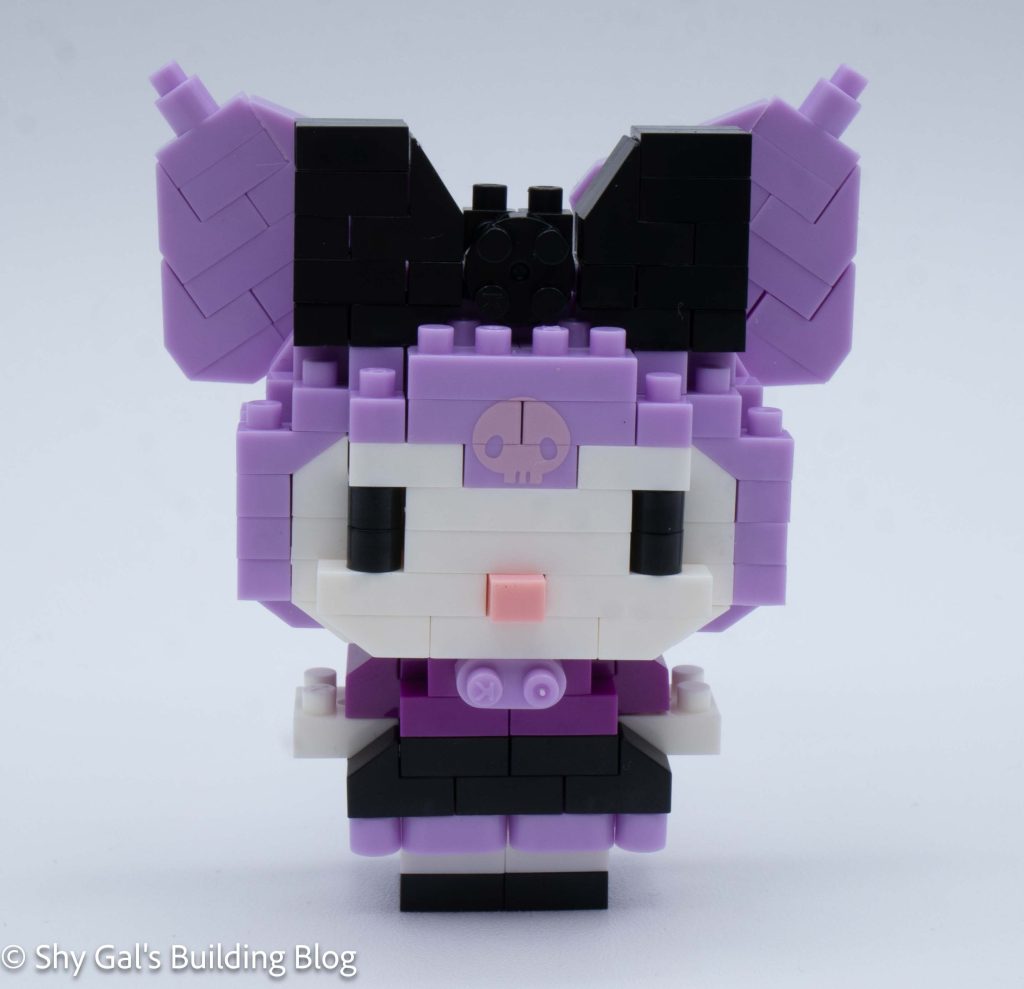
Then the nose and eyes are added to the front. Then, Hello Kitty’s whiskers are added using printed bricks.

Hello Kitty Kimono build side view

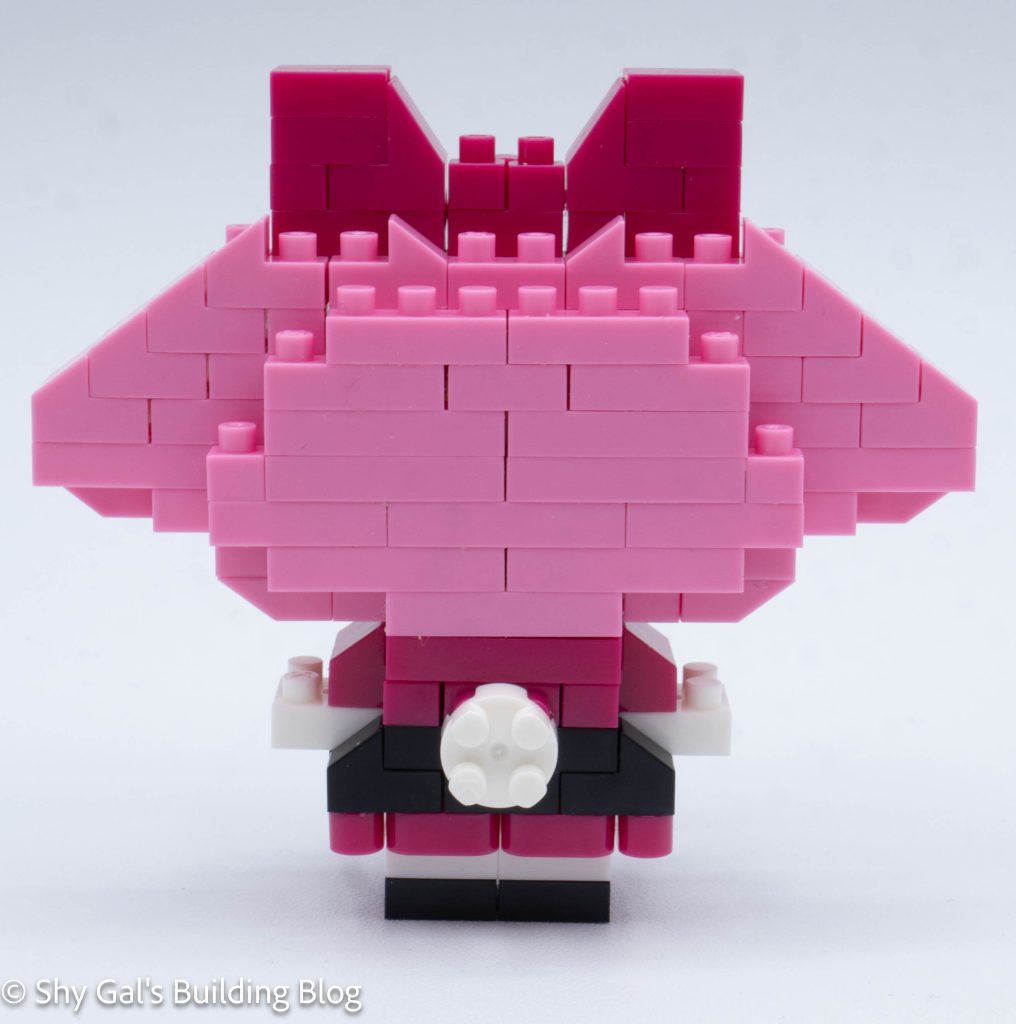
The next several steps are to build the rest of the height in Hello Kitty’s head.

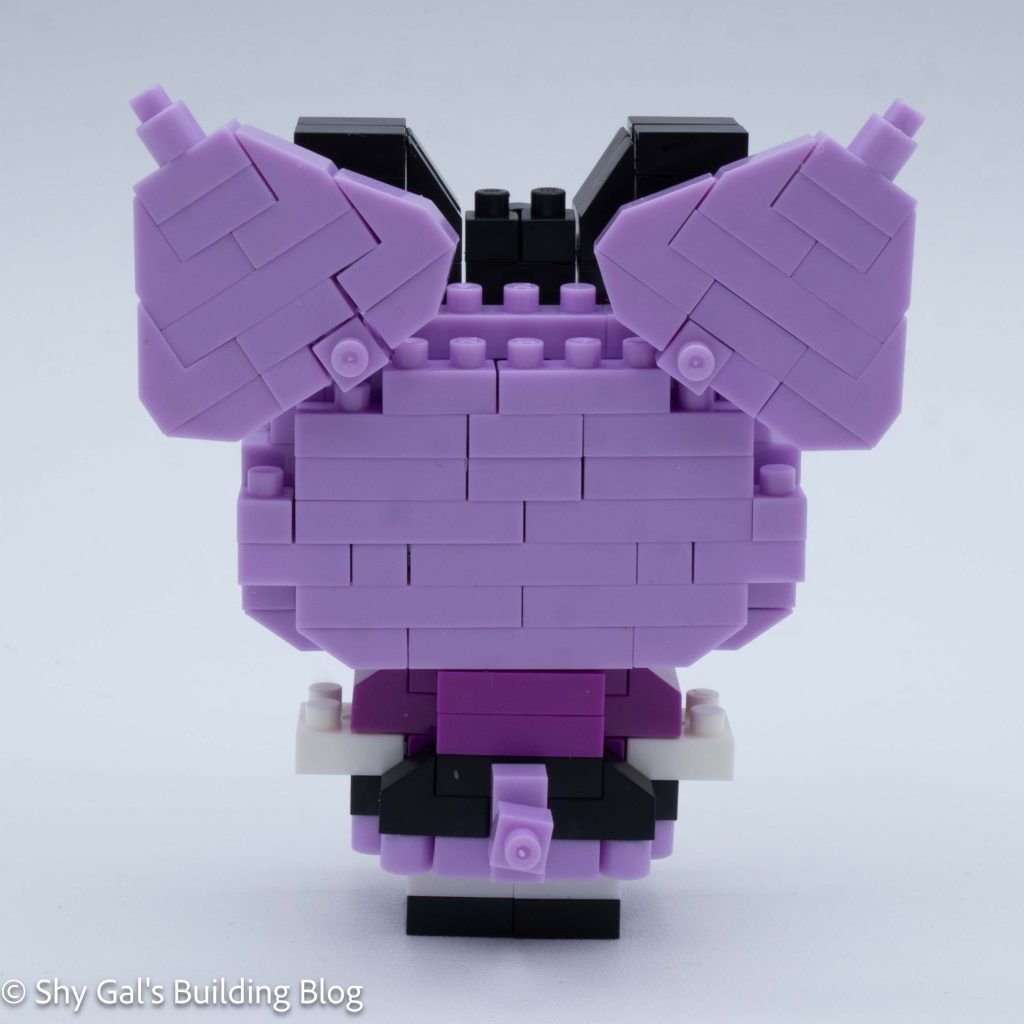
The next step is to flip over the head and add a layer of bricks to the base of her head.

The final step of the head is to add the bow to the front of the head.

Hello Kitty Kimono build back view

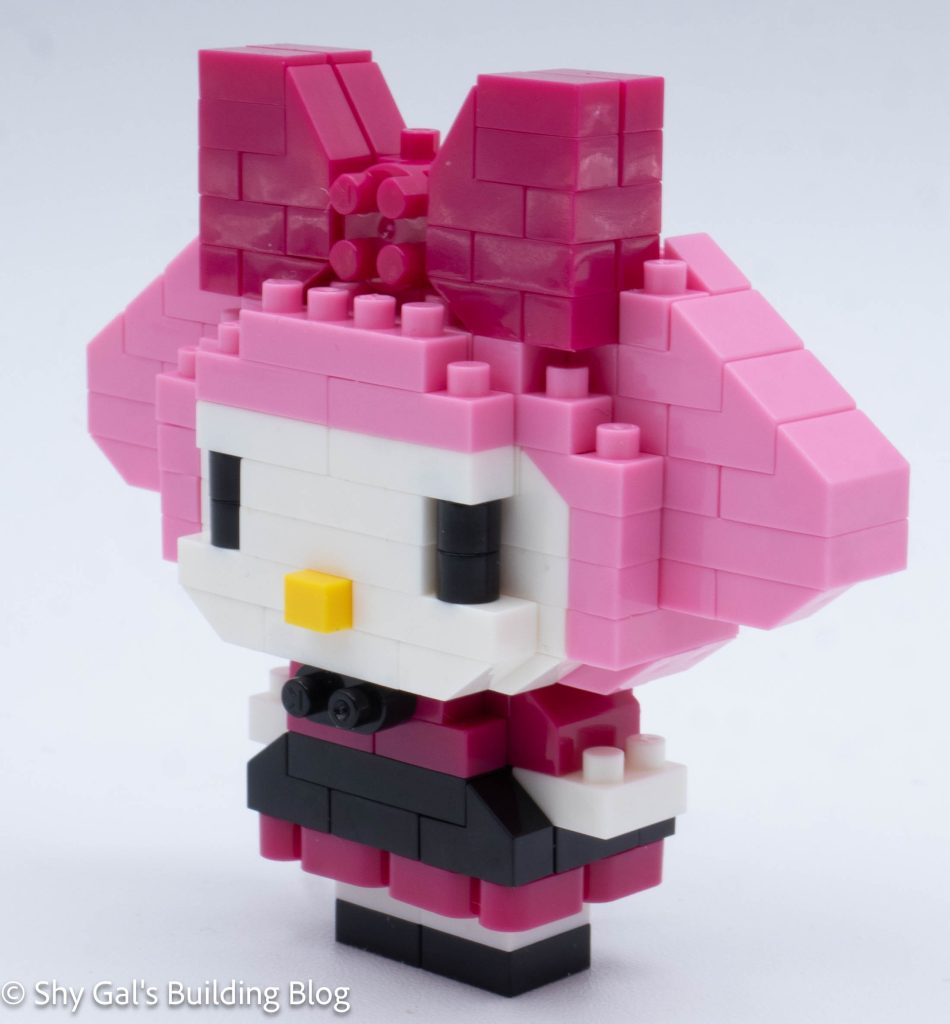
The body takes several steps to build the base. I laid them out on my nanoblock pad, and it was easy to keep everything connected. It was straightforward on my pad.

The next several layers go between building her arms and building up the body.

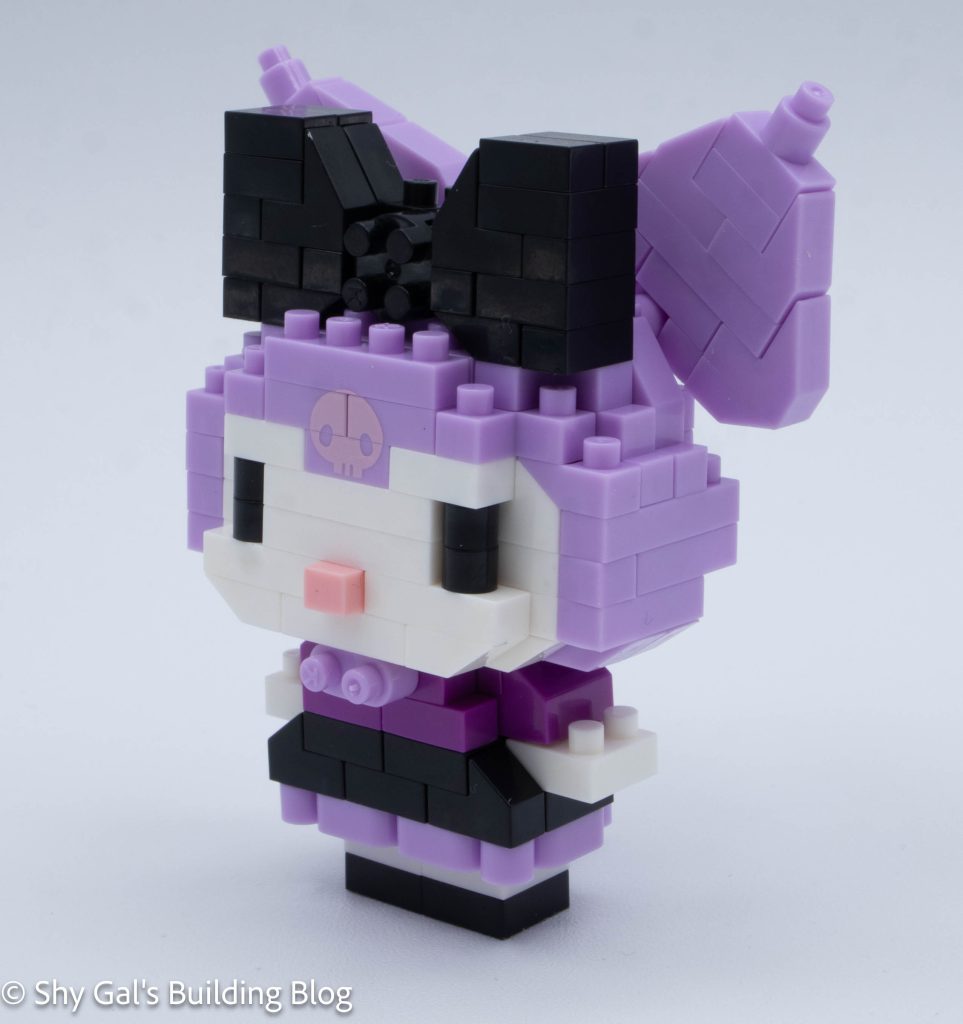
The final step is to attach the head to the body.

Hello Kitty Kimono build front 3/4 view

Things I liked:

  • I really like how the bow looks with the red and clear yellow bricks

Things I didn’t like:

  • I didn’t like how long the build was flimsy for when I was building it

Review of nanoblock Christmas Night NBH_191

Christmas Night build and box

This post is a review of the nanoblock Christmas Night build. Christmas Night is part of the nanoblock Sights to See collection. Wondering what else is part of the Sights to See collection? Click here for a list.

Number: NBH_191 

Number of Pieces: 530

Difficulty Rating: 3/5

Christmas Night build front view

This kit is made up of several smaller sections that are all placed on the baseplate.

The first section is to build the house on the left. I bought this kit used so it was a bit difficult to tell where to use the tan vs the golden single bricks. I guess that the tan bricks were the more peachy-looking bricks on the instructions. Other than the coloring questions, this house was very straightforward.

The second section is the house on the right. Once again, I was guessing about the colors, but overall, the instructions were clear.

Christmas Night build side view

The next section is to lay out the base. This was a bit tricky because the photos were so small it was a bit tricky to keep track of where the bricks went. After laying out the fences, sections 1 and 2 were attached to the base.

Then, some trees and a plant pot were added to the base.

The next section is the sleigh. There were 2 problems with my sleigh. First, the base of my sleigh wasn’t very secure until I attached the runners at a much later step. Secondly, it looked to me like there was no gap between the seat and the presents, but when I built it, I had a gap.

Christmas Night build back view

The next section was the reindeer. He was very clear overall, including when attached to the sleigh.

After building the reindeer and sleigh, the sleigh runners are finally added. The structure that holds up the sleigh is also added.

The last major section to build is the Christmas tree right out front.

This kit also came with a nanobbit dressed up as Santa. Since I bought the kit used it was already put together. He sits nicely in the sleigh but will fall out with any movement.

Christmas Night. build front 3/4 view

Things I liked:

  • I really like the amount of height and the various heights throughout the build. I feel that it adds a lot

Things I didn’t like:

  • I don’t love the combining of clear and solid bricks. I don’t feel that it adds a lot, nor do I think that so many bricks are clear is marked clearly in the instructions

Review of nanoblock Chococat NBCC_232

Chococat build and box

This post is a review of the nanoblock Chococat build. Chococat is part of the nanoblock Character collection. Wondering what else is part of the Character collection? Click here for a list.

Number: NBCC_232 

Number of Pieces: 150

Difficulty Rating: 2/5

Chococat build front view

This build has 2 major sections: the head and the body.

The head begins with a base layer of bricks, with the nose sticking out. This meant that I wasn’t about to build the head on my nanoblock pad. The base layer is all connected and held together by the second layer.

Next, the sides of Chococat’s face are built. These were a bit tricky because there are a couple of layers that aren’t tied together, and everything is pinned at the top instead of the normal locking of each layer.

Chococat build side view

Next, the beginning of the eyes are added.

Over the next several steps, the head is built in straightforward layers. I like how there are round bricks for the eyes, which is a detail that wasn’t clear in the photo.

The next step is to build and add the ears. The ears were straightforward to build, but I had difficulty getting the ears to properly line up with the head.

Chococat build back view

The final step to building the head is to add the whiskers to all the studs sticking out.

The body was very straightforward, and I was able to build the main foundation on my nanoblock pad. The body went up in layers, and all the directions were clear.

After building the main section of the body, I added length to Chococat’s tail and added the legs.

Finally, attach the head to the body.

Chococat build front 3/4 view

Things I liked:

  • I really like the small details like the rounded bricks for the eyes and how much length is in the tail

Things I didn’t like:

  • I didn’t understand the directions for how to attach the ears, which made doing it a lot harder

Review nanoblock Play in the Snow NBH_165

Play in the Snow build and box

This post is a review of the nanoblock Play in the Snow build. Play in the Snow is part of the nanoblock Sights to See collection. Wondering what else is part of the Sights to See collection? Click here for a list.

Number: NBH_165 

Number of Pieces: 360

Difficulty Rating: 3/5

Play in the Snow build front view

I bought this kit used, knowing I would at least get the instructions. Sadly, the bricks had yellowed, which may be visible in the photos. There are bricks that can’t be bought individually, so I couldn’t use my spare white bricks.

This build is broken up into 3 different sections. There is the snowball, the snowman, and the tree.

The first step is to prepare the base. It begins by laying a layer of clear and white bricks out on the white 20×20 base. I like how there is an indent where the path of the snowball that is being rolled would be. A couple more layers of white and clear bricks are added to the base.

Play in the Snow build side view

The next step is to build the snowball. The snowball goes up in straightforward layers, creating a rounded shape.

The next step is to build the snowman. The snowman has a body and a head. The most difficult thing about building the snowman is that there are 2 different slanted bricks. One is steeper than the other. The instructions used a symbol to denote which brick to use, but I kept getting the colors of the symbol confused.

The body of the snowman is built on the base plate. There are several layers of white bricks, but eventually, various colors are used to create the scarf, arms, and gloves.

The head was pretty straightforward. I like that the snowman is smiling and how his carrot nose sicks out. After building the head, it it attached to the body.

Play in the Snow build 3/4 front view

The tree was built off the base plate. It begins with a layer of green that quickly turns to white to show how the tree is snow-covered. The tree goes up in straightforward layers of white. The only tricky part was when there was an overhang making sure that the right amount was overhanging. Then, the tree is flipped over, and the truck is added. Then, the tree is attached to the base by the trunk.

A nice detail of the kit is that it comes with a nanobit. Since I got the kit used, it has already been built. It was easy to pose the nanobit so that it looked like he was rolling the snowball.

Play in the Snow build back view

Things I liked:

  • I really like the details of the various depths in the base plate, so it looks like the nanobit is walking in a trench made by the snowball

Things I didn’t like:

  • I didn’t enjoy all the slanted pieces, but it’s my fault for buying a used kit

Review of nanoblock Gudetama NBCC_231

Gudetama build and box

This post is a review of the nanoblock Gudetama build. Gudetama is part of the nanoblock Character collection. Wondering what else is part of the Character collection? Click here for a list.

Number: NBCC_231

Number of Pieces: 180

Difficulty Rating: 2/5

Gudetama build front view

This build has 2 major sections. There is the yolk and the white (since he is an egg).

The yolk is the main section of the character and comes with a printed face piece.

The first step is to build 2 2-layered segments and attach them together. The rest of the body is very straightforward and goes up in layers.

Gudetama build side view

Once the body is built and closed up, little arms are added to the front of the build.

The final step is to flip the build over and add some depth and feet. I had difficulty figuring out where to attach the feet, which was frustrating. The rest of the details were straightforward.

Gudetama build back view

The second major section is the white. It is a flat layer of bricks with a few studs sticking out so you can attach the yolk section to it later. Building it was very straightforward.

The final step is to connect the 2 sections together. It was a bit tricky to connect them because the fit is so tight, and everything needs to be exactly lined up.

Gudetama build front 3/4 view

Things I liked:

  • I like that they used clear white bricks for the white section instead of actual white bricks

Things I didn’t like:

  • I didn’t find the directions for adding the feet clear

Review of nanoblock X’mas Tree NBC_043

X'mas Tree build and package

This post is a review of the nanoblock X’mas Tree build. X’mas Tree is part of the nanoblock Mini Collection series. Wondering what else is part of the Mini Collection? Click here for a list.

Number: NBC_043 

Number of Pieces: 120

Difficulty Rating: 1

X'mas Tree build front view

This tree is unique because it is composed of all clear blocks. Most of the other builds are built from opaque bricks.

The build begins with building the trunk of the tree. There is a bit of detailing in the trunk.

X'mas Tree build side view

The next step is to build the main section of the tree. Creating the base is difficult because the instructions aren’t very clear. I had a very hard time figuring out where each brick went. Normally, there are arrows saying where the studs are lined up, but the instructions don’t have the arrows to show between layers.

After finally getting the base layers built, it is time to build the height of the tree. The body of the tree goes up in straightforward layers that get smaller as you get to the top of the tree. Scattered throughout the layers are little lights made with round bricks.

X'mas Tree. build back view

The final step is to build the star. The star is very straightforward.

All three sections are connected together to build a tree.

X'mas Tree build front 3/4 view

Things I liked:

  • I really like how the totally clear tree looks

Things I didn’t like:

  • The instructions for the base layer of the tree are very unclear

Review of nanoblock Kuromi Dress Up NBCC_230

Kuromi Dress Up build and box

This post is a review of the nanoblock Kuromi Dress Up build. Kuromi Dress Up is part of the nanoblock Character collection. Wondering what else is part of the Character collection? Click here for a list.

Number: NBCC_230

Number of Pieces: 180

Difficulty Rating: 2/5

Kuromi Dress Up build front view

This build is made up of 2 sections. There is the head and the body.

The head begins by taking 6 steps to create the base 2 layers of the head.

After building the base, the head goes up in layers that are straightforward. A hole is left so that the printed piece can be dropped into place right in front.

The head continues in layers, and eventually, I began the bow. After building the sides of the bow, I added the center of the bow.

Kuromi Dress Up build side view

After finishing the bow, I flipped the head over and added the bottom of the head.

The final step of the head is to add a small brick that acts as a bow around Kuromi’s neck.

I began the body by laying the base layer out on my nanoblock pad. Bricks were added to the side over the next few steps.

Once I attached bricks to the back of the body. I stopped using my nanoblock pad because the studs didn’t line up.

Kuromi Dress Up build back view

The rest of the body goes up in straightforward layers.

Then I flipped the body over and added the legs and tail.

Next, attach the head to the body.

The final step is to build 2 identical ears and attach them to Kuromi’s head.

Kuromi Dress Up build front 3/4 view

Things I liked:

  • I really like that the skull on her hood is printed

Things I didn’t like:

  • I don’t love how the purples look together

Review of nanoblock Snowman NBC_042

Snowman build and package

This post is a review of the nanoblock Snowman build. Snowman is part of the nanoblock Mini Collection series. Wondering what else is part of the Mini Collection? Click here for a list.

Number: NBC_42 

Number of Pieces: 130

Difficulty Rating: 1

Snowman build front view

I bought this kit used, knowing I would at least get the instructions. I ended additionally getting all the bricks to complete the kit. Sadly, however, the white has become yellow with age. The discolored bricks may be visible in my photographs.

Snowman build side view

The build begins laying out the base layer of white bricks on a red base. Building the snowman goes up in fairly straightforward layers.

A lot of details of the body go into the build as you add each layer. These details include buttons, arms, and a scarf.

Snowman build back view

The head is added to the built-in direct layers. The details of the face are added in the layers.

The final steps are to add the hat to complete the build.

Snowman build front 3/4 view

Things I liked:

  • I really like how quickly the build came together. I’m not sure if this is my favorite nanoblock snowman.

Things I didn’t like:

  • Snowman has become an annual build, and I’m not sure if this is my favorite snowman build.

Review of nanoblock My Melody Dress Up NBCC_229

My Melody Dress Up build and box

This post is a review of the nanoblock My Melody Dress Up build. My Melody Dress Up is part of the nanoblock Character collection. Wondering what else is part of the Character collection? Click here for a list.

Number: NBCC_229

Number of Pieces: 160

Difficulty Rating: 2/5

My Melody Dress Up build font view

This build is made up of 2 sections: the head and the body.

The head begins with building 2 sections that are connected. Then the front center is built and added to the face. Overall, getting the base layer of the head takes a total of 6 instructions. At this point, the head was a bit flimsy and tried to fall apart on me.

The next layer takes 4 steps, but locks all the loose bricks into place.

The rest of the head is fairly straightforward, going up in layers. At one point, I began to build the bow, so I needed to be careful to use the correct pink in each step.

My Melody Dress Up build side view

After completing the bow, I added the center of the bow.

Next, I flipped the head over and added details to the underside to round out the head.

The final step of the head is to add what appears to be a random brick to the front of the build.

My Melody Dress Up build back view

Next was the time to build the body. I was able to build the body on my nanoblock pad, which made it very simple. The body goes up in straightforward layers.

After building up the body, I flipped the build over and added the legs.

The final step was to add the details to the back of the outfit.

Finally, connect the head to the body. The random brick on the head became a bow on the body.

My Melody Dress Up build front 3/4 view

Things I liked:

  • I really like the details throughout the dress, such as the bows and use of rounded bricks

Things I didn’t like:

  • I didn’t really like how loose the head was, and the bricks were going in various directions when I tried to push the bricks together.