Review of nanoblock Clodsire RS NBPM_R09

Clodsire builds and box

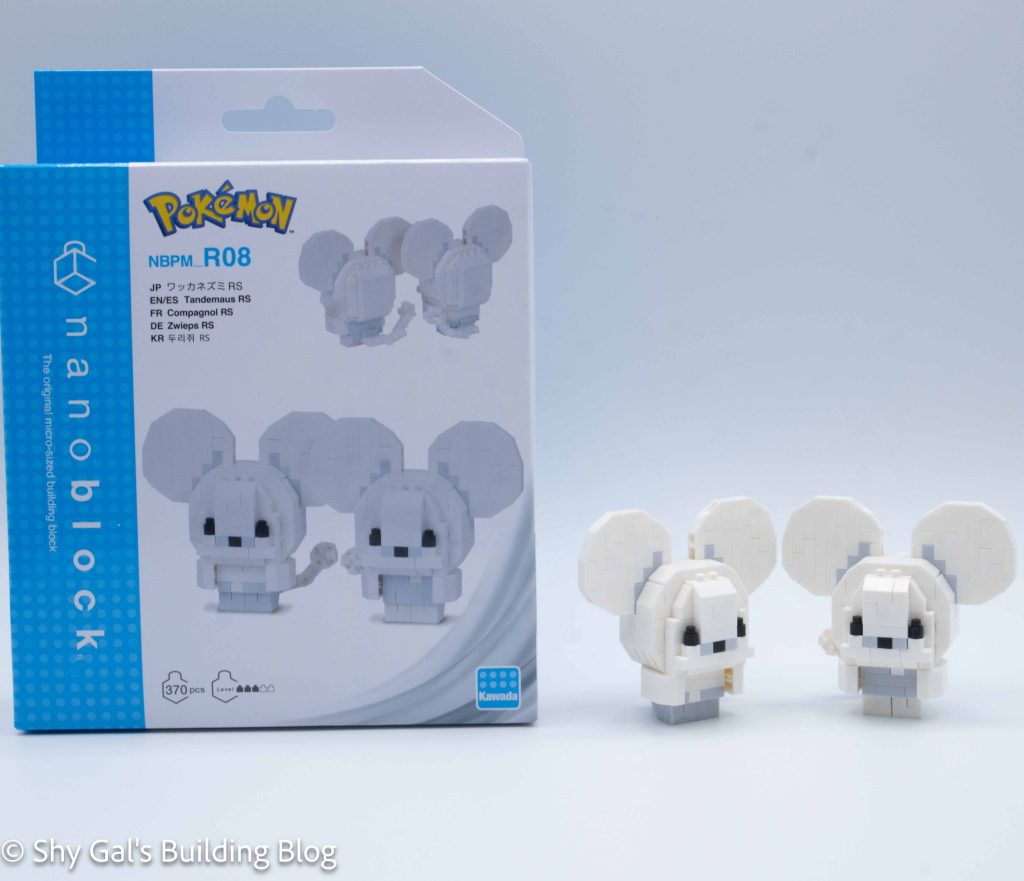
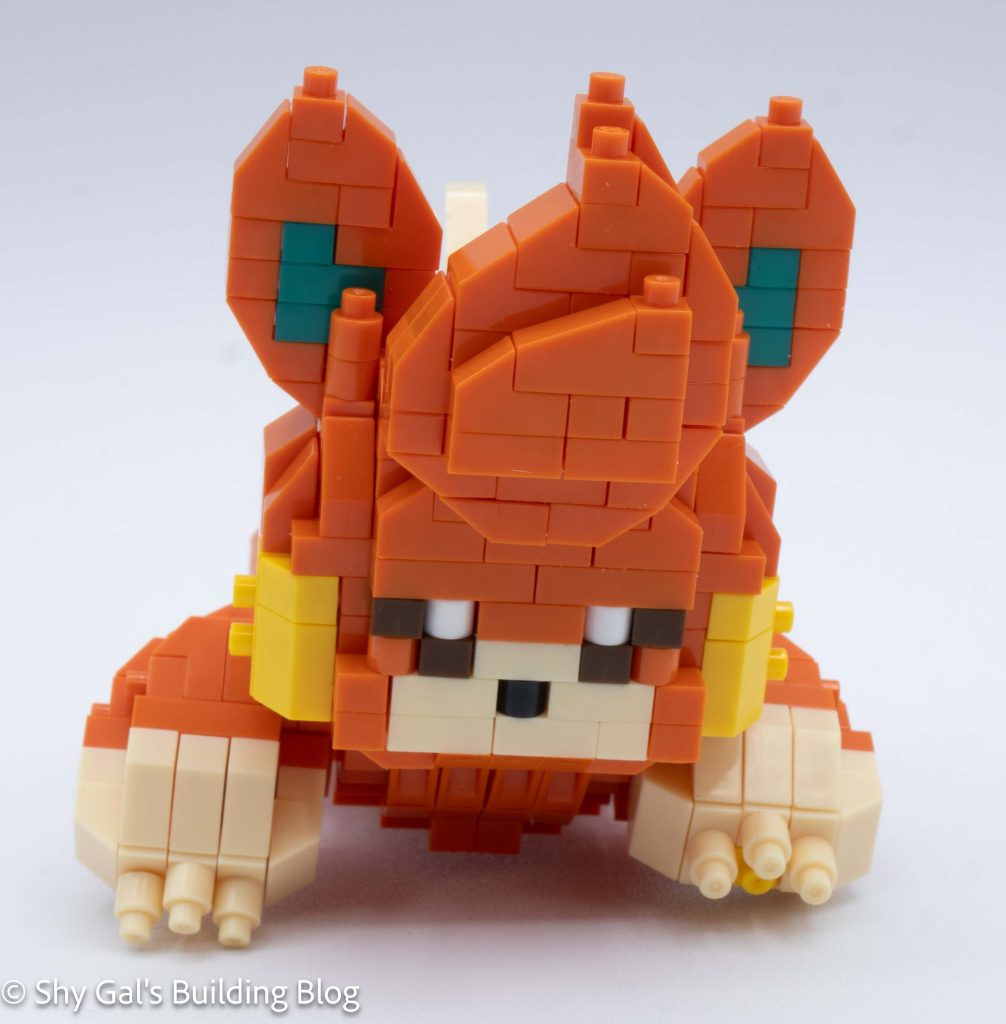
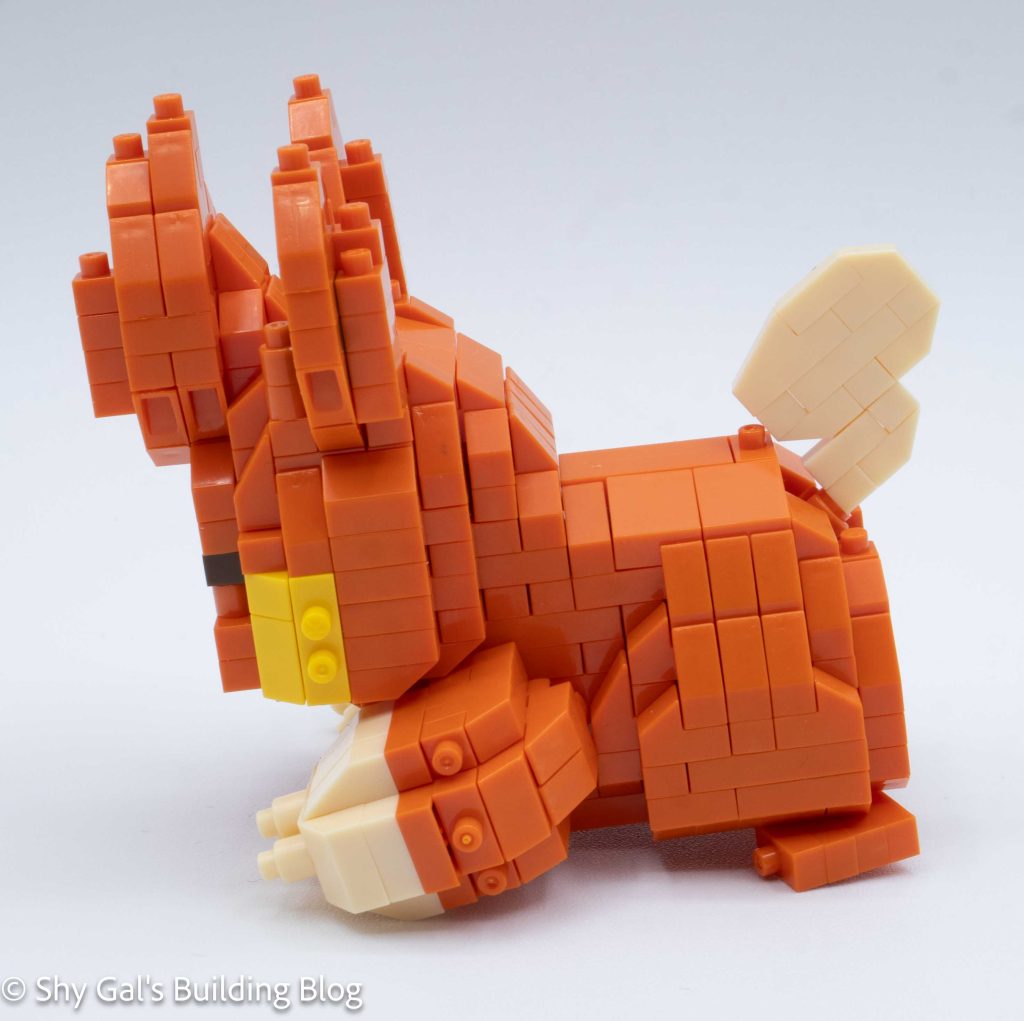
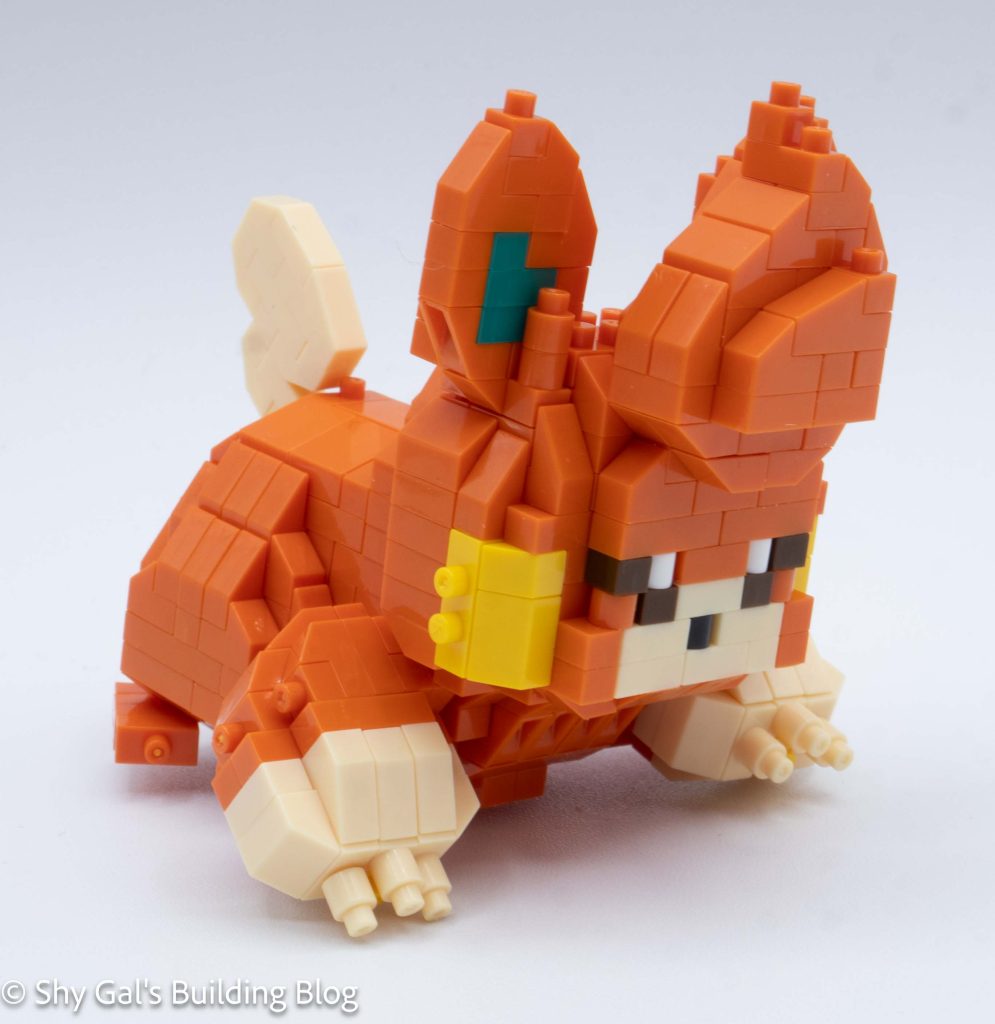
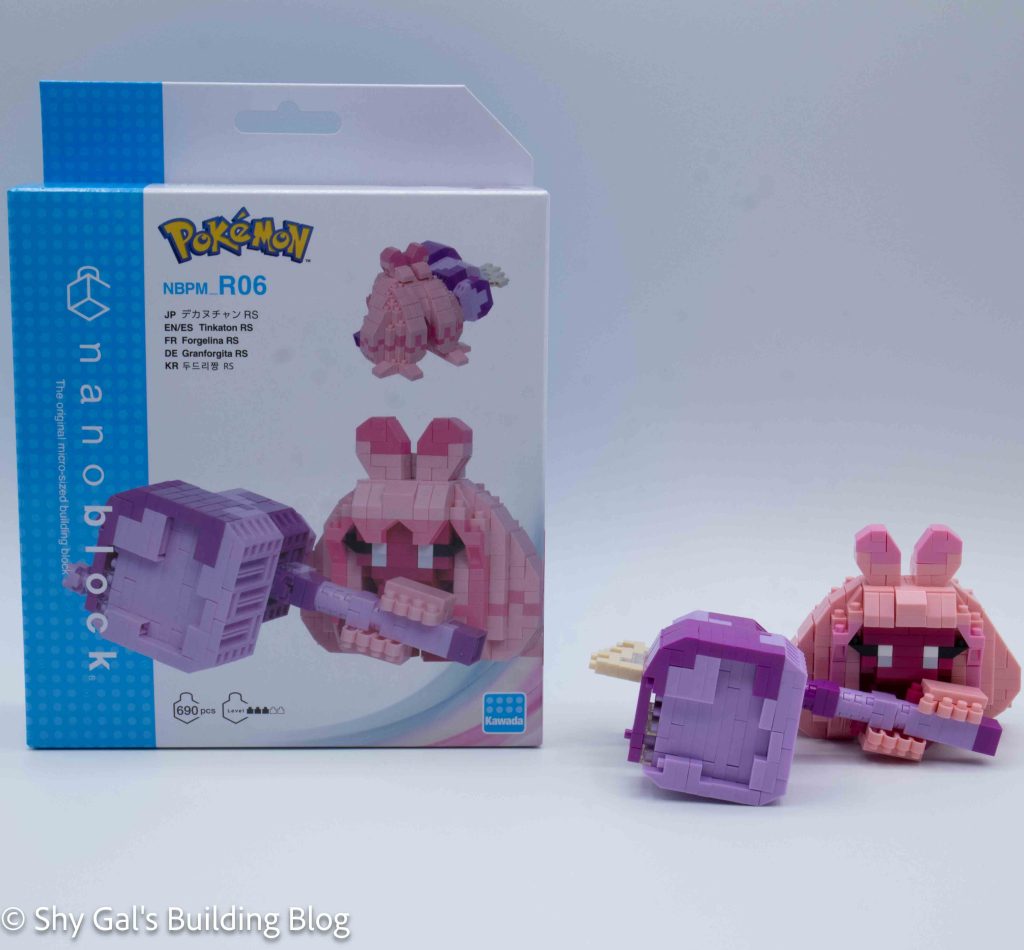
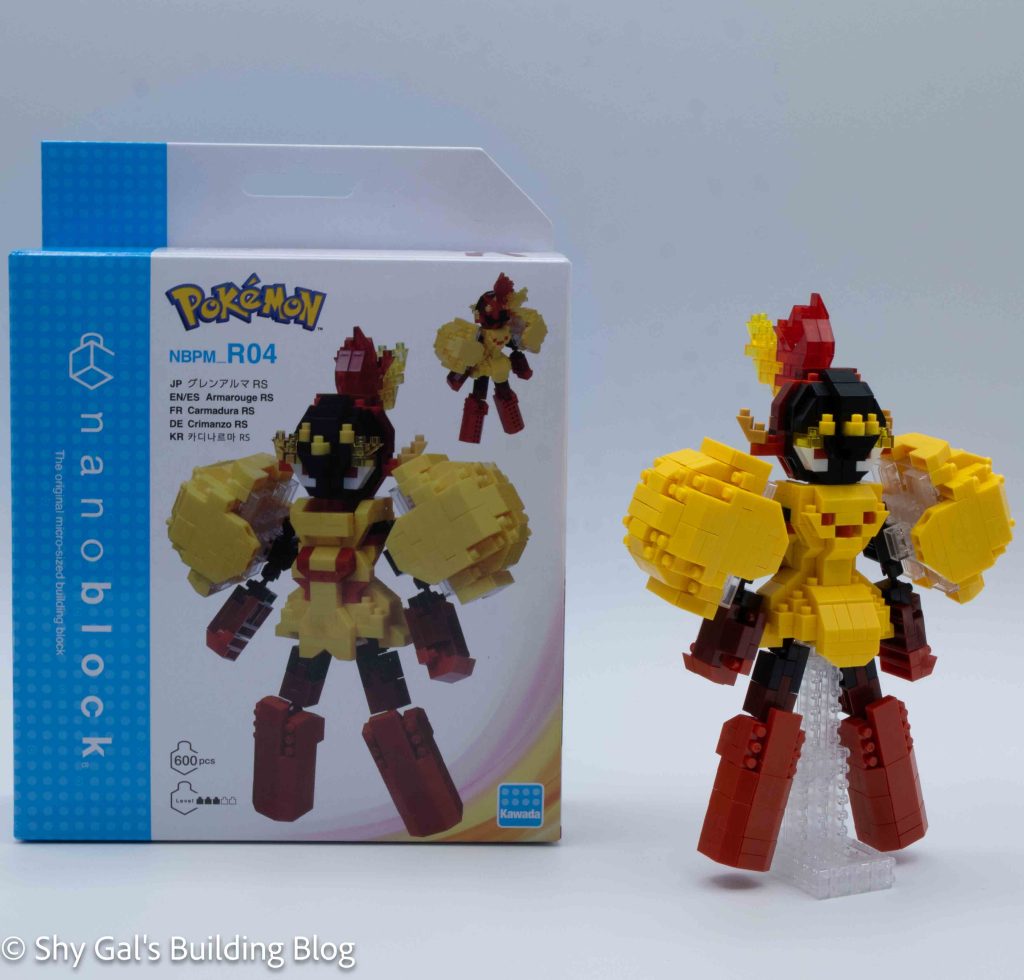
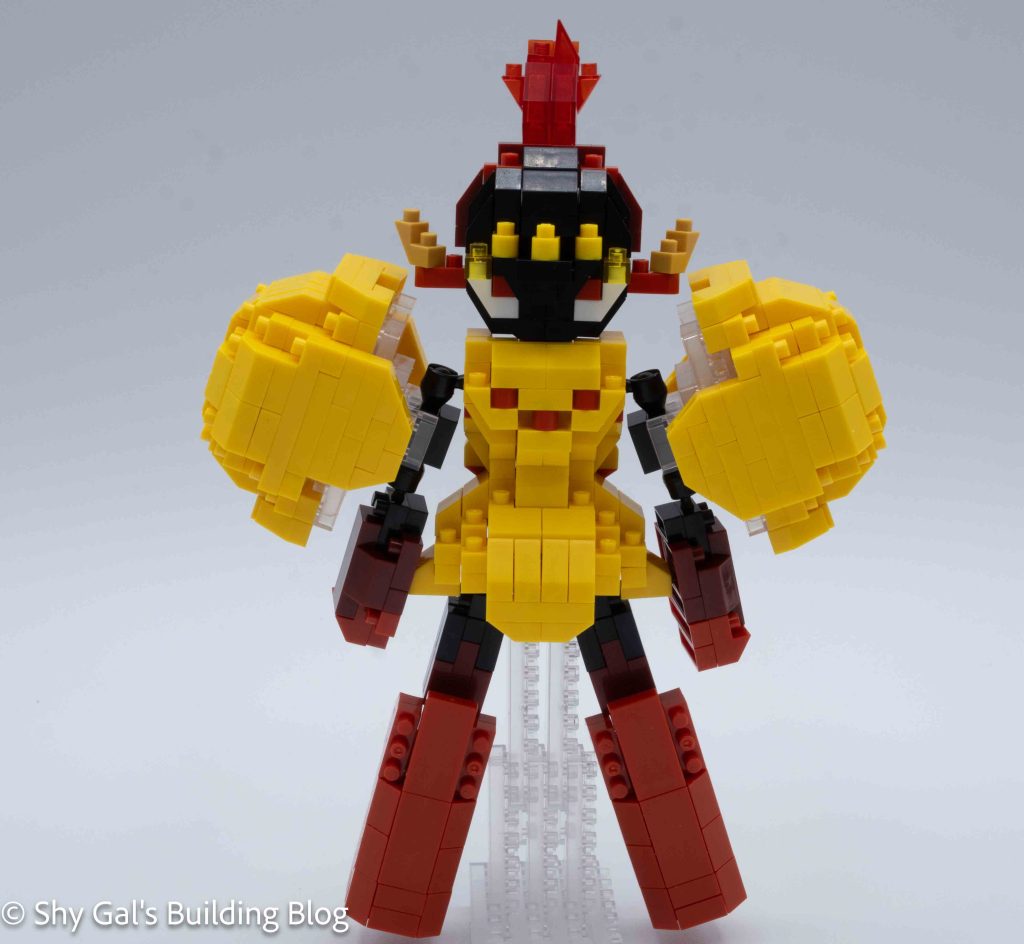
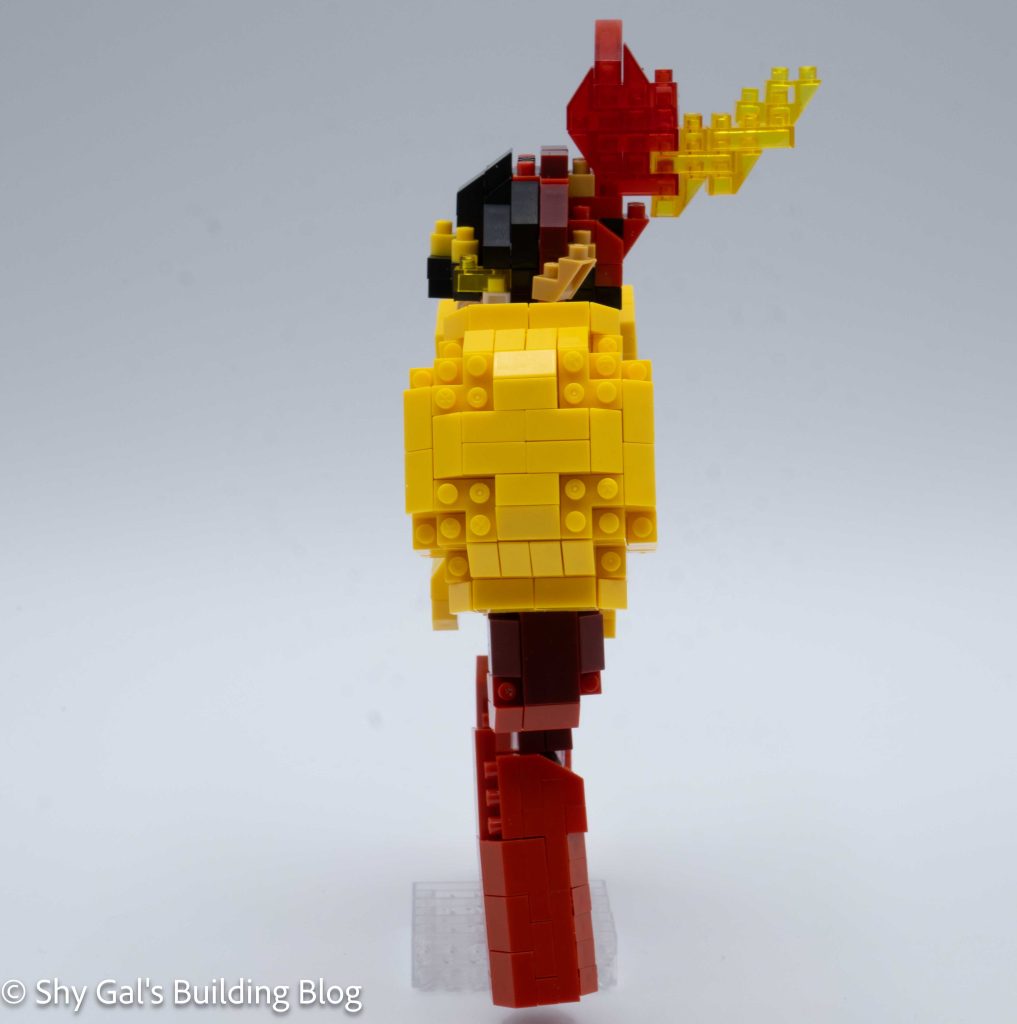
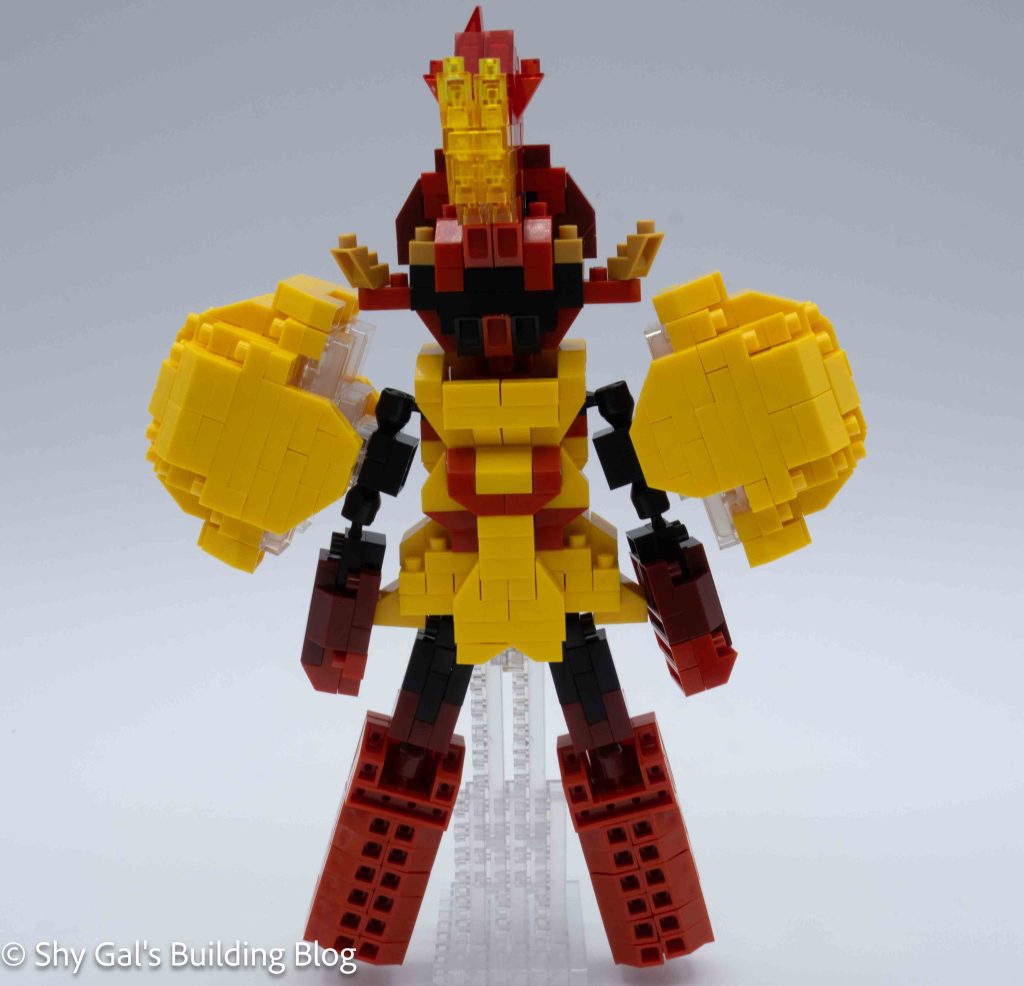
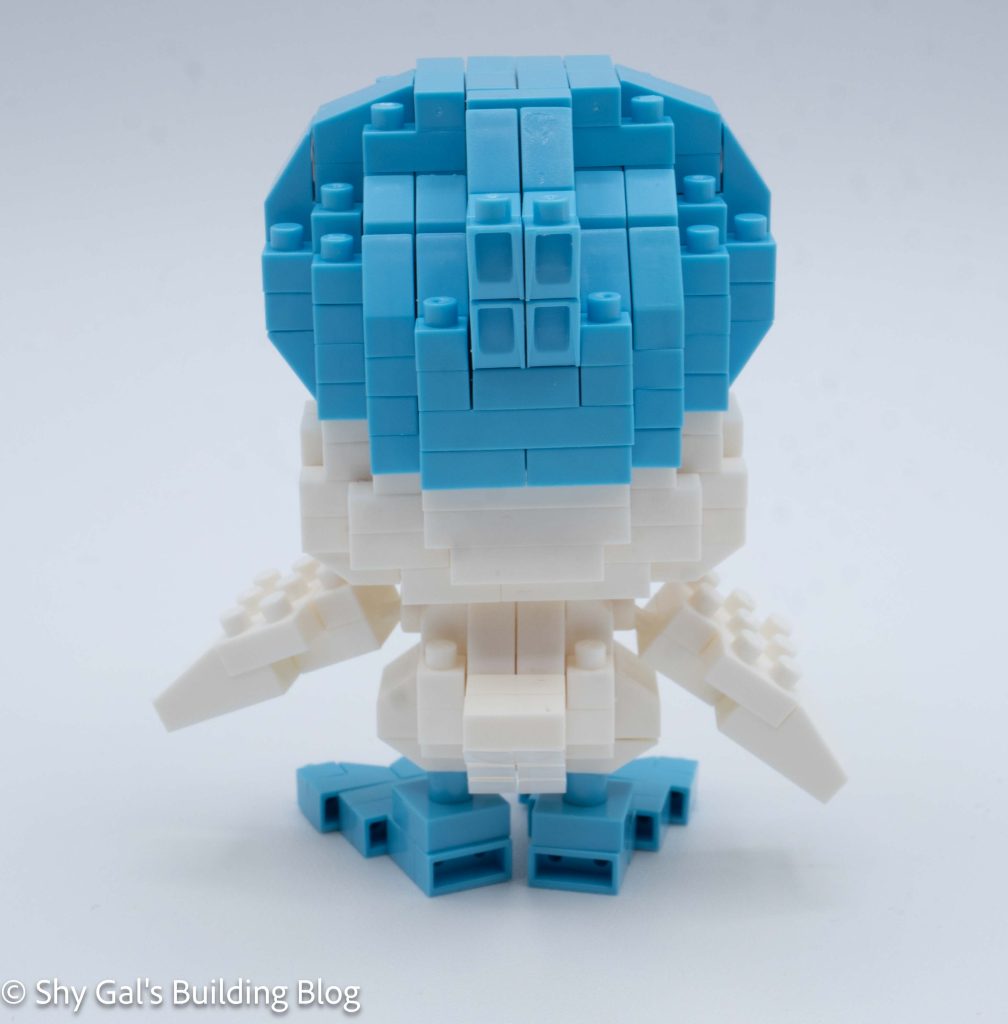
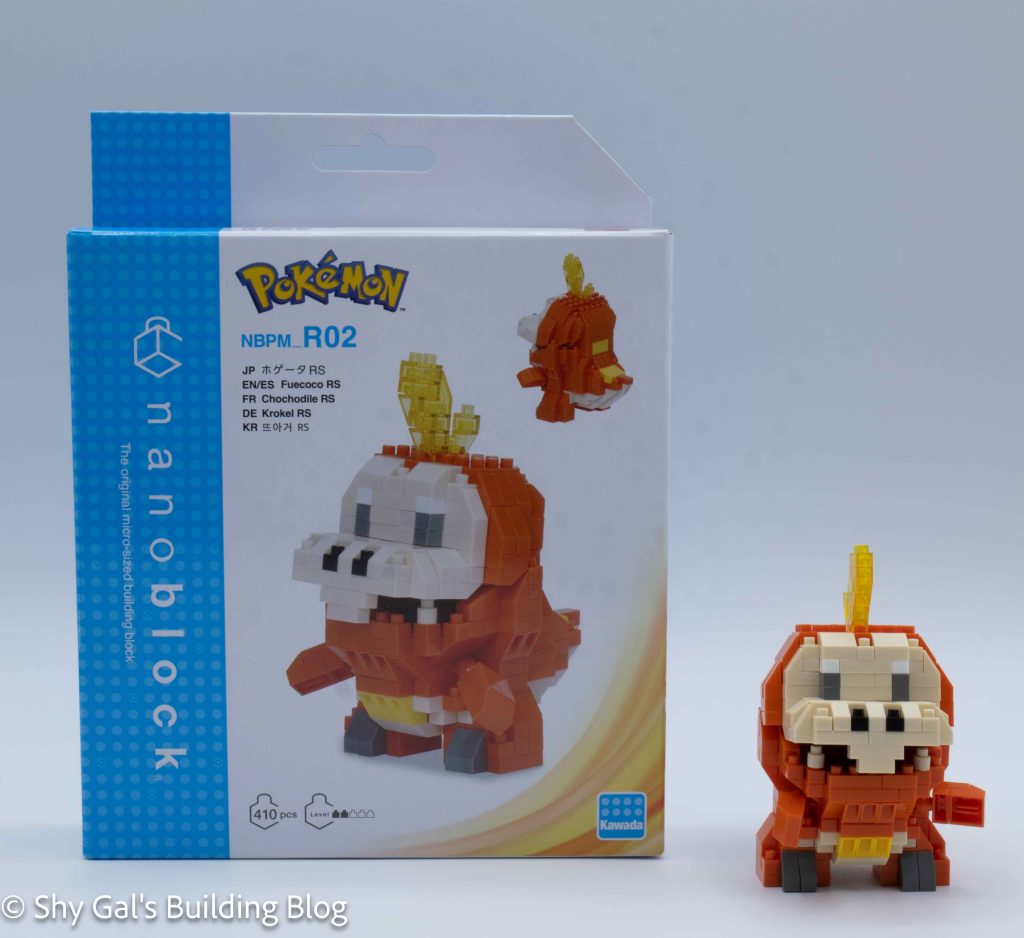
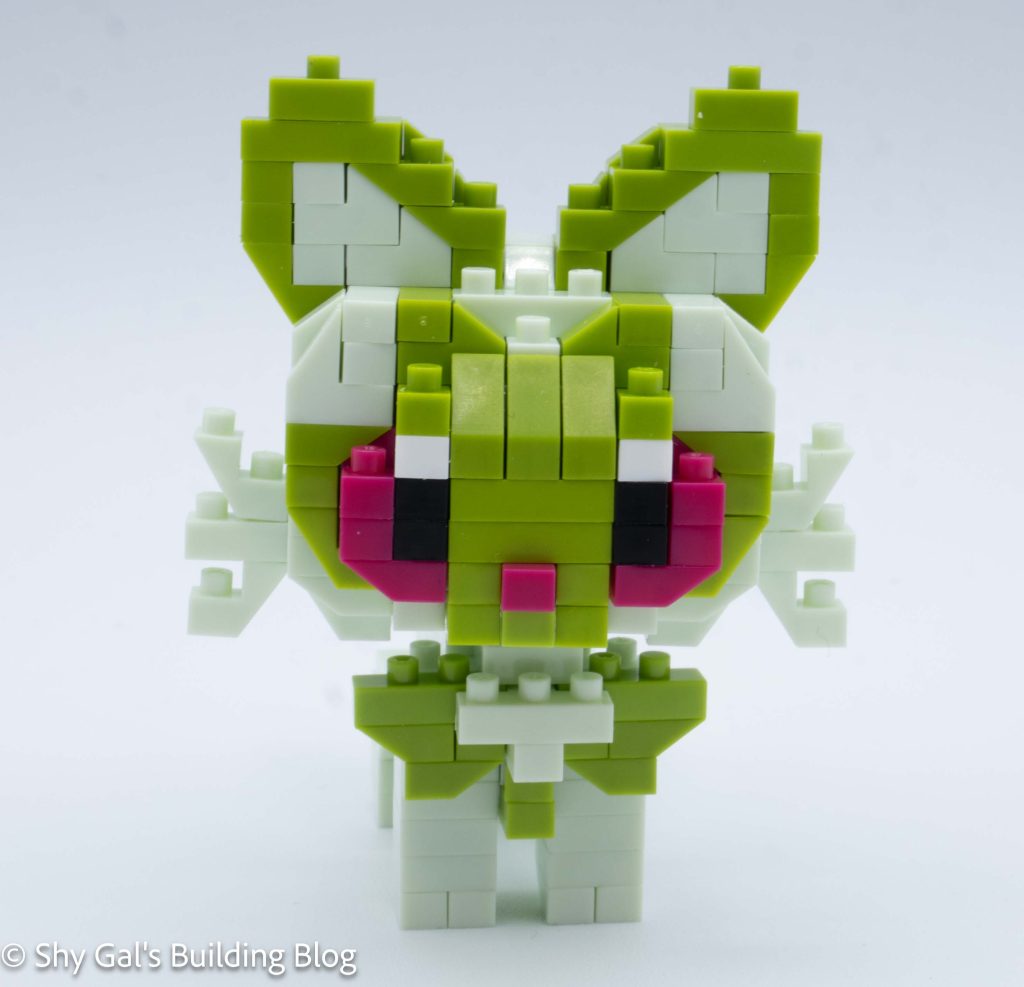
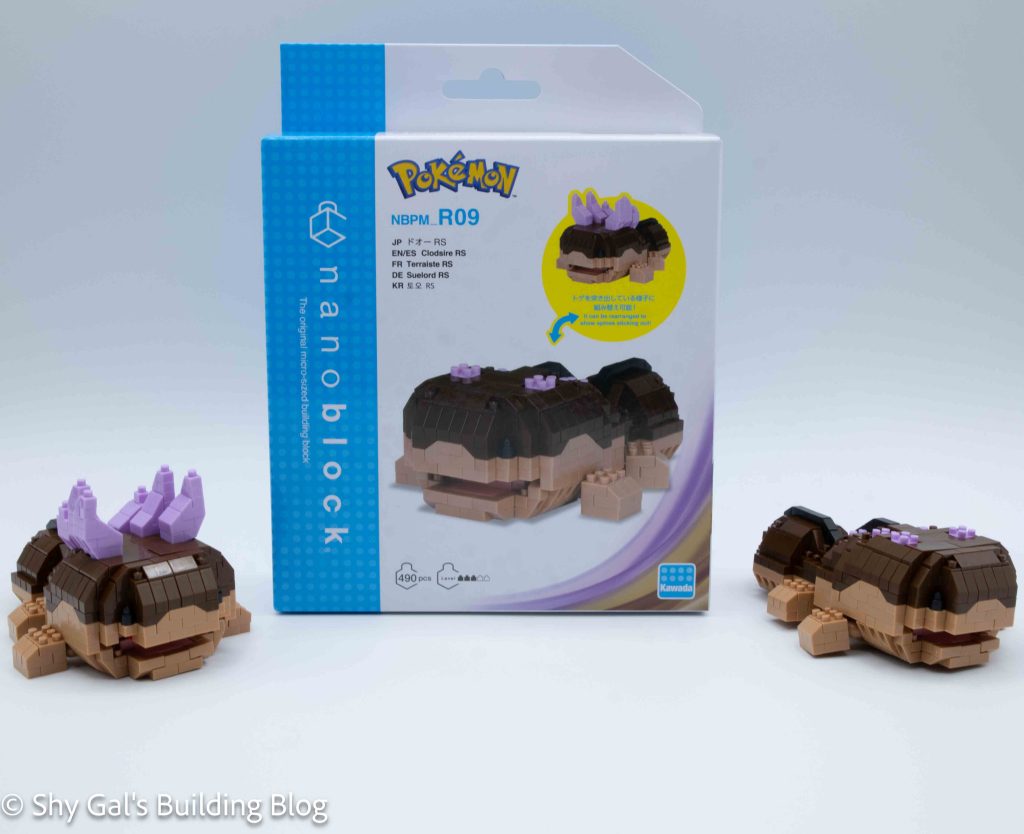
This post is a review of the nanoblock Clodsire RS build. Clodsire RS is part of the nanoblock Pokemon collection. Wondering what else is part of the Pokemon collection? Click here for a list.

Number: NBPM_R09

Number of Pieces: 490

Difficulty Rating: 3/5

Clodsire builds front view

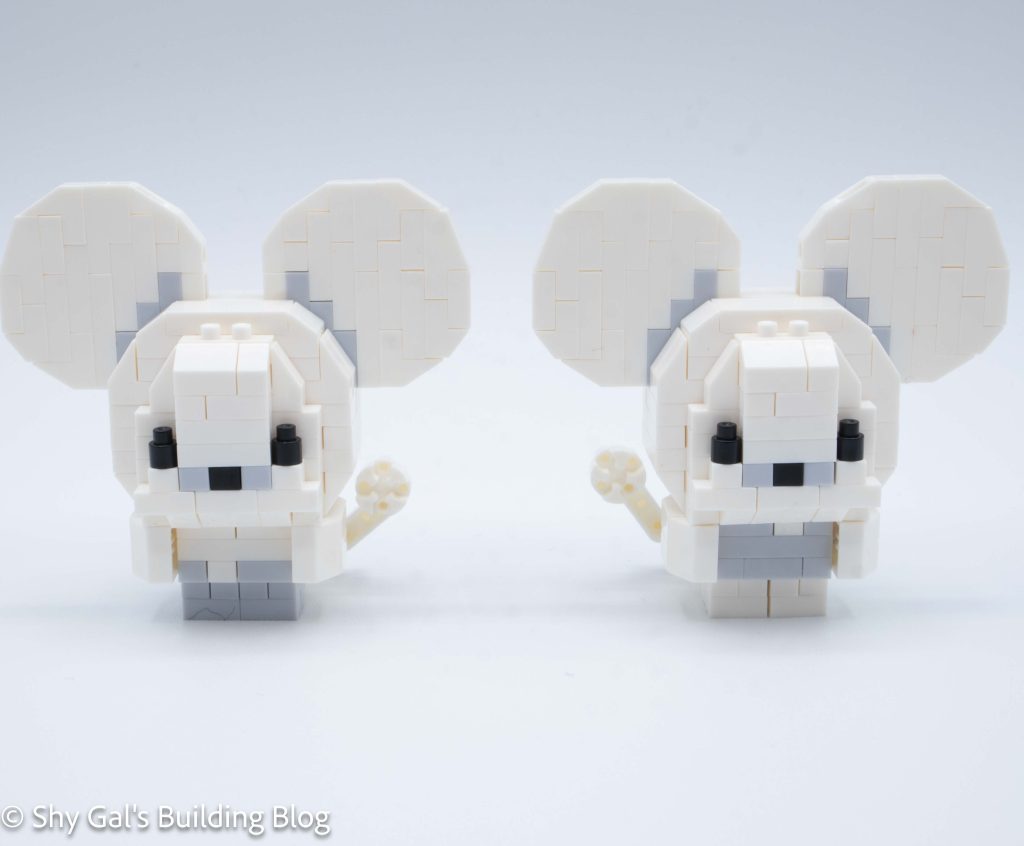
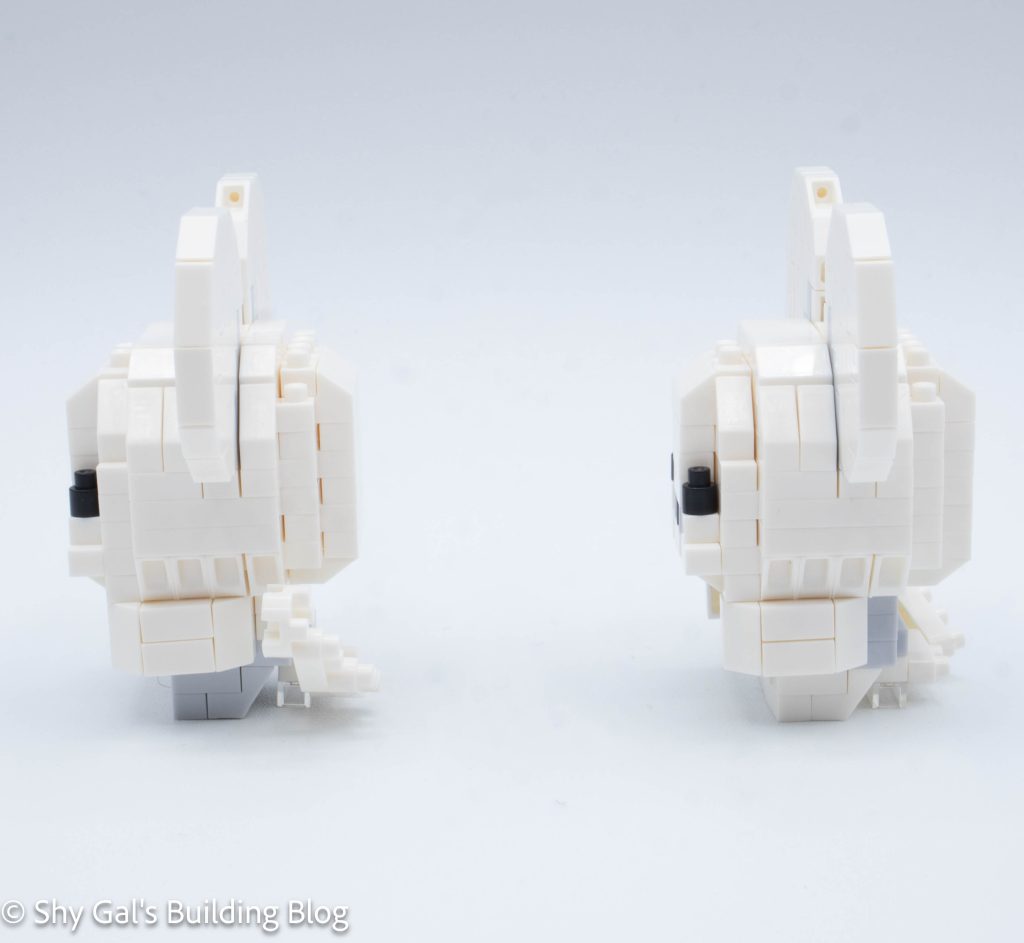
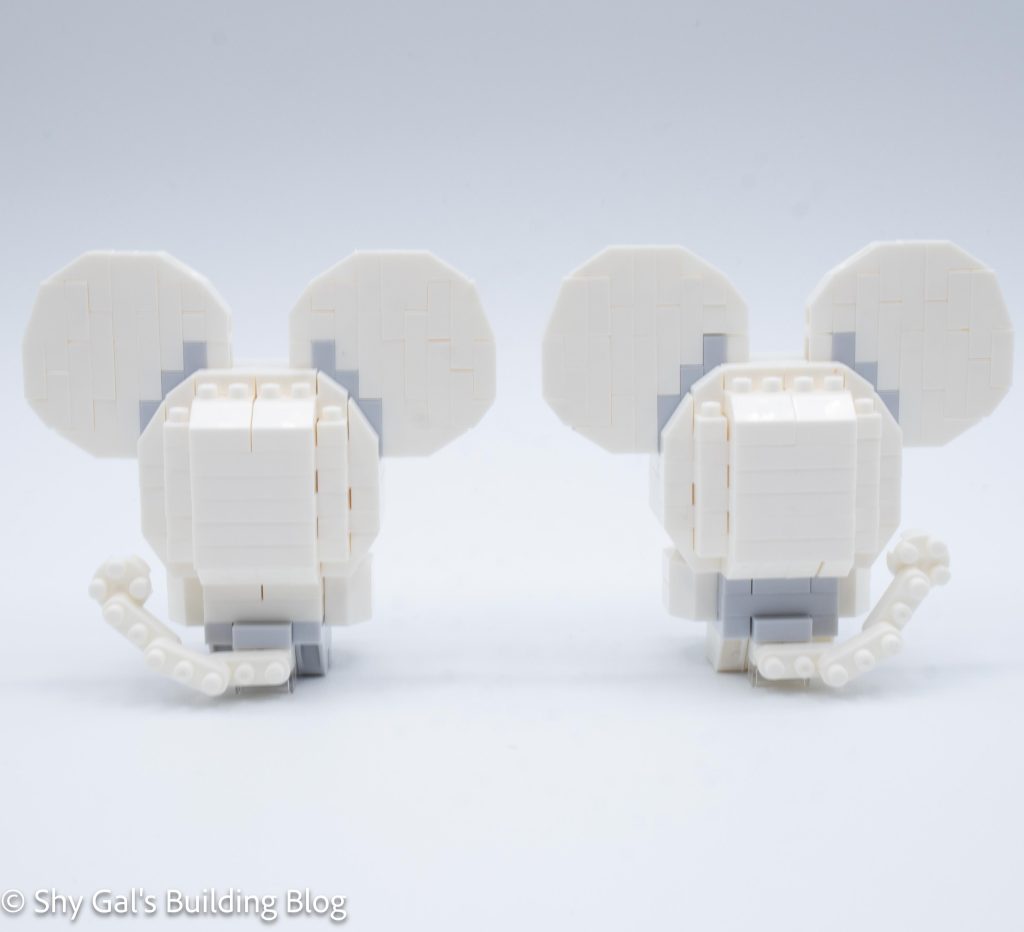
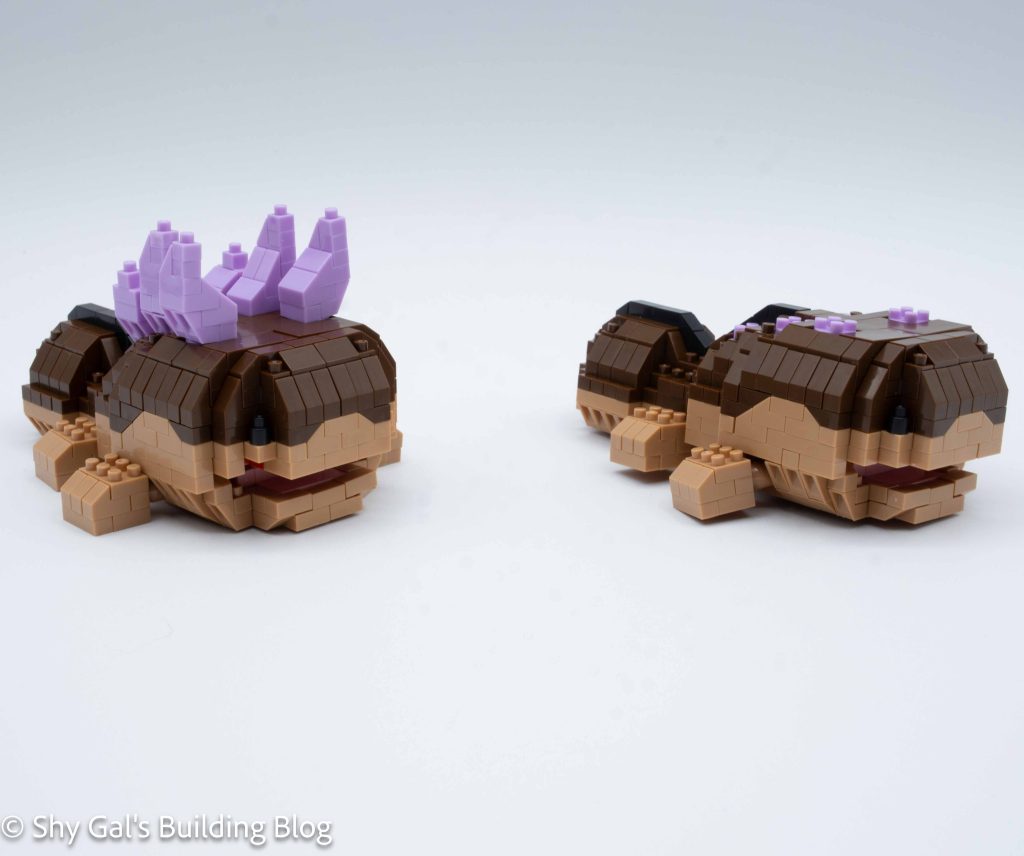
This kit comes with 2 different builds. There is a model with the spines down and a model with the spines up. The build is identical until the final steps of adding the spines.

The build begins by laying out the base layer of bricks. I used my nanoblock pad. Over the first 15 steps, I created the base 2 layers of the build. I kept building small chunks that connected to the main base section.

Clodsire builds side view

After creating the base, Clodsire goes up in layers. Each layer includes at least 2 steps. First, there is the back section. Then there is the front section. The fact that each layer is split means that there aren’t too many bricks to add in a given step.

One of the hardest parts was figuring out which slanted pieces to use. Normally, when nanoblock uses the 2 slanted pieces in the photo of where to add parts, it marks which to use. Instead, in this kit, it says which slanted piece to use and which bricks to use in each step. It was only confusing because it is unusual.

Clodsire build back view

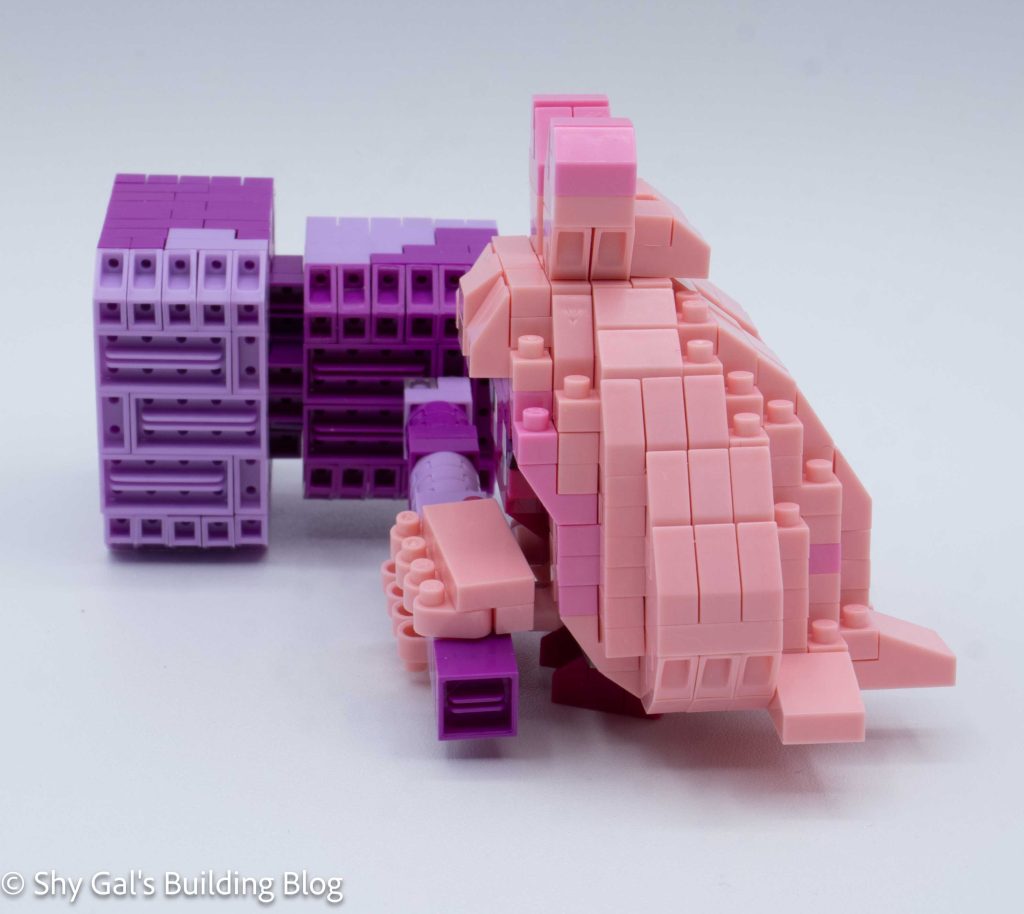
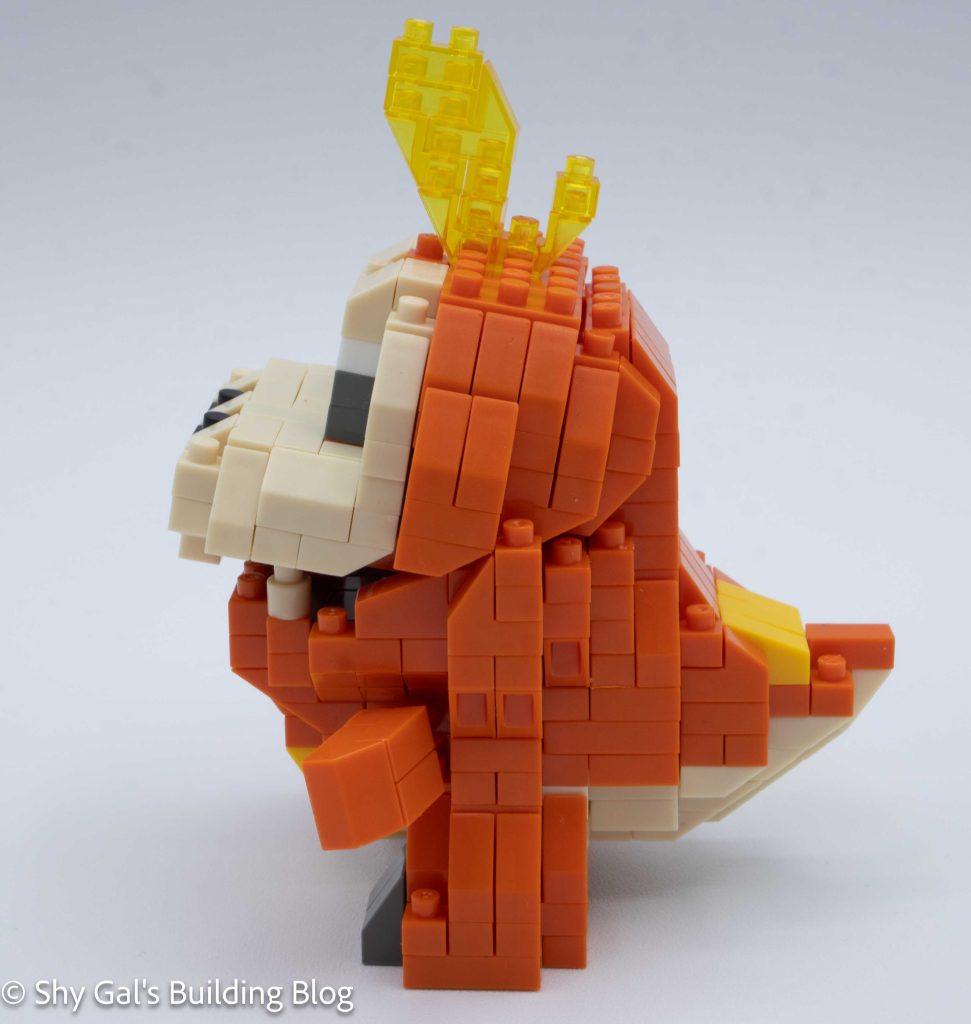
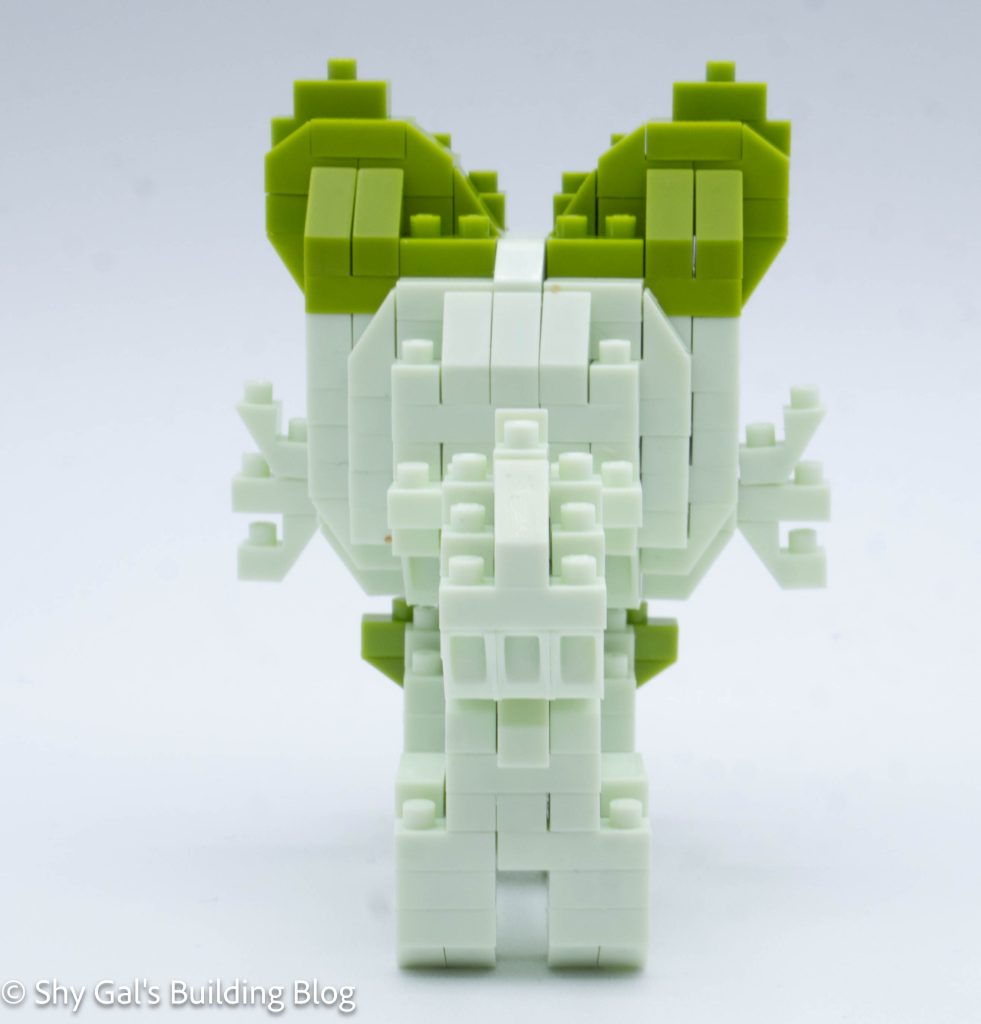
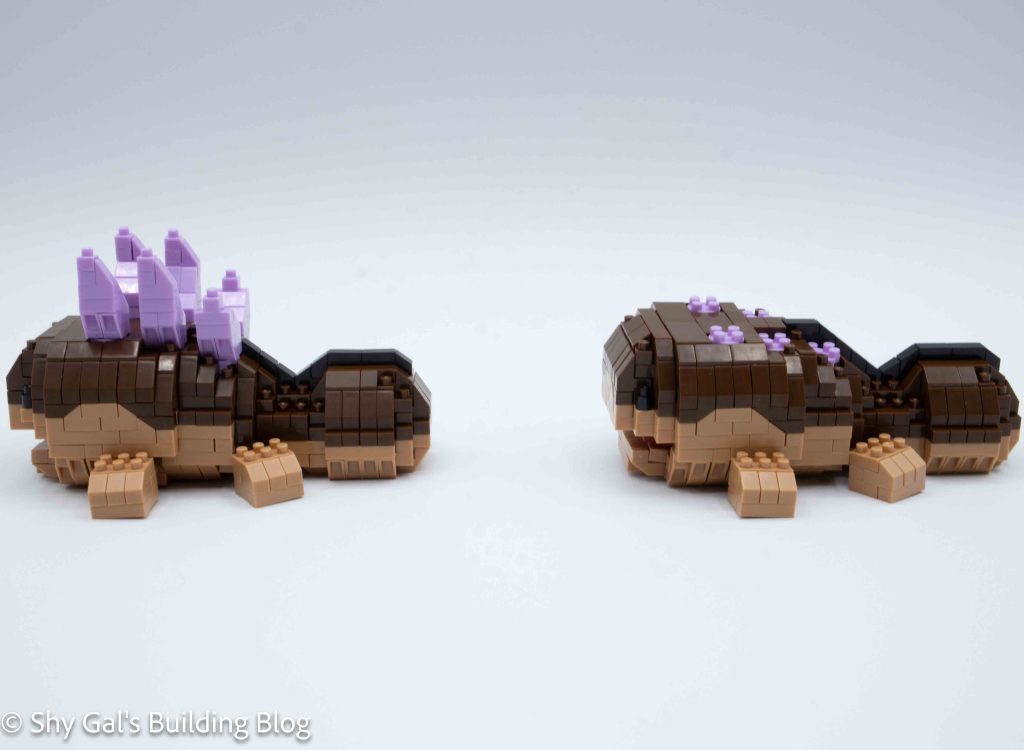
Clodsire goes up in layers, adding the Camel and Brown bricks to each layer. The Brown bricks begin at the tail and flow into the front of the build.

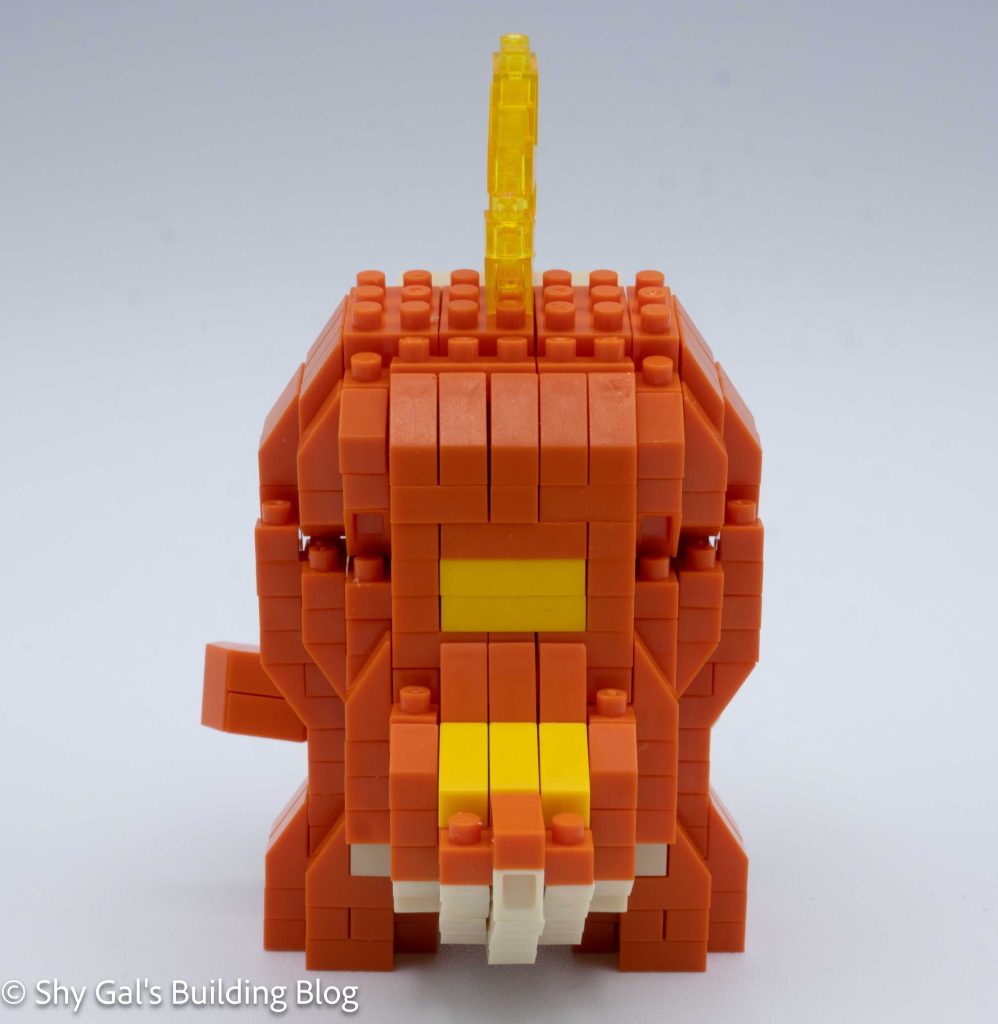
Eventually, the front of the head is closed up and topped off with flat bricks.

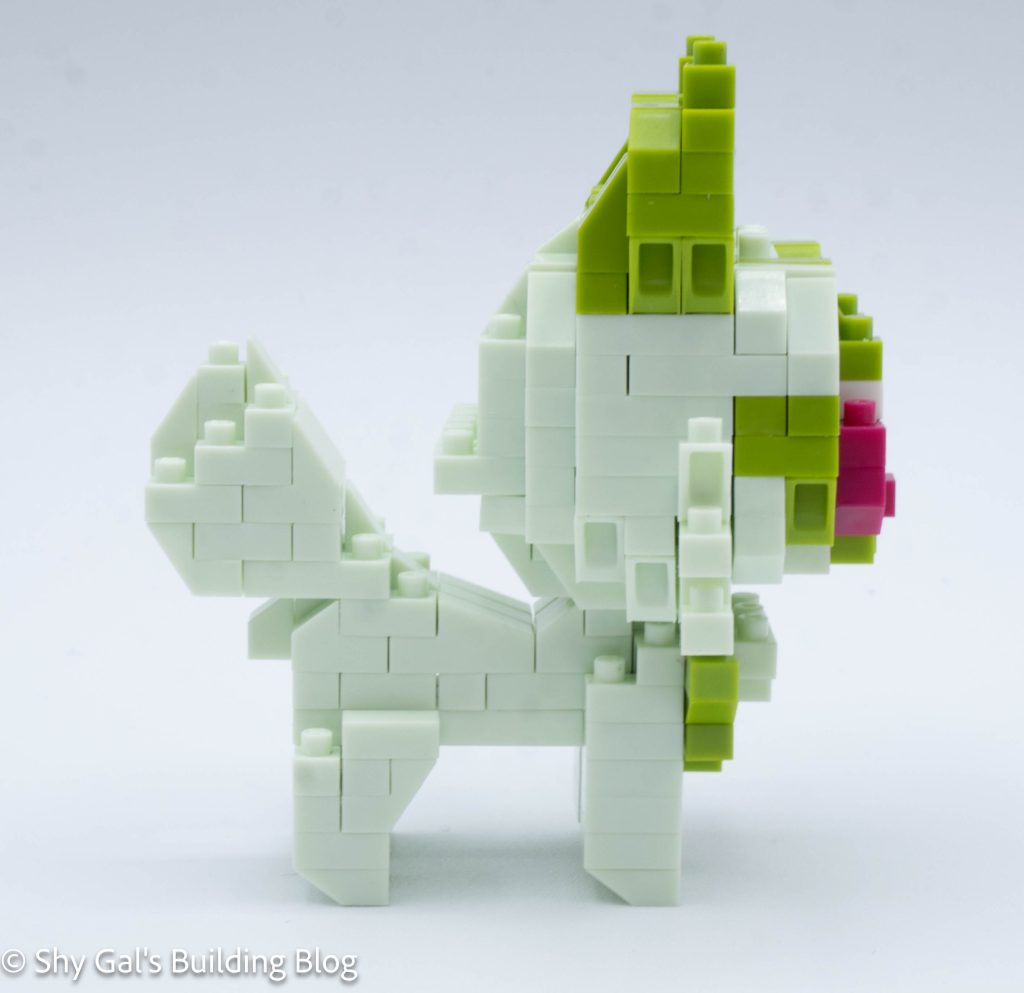
Next, I built the feet and added them to the build.

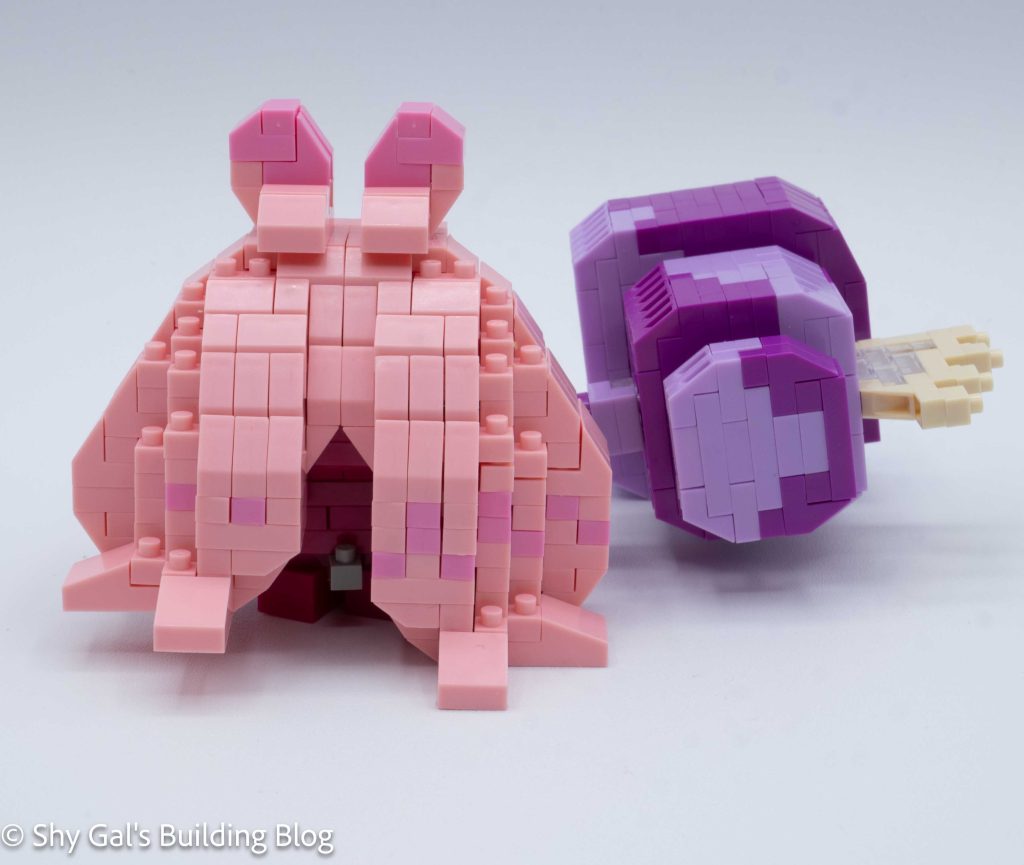
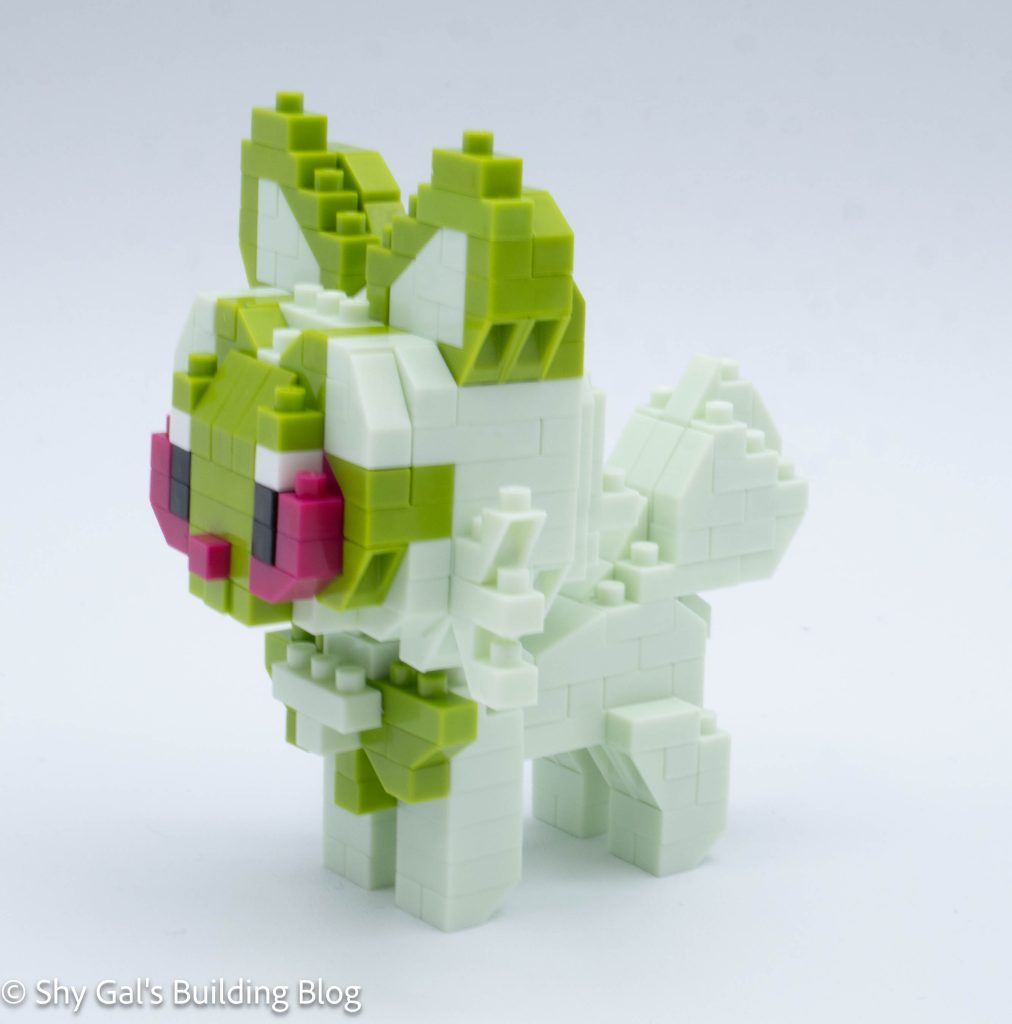
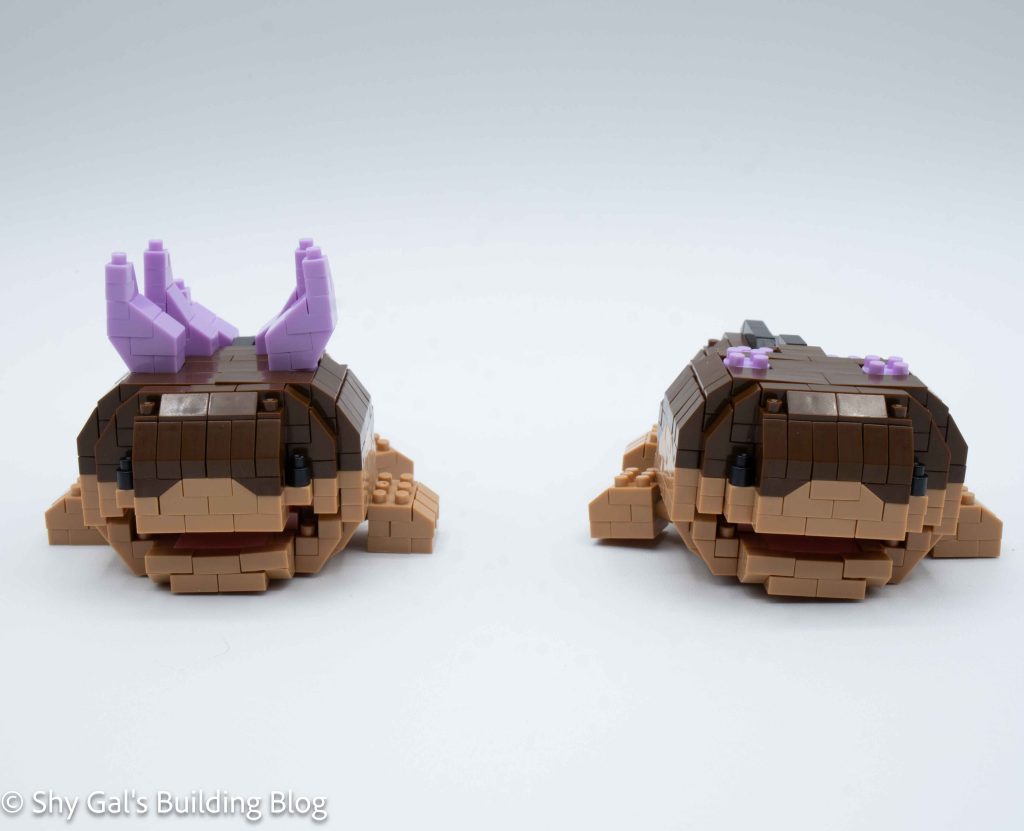
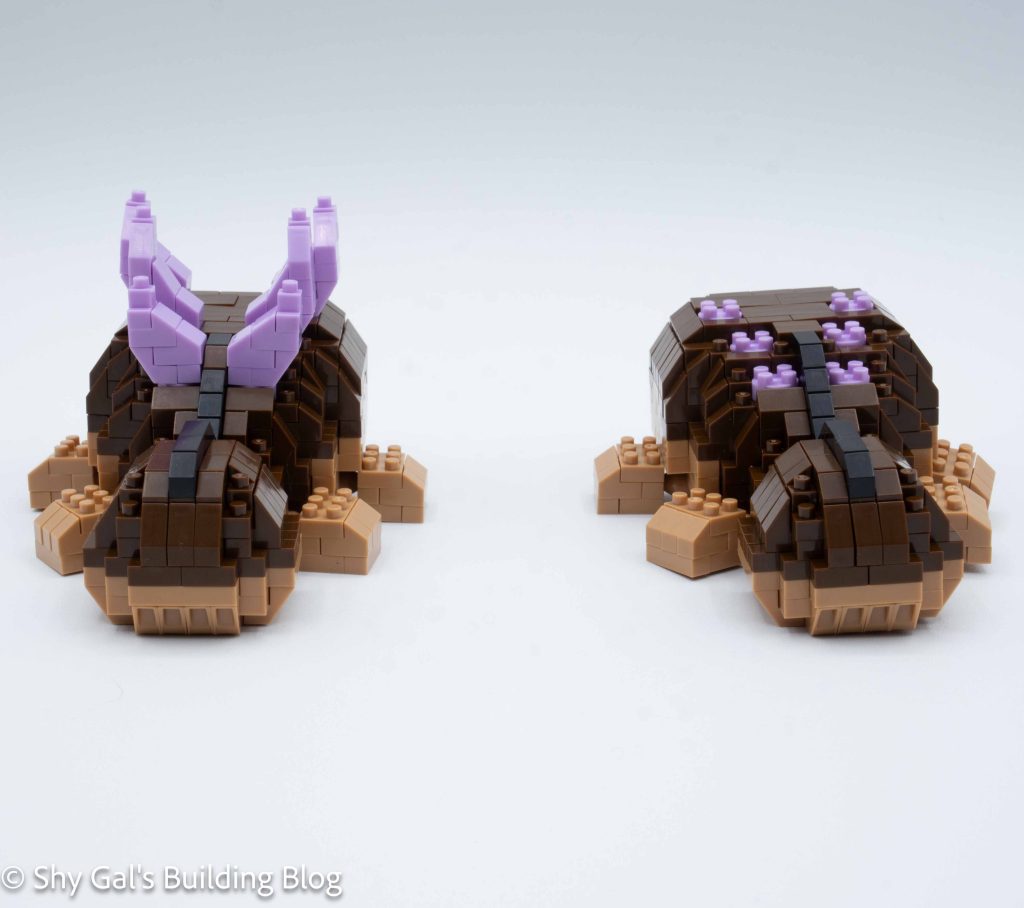
This is where the build splits into 2 options. The difference is how the spines look.

Clodsire build spines down detail

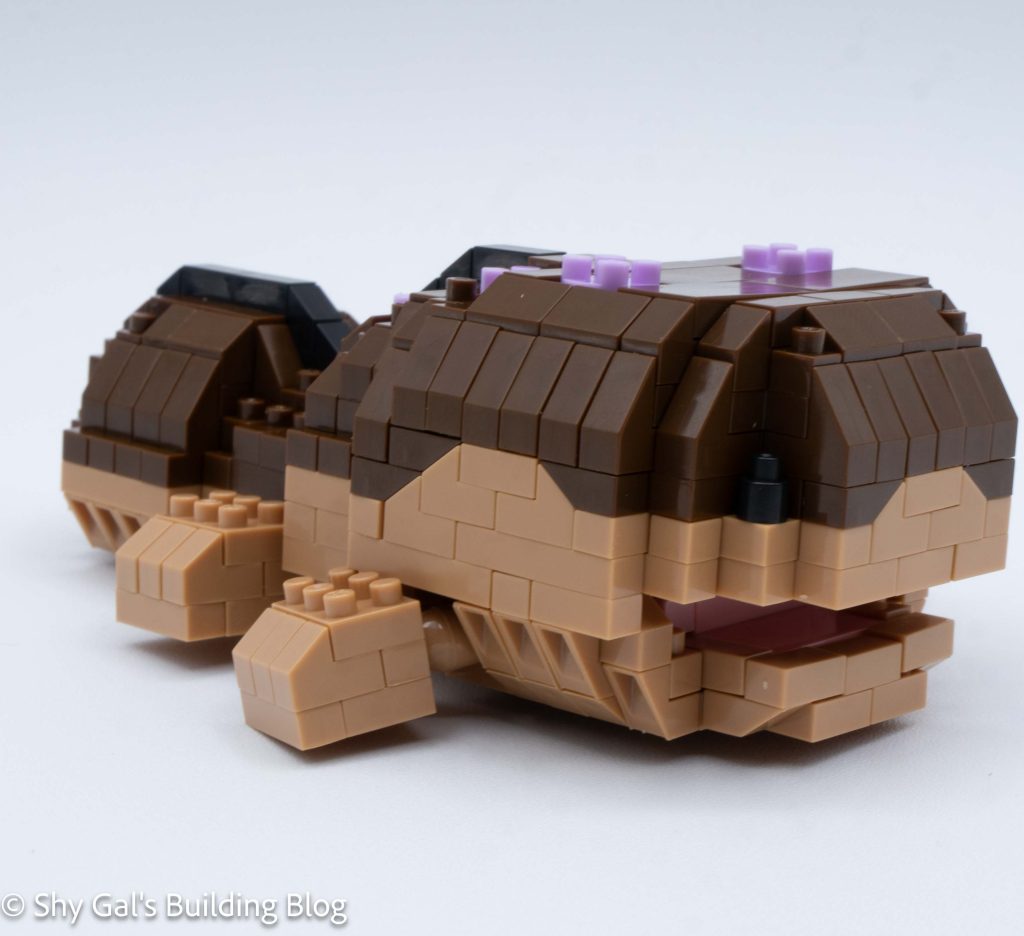
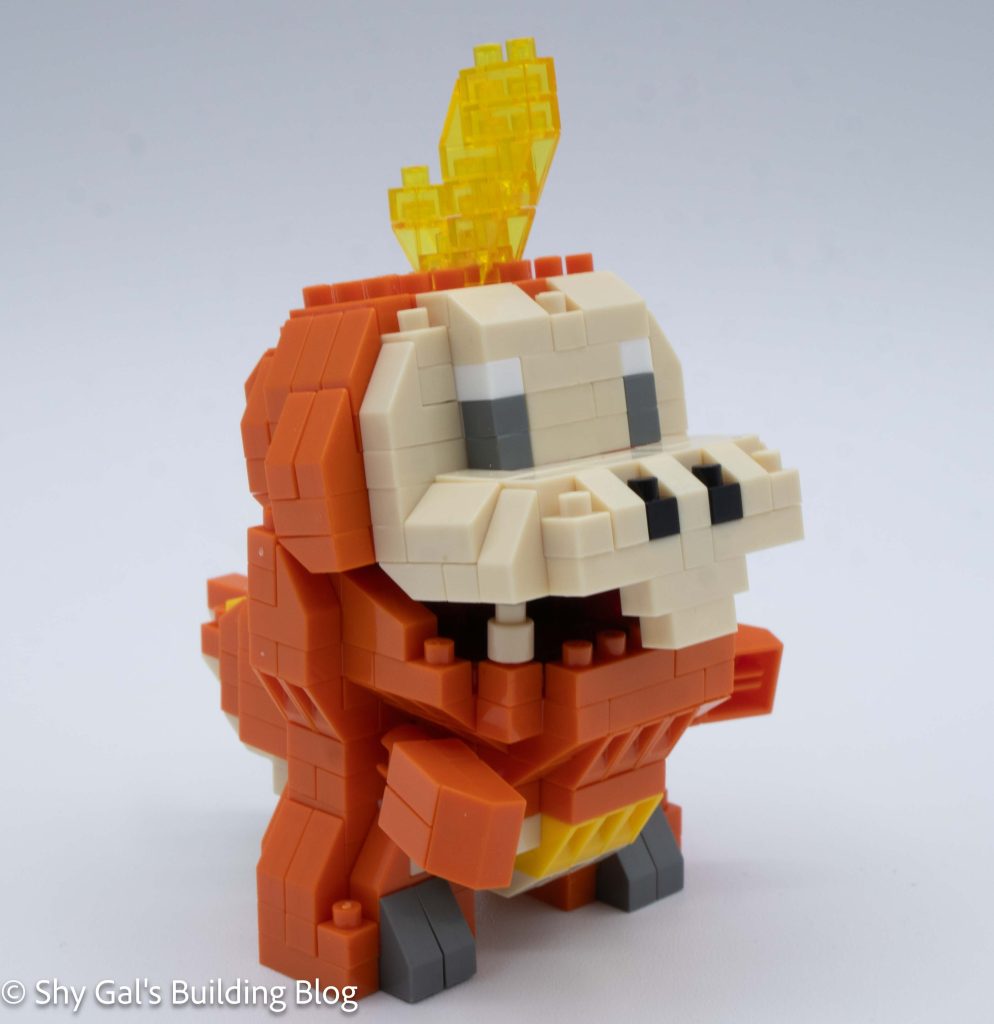
If I didn’t want the spines raised, I was able to drop in 6 bricks that look like spots on Clodsire’s back.

Clodsire build spines up detail

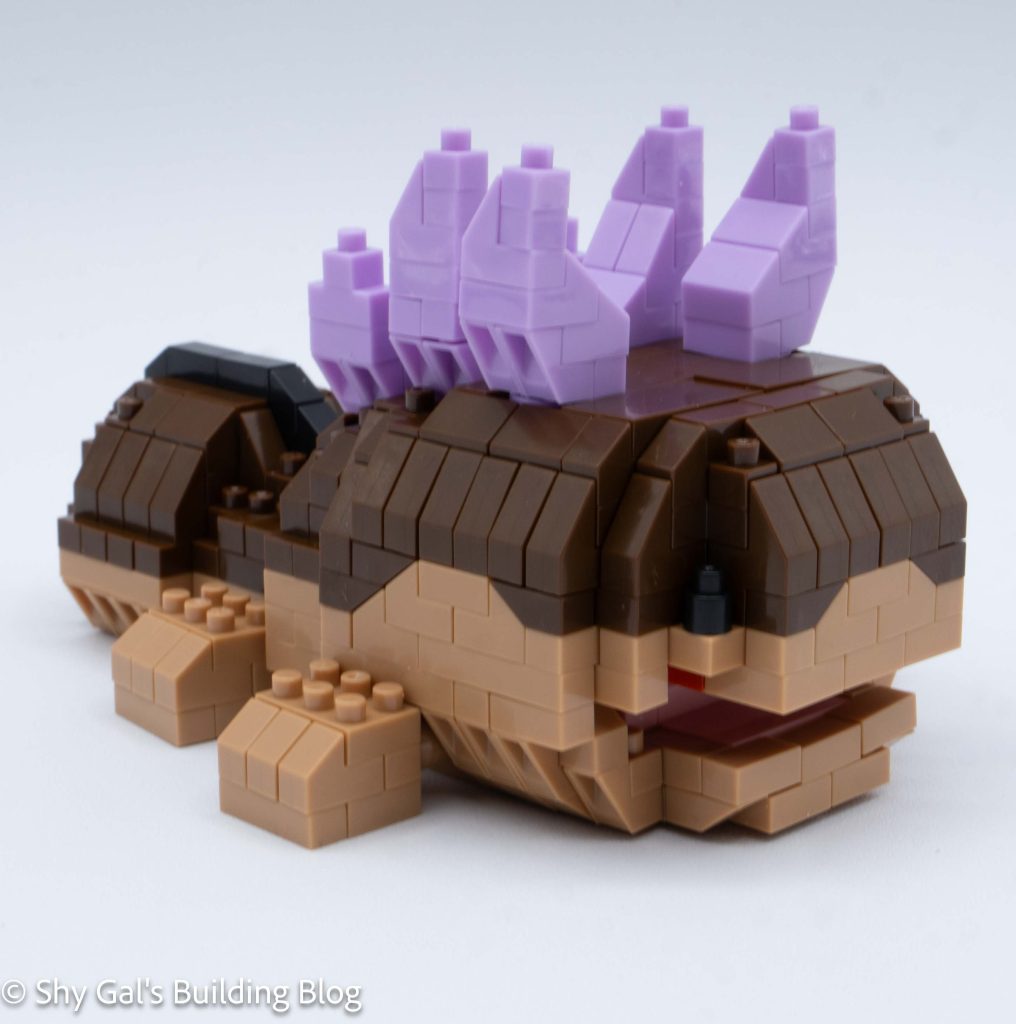
If I wanted the spines raised, I built the spines. I needed to be careful because the direction of the bricks mattered to get the slants in the spines correct.

Clodsire builds front 3/4 view

Things I liked:

  • I like that there are 2 models, even though it meant I needed to buy 2 kits

Things I didn’t like:

  • The bottom section of the mouth kept popping out of place, which was frustrating

Review of nanoblock Tandemaus RS NBPM_R08

Tandemaus build and box

This post is a review of the nanoblock Tandemaus RS build. Tandemaus RS is part of the nanoblock Pokemon collection. Wondering what else is part of the Pokemon collection? Click here for a list.

Number: NBPM_R08

Number of Pieces: 370

Difficulty Rating: 3/5

Tandemaus build front view

Tandemaus is a Pokemon that is made up of 2 mice. They appear identical from a distance, but up close, one is wearing a shirt and the other is wearing pants.

The first step is to build 2 identical heads. I built the heads simultaneously by adding bricks to each head every step.

Tandemaus build side view

The build begins by creating a base segment of bricks that is 2 layers high. It takes 5 steps to complete the head.

Then I added the eyes and nose to the head.

Tandemaus build back view

Next, I built up the back of the head in straightforward layers.

Then I built the ears off the head chunks. I needed to build a total of 4 ears. Then I attached the ears to the heads.

Next, I followed a few steps to create the front of the head.

Then it was time to build the different bodies. They are very similar, but there are steps that are different in the build.

Tandemaus build Pants mouse detail

First, I built the body that is wearing pants. It began with a base layer I laid out on my nanoblock pad. I then added a couple of layers to the body.

Then I added the pieces to balance the build and to attach the tail.

Then I added the legs. Next, I attached the head.

Then I built the arms and attached them to the body.

Finally, I built and attached the tail.

Tandemaus build shirt mouse detail

Second, I built the body that is wearing a shirt. It began with a base layer I laid out on my nanoblock pad. I then added a couple of layers to the body.

Then I added the pieces to balance the build and to attach the tail.

Then I added the legs. Next, I attached the head.

Then I built the arms and attached them to the body.

Finally, I built and attached the tail.

Tandemaus build front 3/4 view

Things I liked:

  • I like that the bodies are not identical and that there is a bit of variation

Things I didn’t like:

  • The eyes aren’t held in super strongly, so I kept popping them off while I was building the head

Review of nanoblock Pawmi RS NBPM_R07

Pawmi build and box

This post is a review of the nanoblock Pawmi RS build. Pawmi RS is part of the nanoblock Pokemon collection. Wondering what else is part of the Pokemon collection? Click here for a list.

Number: NBPM_R07

Number of Pieces: 470

Difficulty Rating: 3/5

Pawmi build front view

The build begins with several steps to create the base layer. It takes 6 steps to make the entire base.

The main body goes up in layers. In general, it takes 2 steps to complete an entire layer. The spacing is nice, and it means that each step isn’t crammed.

After adding several layers, the body is closed up. Then I began to work on the face. The first step is to add the nose.

Pawmi build side view

After a few more layers, I added Pawmi’s great big eyes. They are huge for a nanoblock Pokemon build.

Then I built up the head. As I built the head, I added the puff at the front of Pawmi’s face and its ears.

The next step is to build the cheeks. I initially attached them to the wrong place, but it was easy to fix once I realized the error.

Pawmi build back view

The next step is to build the front paws.

Then it was time to build the back paws. I was happy that the build still stood ok after the legs were attached.

The final step is to build the tail. The tail was straightforward. However, the tail is attached by sticking a round 1×1 into a socket joint. I don’t like it when nanoblock does this because it stretches out the socket, which makes it harder to reuse.

Pawmi build front 3/4 view

Things I liked:

  • I think this is one of the cutest builds that nanoblock has built for the Pokemon line

Things I didn’t like:

  • I don’t like it when round pieces are stuck into socket joints

Review of nanoblock Tinkaton RS NBPM_R06

Tinkaton RS build and box

This post is a review of the nanoblock Tinkaton RS build. Tinkaton RS is part of the nanoblock Pokemon collection. Wondering what else is part of the Pokemon collection? Click here for a list.

Number: NBPM_R06

Number of Pieces: 690

Difficulty Rating: 3/5

Tinkaton RS build front view

I found this kit incredibly difficult because the colors on the printed instructions don’t match or come close to the actual brick color.

The first step is to build a small body. I was surprised that there were ball joints since I couldn’t see them on the box.

Tinkaton RS build side view

The next step is to build the main section of the head. This includes the eyes.

The next section is to build the bottom of the hair. It is built in 2 sections, left and right. They are supposed to be near mirror images of each other. I goofed up and missed a layer on one side, but I didn’t notice until I had attached the hair sections. I tried to separate the bricks but couldn’t get a gap so I just left the layer out.

The next step is to finish the top of the hair. This was fairly straightforward.

Tinkaton RS build back view

Now, it is time to build Tinkaton’s massive hammer.

The first step is to build the head of the hammer. The hardest part was figuring out what colors to use where because the colors are so different.

Then, it was time to build the handle. This was fairly straightforward, and I like how Tinkaton’s hands are added to hold the hammer.

The final step is to attach the hammer to Tinkaton.

Tinkaton RS build front 3/4 view

Things I liked:

  • I feel like this build gets the essential things that make up Tinkaton

Things I didn’t like:

  • I didn’t like how the instructions didn’t match the colors of the actual brick

Review of nanoblock Ceruledge RS NBPM_R05

Ceruledge RS build and box

This post is a review of the nanoblock Ceruledge RS build. Ceruledge RS is part of the nanoblock Pokemon collection. Wondering what else is part of the Pokemon collection? Click here for a list.

Number: NBPM_R05

Number of Pieces: 500

Difficulty Rating: 3/5

Ceruledge RS build front view

Ceruledge is built in several small pieces that are all connected to each piece. Other than telling whether bricks were navy or black, each step was very straightforward.

Ceruledge was a bit more tricky than Armarouge because of the use of navy and black pieces and the fact that it is hard to tell the difference between the two colors in poor lighting.

Ceruledge RS build side view

The first step is to build the hips. These are only a few steps that are quickly completed.

The next step is to build is to build the 2 legs. There is one set of directions for each leg so that the legs are correctly mirrored.

The next step was to build the torso. It added the ball joints for the arms and the head connection.

Ceruledge RS build back view

The next step is to build the arms. I really like the use of clear bricks to make the blades. Once again, each arm has a set of directions to ensure things are correctly mirrored.

The next step is to build the stand. I really like how they gave Ceruledge a stand since there is no way it would be able to stand on its own.

The final step was to build the head. For some reason, I suddenly started having difficulty telling which blue to use based on the printed instructions. I was able to figure out which colors to use and was able to build the head.

Ceruledge RS build front 3/4 view

Things I liked:

  • I really like that they gave you a stand so the model is able to stand up

Things I didn’t like:

  • I didn’t like how it was hard to tell which shade of blue to use looking at the instructions, and not every step said which blue to use

Review of nanoblock Armarouge RS NBPM_R04

Armarouge RS build and box

This post is a review of the nanoblock Armarouge RS build. Armarouge RS is part of the nanoblock Pokemon collection. Wondering what else is part of the Pokemon collection? Click here for a list.

Number: NBPM_R04

Number of Pieces: 600

Difficulty Rating: 3/5

Armarouge RS build front view

The first step is to build the center body. I built it on my nanoblock pad. It began by laying the base out on my nanoblock pad. It went up very straightforwardly in layers.

The next step is to build the legs. There is an independent direction for each leg. I built each on my nanoblock pad. The directions for each leg are slightly different to get the correct piece to show in the upper leg section.

Armarouge RS build side view

The next step is to build the hands and arms. There are 2 sets of directions, one for each arm. They are mirrored so that the hands appear correctly.

The next step is to build the shoulder guards. These are straightforward. I like how the arms are poseable even though such large guards are on the shoulders.

Armarouge RS build back view

I was super excited to see that there was a stand for this kit. Based on how the legs are built, it would be super hard to get the build to stand on its own. The stand was very straightforward to build and attach.

The hardest part of this build was putting the head together. After building the base of the head, it goes up in layers. As I was placing bricks, the placement seemed kinda random, so I had to trust the process. After building the front of the head, I built the flame coming off the back of the head.

Armarouge RS build front 3/4 view

Things I liked:

  • I really like that the build comes with a stand because it was clear that the build wouldn’t stand on its own

Things I didn’t like:

  • Surprisingly, I had difficulty making the head, so I had to remove and redo several layers. I’m still not sure that the head is 100% right

Review of nanoblock Quaxly RS NBPM_R03

Quaxly RS build and box

This post is a review of the nanoblock Quaxly RS build. Quaxly RS is part of the nanoblock Pokemon collection. Wondering what else is part of the Pokemon collection? Click here for a list.

Number: NBPM_R03

Number of Pieces: 280

Difficulty Rating: 2/5

Quaxly RS. build front view

This kit begins with building the main section of the body. It is building the front and back of the body with a gap in the middle. The entire section I was able to build on my nanoblock pad.

The next section is to build the wings. There is a center pillar that has some ball joints for the wings to attach. Then, I built the wings and attached them to the ball joints.

Quaxly RS build side view

Now that the body is complete, it is time to add the feet. I built 2 identical feet and attached them to the bottom of Quaxly’s body.

The next major section is to build Quaxly’s head. I was able to build the first several steps on my nanoblock pad. The base was fairly straightforward. At some point, I added the dark blue eyes.

Quaxly RS build back view

After building a lot of the head, it is time to build Quaxly’s most distinguishing feature, his hair. The steps to build the hair are very clear. Building the hair adds a checkerboard pattern in front, which I think looks a little odd. I do like how there is a wave in the front of the hair.

The final step is to add some details to the bottom of the head and to attach the head to the body.

Quaxly RS build front 3/4 view

Things I liked:

  • I like how poseable the figure is between the wings and feet

Things I didn’t like:

  • I don’t like the checkerboard in front of the hair

Review of nanoblock Fuecoco RS NBPM_R02

Fuecoco RS build and box

This post is a review of the nanoblock Fuecoco RS build. Fuecoco RS is part of the nanoblock Pokemon collection. Wondering what else is part of the Pokemon collection? Click here for a list.

Number: NBPM_R02

Number of Pieces: 410

Difficulty Rating: 2/5

Fuecoco RS build front view

The first thing I noticed when I looked at the directions was how cramped the directions were. This meant that I needed to be more careful as I was building the set since there were so many little cutouts in the directions.

The build begins with building one side of the base of the Fuecoco. Over the next several steps the base of the Fuecoco is built. Once the entire base was built, I began to build the body section in layers. There was one step where it took me a while to figure out what brick was needed. This is because it appeared to be slanted in the directions and I had missed there was a flat piece used in the step.

Fuecoco RS build side view

The next step is to build the stubby little legs off the body and attach them. Overall, the legs are clear on how to build them and attach them.

The next step is to add the little arms.

Fuecoco RS build back view

Next, I built the head. It started from a maroon base of the mouth. Once again, it begins with a corner and builds out to create a base of the mouth. After building the entire base, the rest of the head goes up in layers. Fuecoco has dark grey eyes, which is unusual in Pokemon builds, which typically feature black eyes.

The final step is to build the neck section. The following section is straightforward, and it is clear where to connect the pieces. I really like how Fuecoco can have his mouth open a little bit. I’m not sure I’ve ever seen a photo where Fuecoco has closed its mouth all the way

Fuecoco RS build front 3/4 view

Things I liked:

  • I really like how the mouth is slightly open because that is how the Pokemon is usually seen

Things I didn’t like:

  • I didn’t like how cramped the directions where

Review of nanoblock Sprigatito RS NBPM_R01

Sprigatito RS build and box

This post is a review of the nanoblock Sprigatito RS build. Sprigatito RS is part of the nanoblock Pokemon collection. Wondering what else is part of the Pokemon collection? Click here for a list.

Number: NBPM_R01

Number of Pieces: 280

Difficulty Rating: 2/5

Sprigatito RS build front view

Sprigatito is the grass starter for Generation 9. This kit features a custom brick color for the lighter green.

The build has 3 sections, the body, tail, and head.

Sprigatito RS build side view

The build begins with building the body. I lay the body out on my nanoblock pad. The body is very straightforward.

After building the body, I flipped the body over and added the legs.

The next section to build is the tail. It is also very straightforward.

Sprigatito RS build back view

The last major section is the head. The beginning of the head is a bit unusual because it takes about 10 steps to create the entire base building from the back to the front.

Once the base of the head is created, the rest of the head is fairly straightforward. I just needed to be careful about which slanty pieces I used. The eyes were also a bit tricky to connect because it wasn’t clear where things lined up or when higher than the base.

Sprigatito RS build front 3/4 view

Things I liked:

  • I really like the custom green color that nanoblock created for this build

Things I didn’t like:

  • I wish the instructions were a bit clearer for the eyes