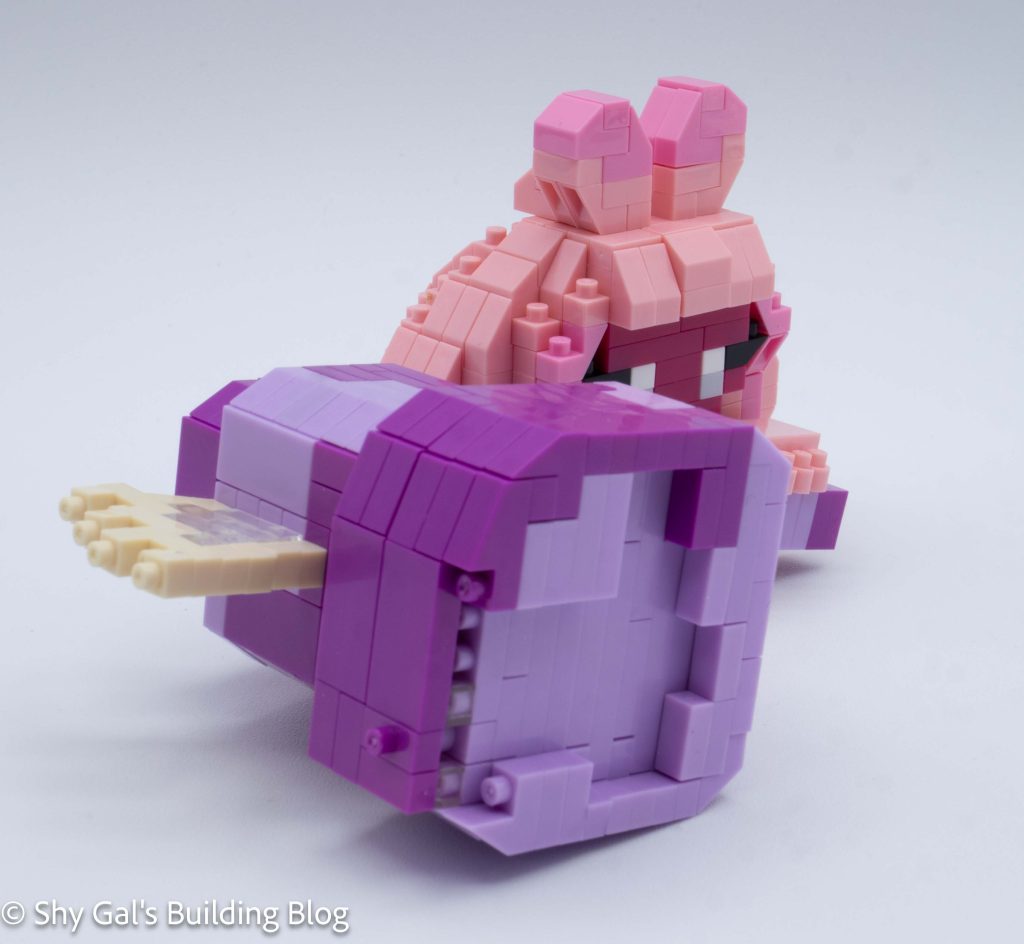
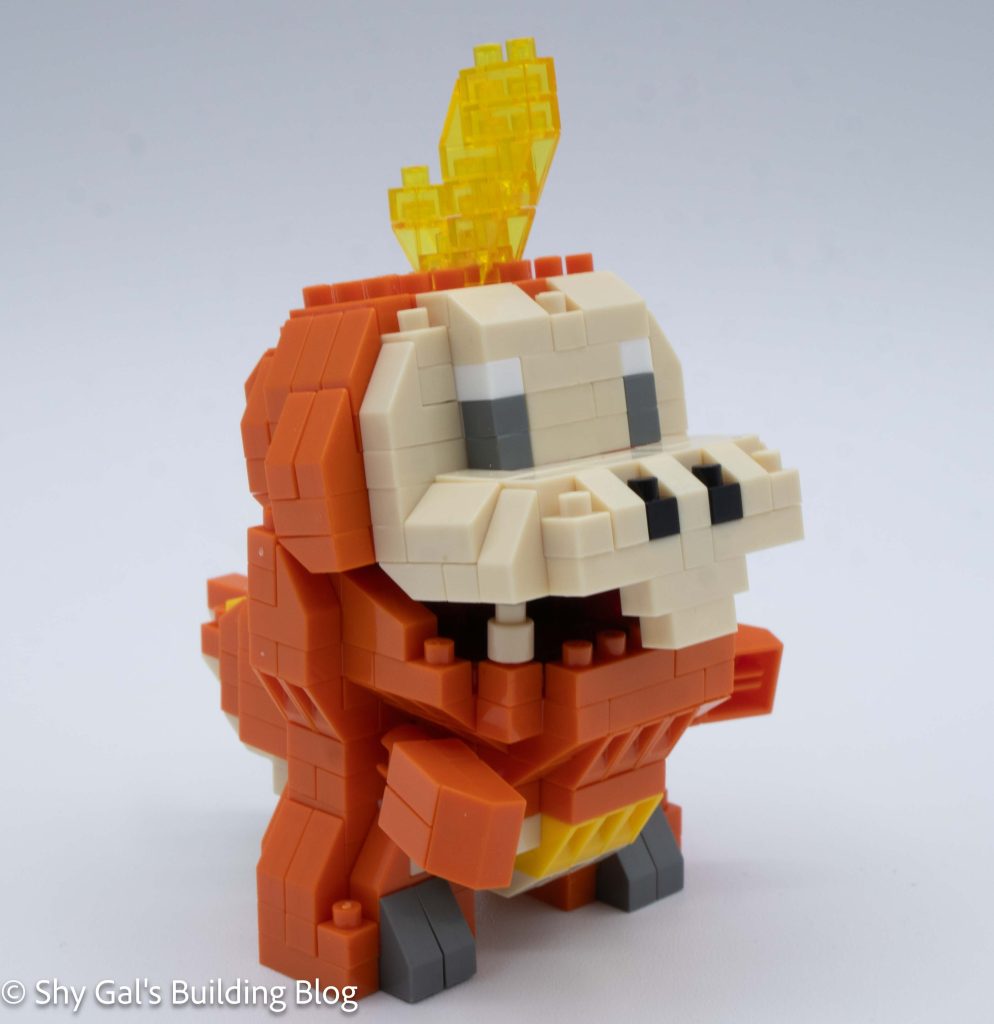
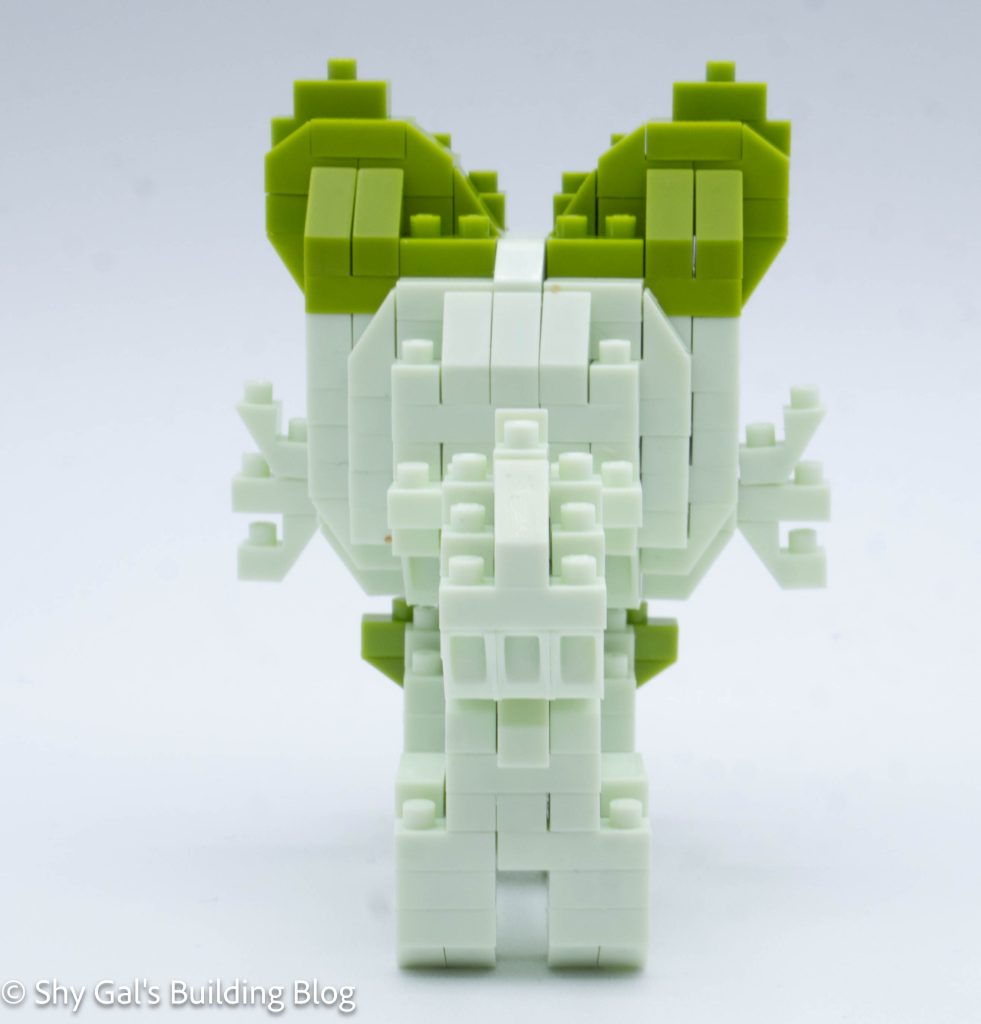
This post is a review of the nanoblock Arcanine build. Arcanine is part of the nanoblock Pokemon collection. Wondering what else is part of the Pokemon collection? Click here for a list.
Number: NBPM_106
Number of Pieces: 150
Difficulty Rating: 3/5
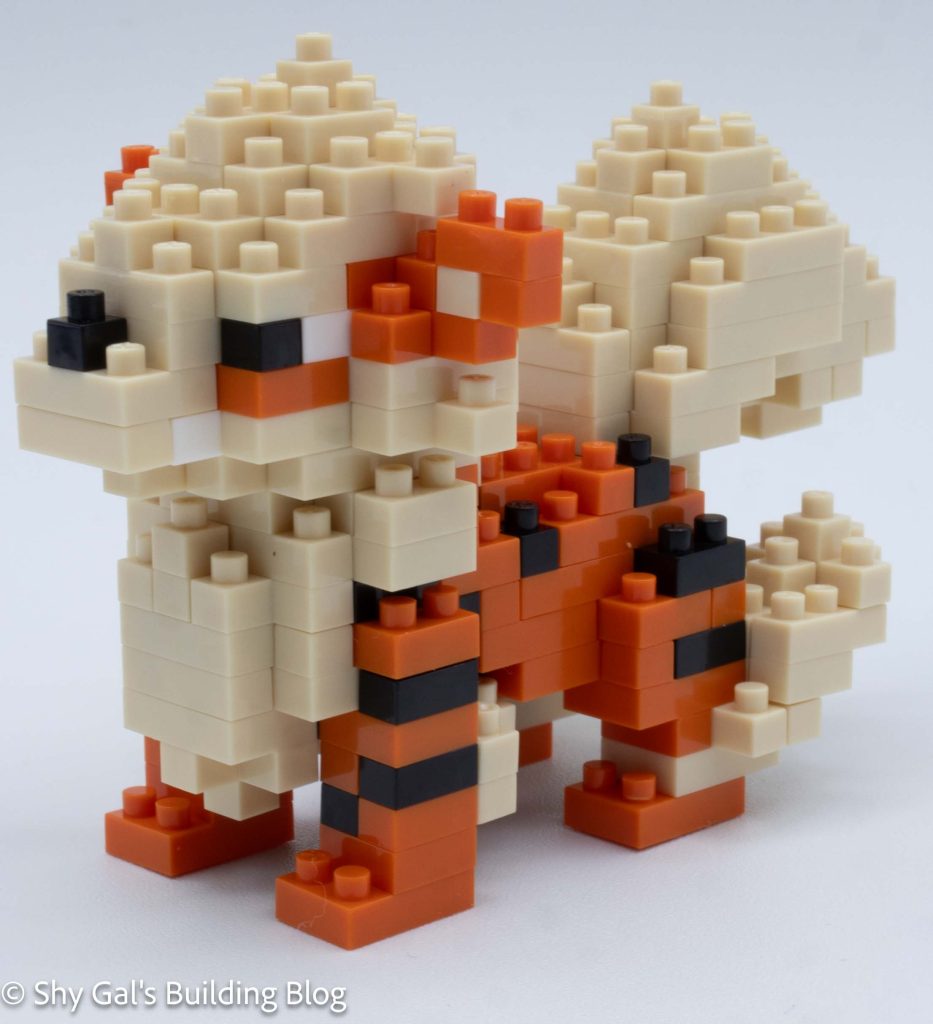
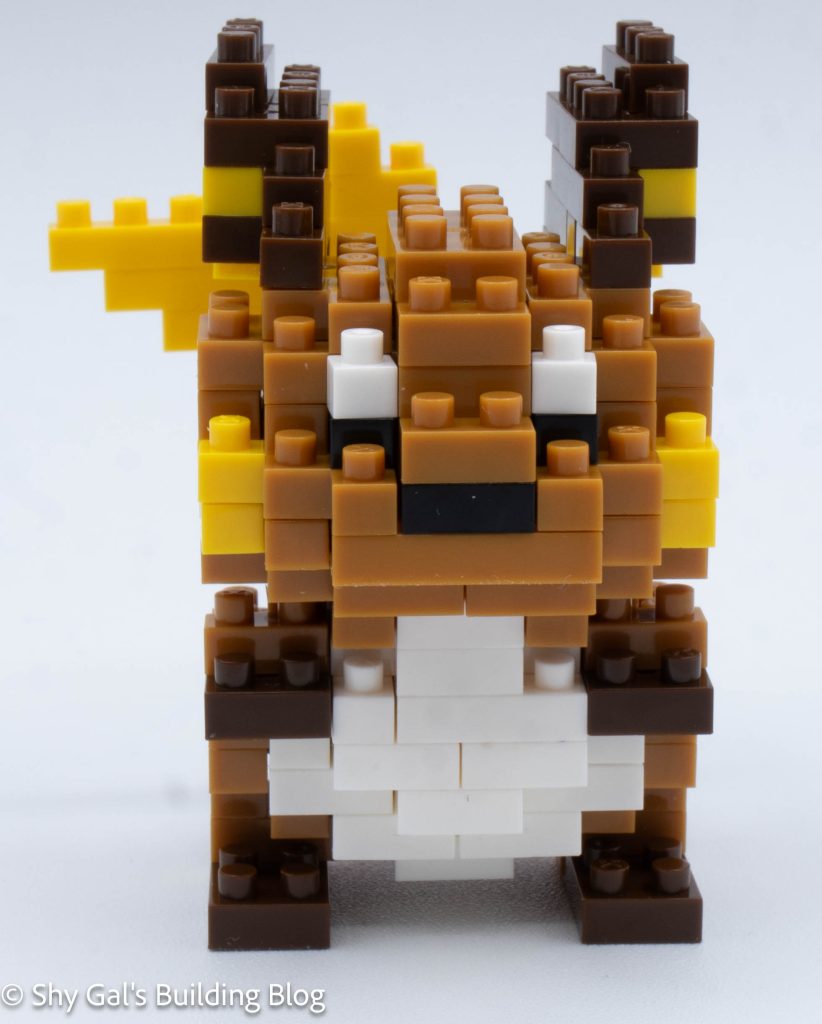
The first 3 steps of this build create the base of the Arcanine. I was able to build them on my nanoblock pad so everything lined up nicely.
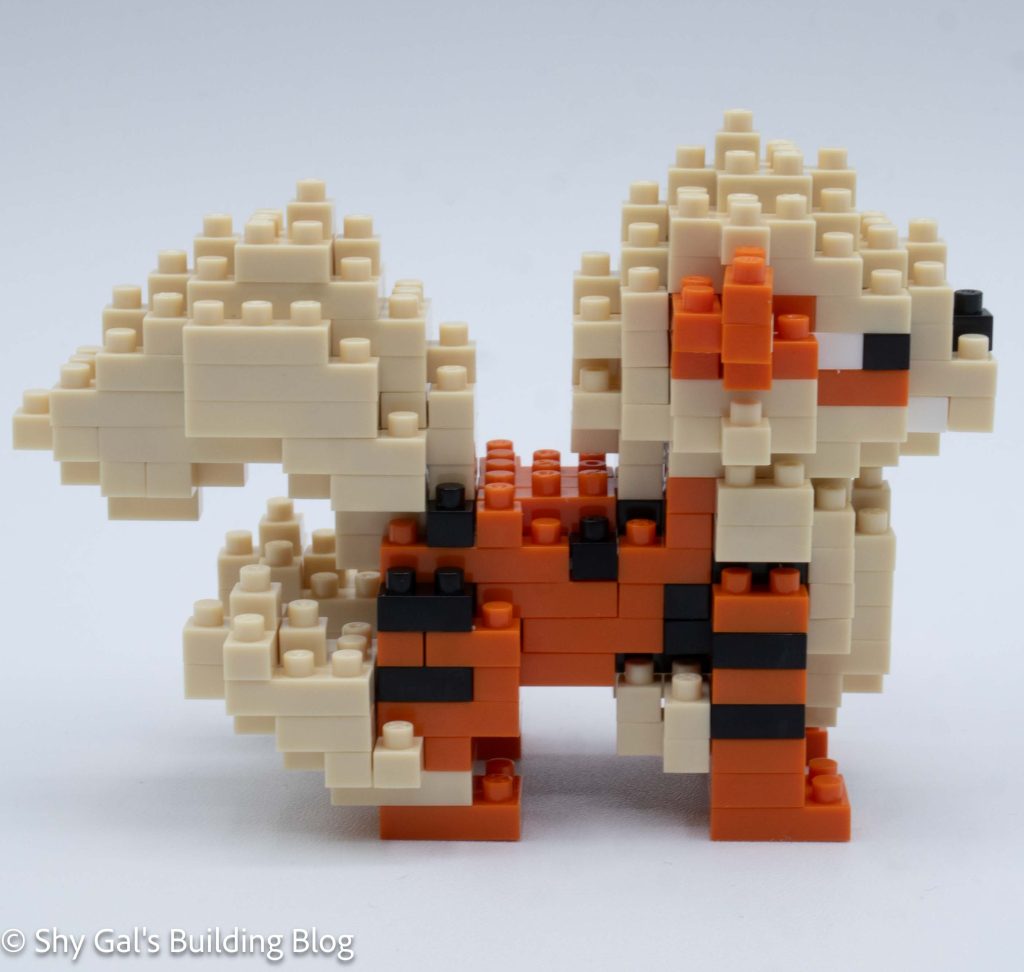
After creating the base, Arcanine is built by adding layers of bricks. These create the fur in front, the fur that will act as a connector for the tail, the stripes, and the main body. Each step was clear and straightforward.
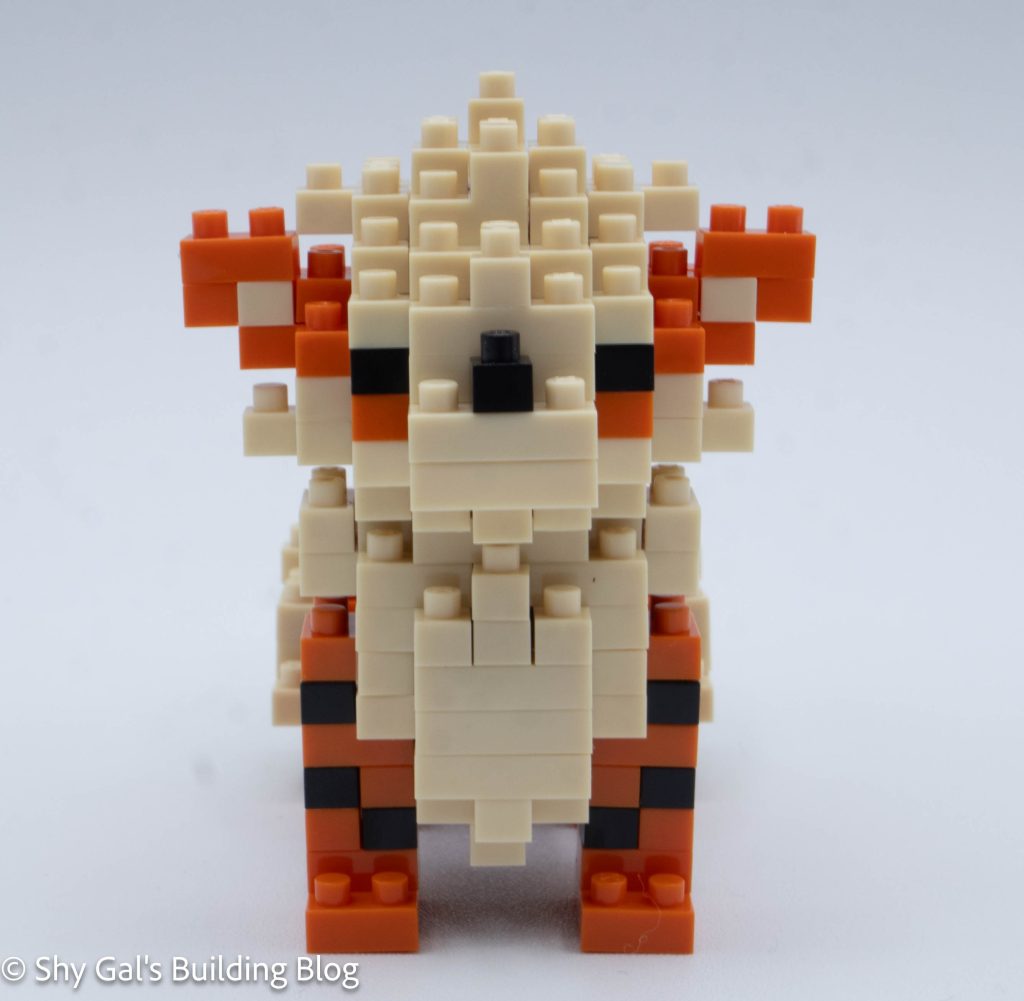
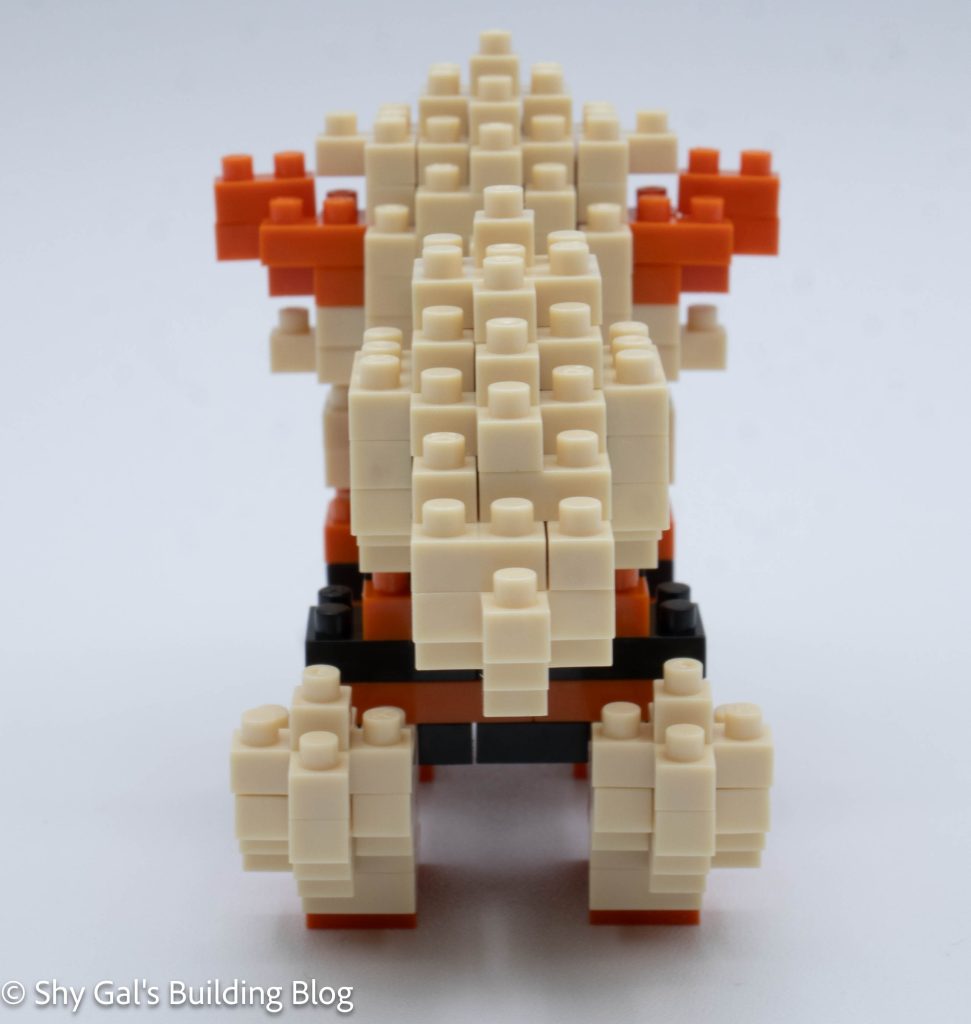
Then I began to focus on the head. In layers, I added fangs, eyes, nose, and ears, all in the fur that engulfs Arcanine’s head.
After finishing the head, it was time to add details to complete the build.
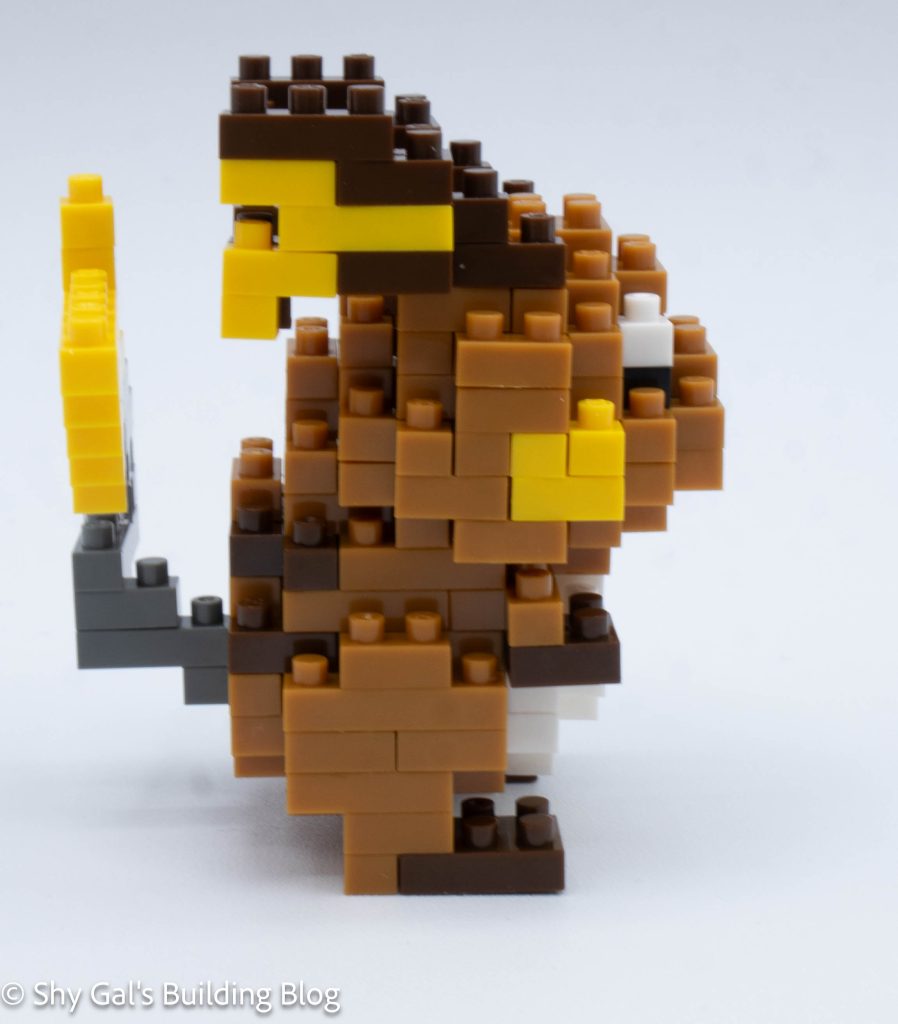
First, I built the tail on my nanoblock pad. I needed to be careful that I connected the sections in correctly so that there was proper flow to the tail.
Then I built the legs on the left and right. Building the legs was easy, but I had a hard time figuring out where exactly on Arcanine the legs connected to keep the stripes correct.
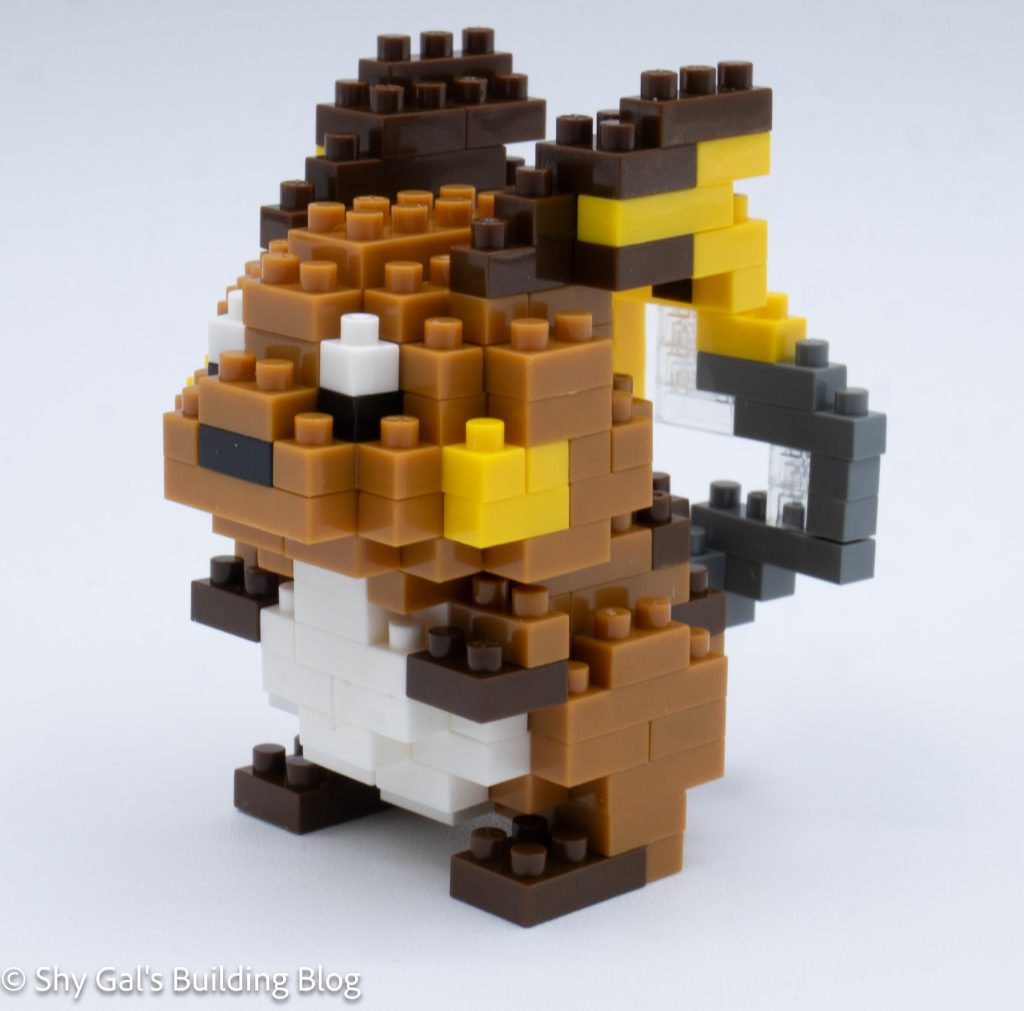
Things I liked:
I like his fluffy fur that captures the fur on the pokemon
Things I didn’t like:
It wasn’t clear where to connect the legs to the body
This post is a review of the nanoblock Raichu build. Raichu is part of the nanoblock Pokemon collection. Wondering what else is part of the Pokemon collection? Click here for a list.
Number: NBPM_105
Number of Pieces: 170
Difficulty Rating: 2/5
This build begins by laying out a layer of bricks to create the base of the body. I used my nanoblock pad.
The body goes up in layers. In adding the layers, I added the stomach, back stripes, and the foundation where the tail will attach. I also added Raichu’s front paws. Each layer is fairly straightforward. Eventually, the body is closed up.
The next section is to build the head. The head is built directly on the body.
Like the body, the head goes up in straightforward layers. These layers add the nose, cheeks, and eyes to the build. After a few steps, the head is completed.
The next step is to add the feet to the base of the build.
The next step is to build and attach the ears. Reading the directions for the ears was a bit tricky because the black outlines on the dark brown bricks were hard to see. I wish the brown bricks were outlined in white like they are for black bricks.
The final step is to add the tail. I like how clear bricks are used for support, so the tail can be more angled and look like Raichu’s tail.
Things I liked:
I like how the tail is built and how the final product looks like the correct tail
Things I didn’t like:
I didn’t like how dark the instructions for the ears are
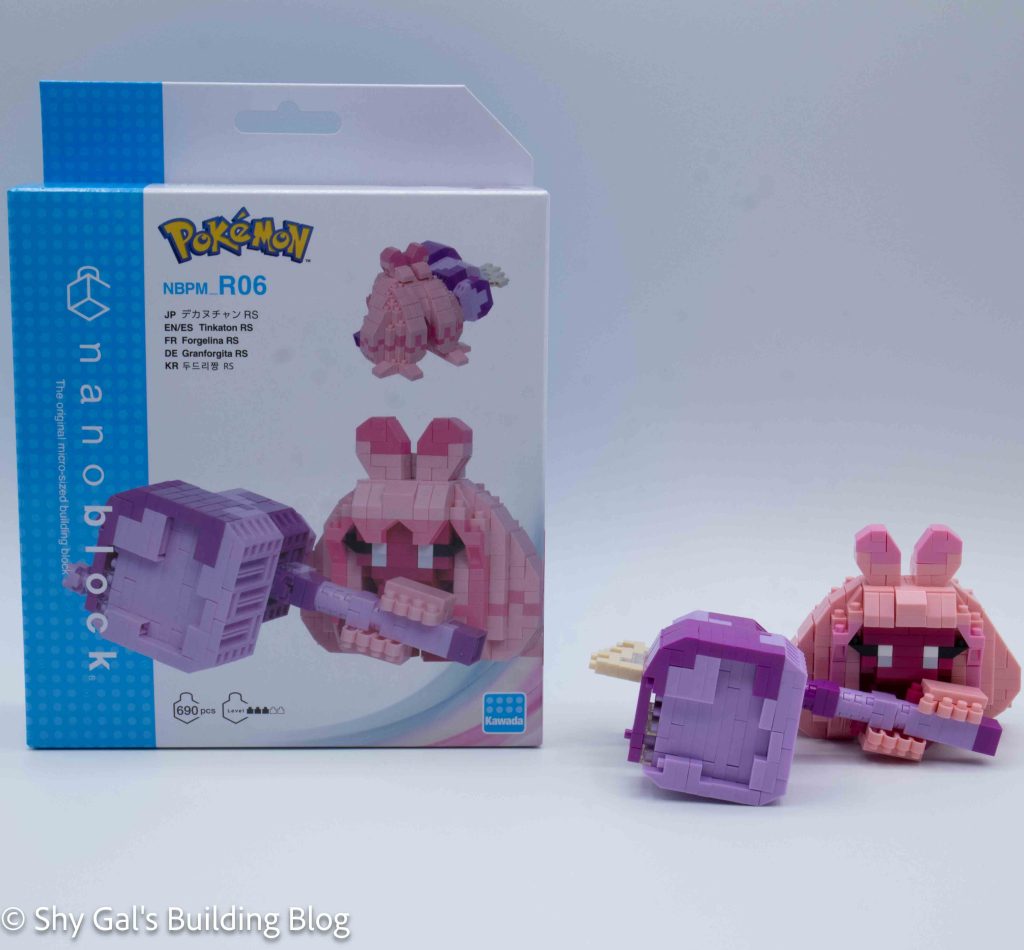
This post is a review of the nanoblock Tinkaton RS build. Tinkaton RS is part of the nanoblock Pokemon collection. Wondering what else is part of the Pokemon collection? Click here for a list.
Number: NBPM_R06
Number of Pieces: 690
Difficulty Rating: 3/5
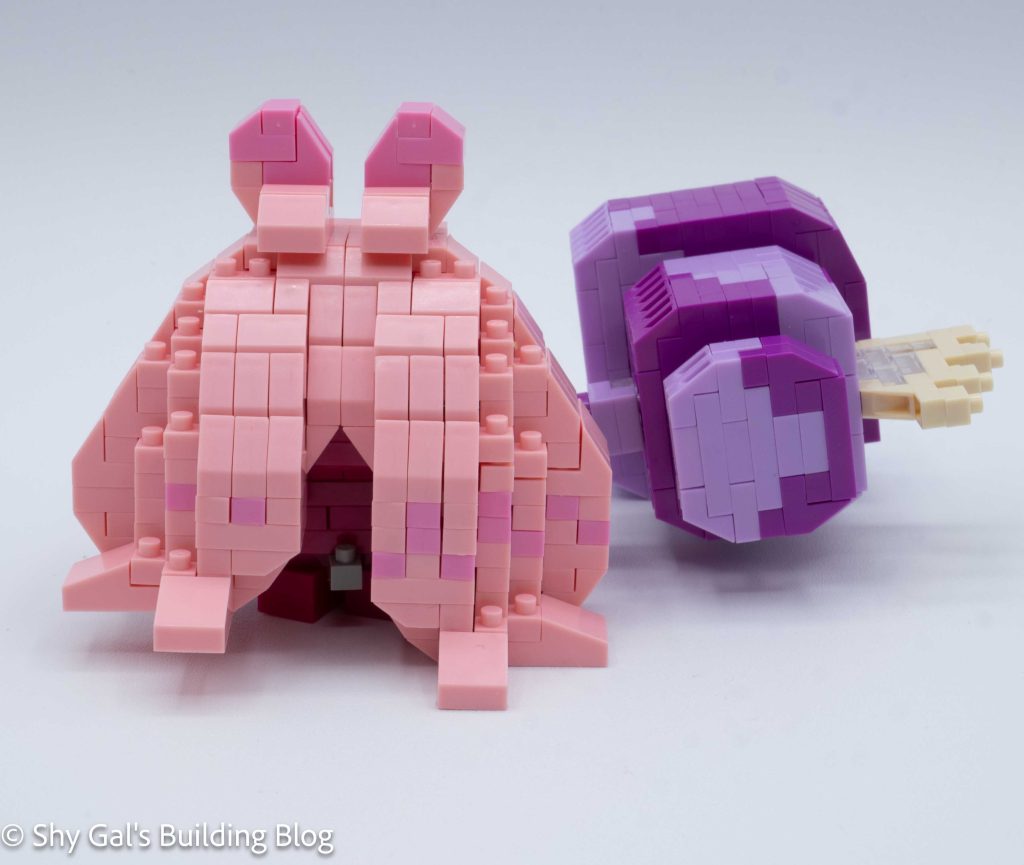
I found this kit incredibly difficult because the colors on the printed instructions don’t match or come close to the actual brick color.
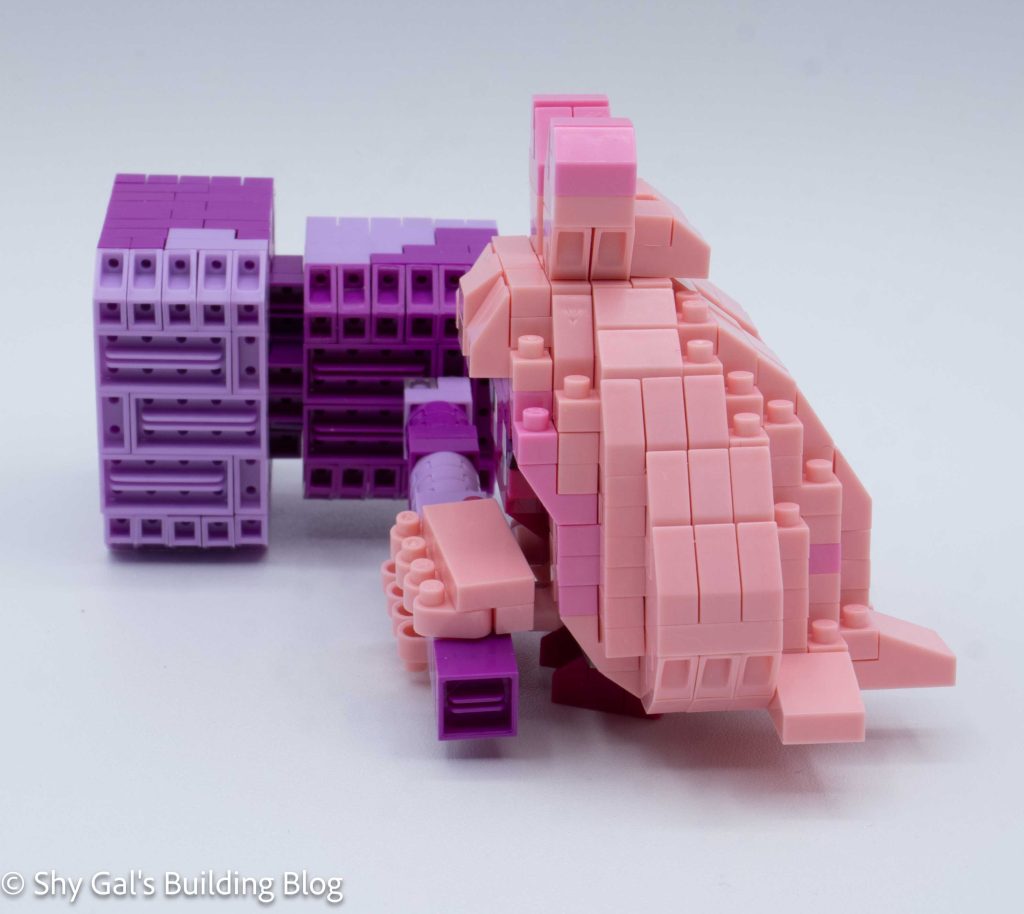
The first step is to build a small body. I was surprised that there were ball joints since I couldn’t see them on the box.
The next step is to build the main section of the head. This includes the eyes.
The next section is to build the bottom of the hair. It is built in 2 sections, left and right. They are supposed to be near mirror images of each other. I goofed up and missed a layer on one side, but I didn’t notice until I had attached the hair sections. I tried to separate the bricks but couldn’t get a gap so I just left the layer out.
The next step is to finish the top of the hair. This was fairly straightforward.
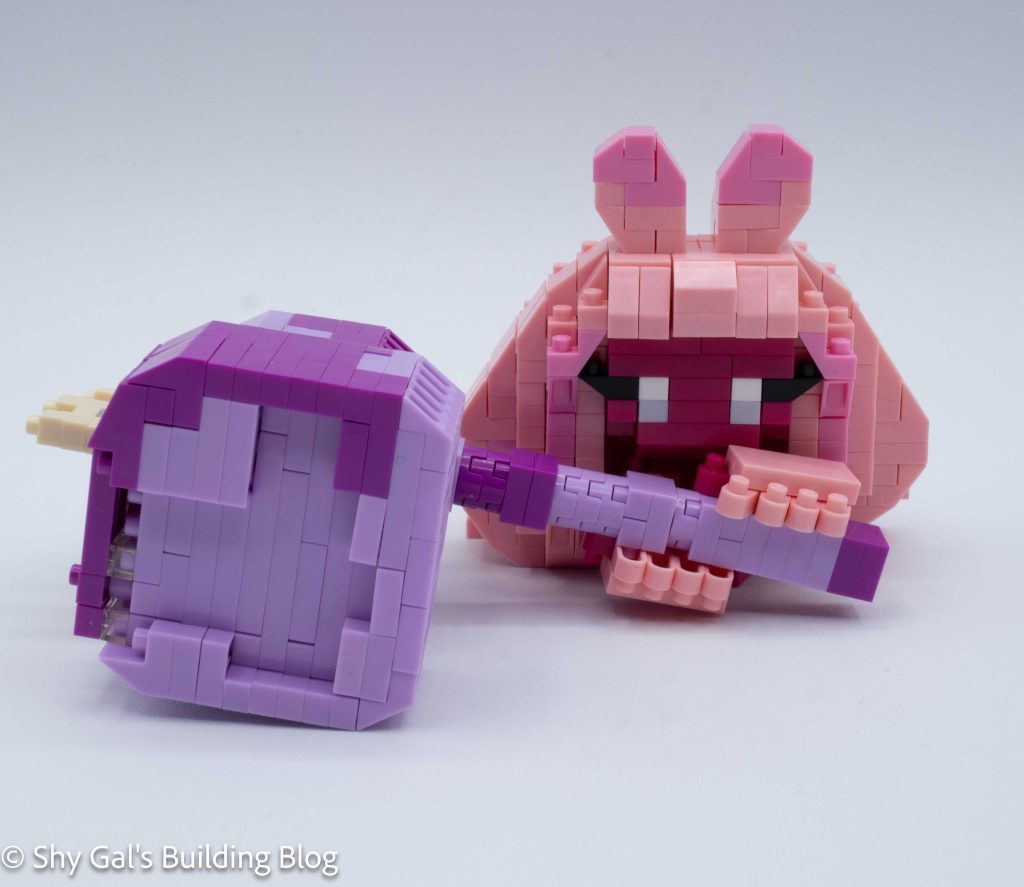
Now, it is time to build Tinkaton’s massive hammer.
The first step is to build the head of the hammer. The hardest part was figuring out what colors to use where because the colors are so different.
Then, it was time to build the handle. This was fairly straightforward, and I like how Tinkaton’s hands are added to hold the hammer.
The final step is to attach the hammer to Tinkaton.
Things I liked:
I feel like this build gets the essential things that make up Tinkaton
Things I didn’t like:
I didn’t like how the instructions didn’t match the colors of the actual brick
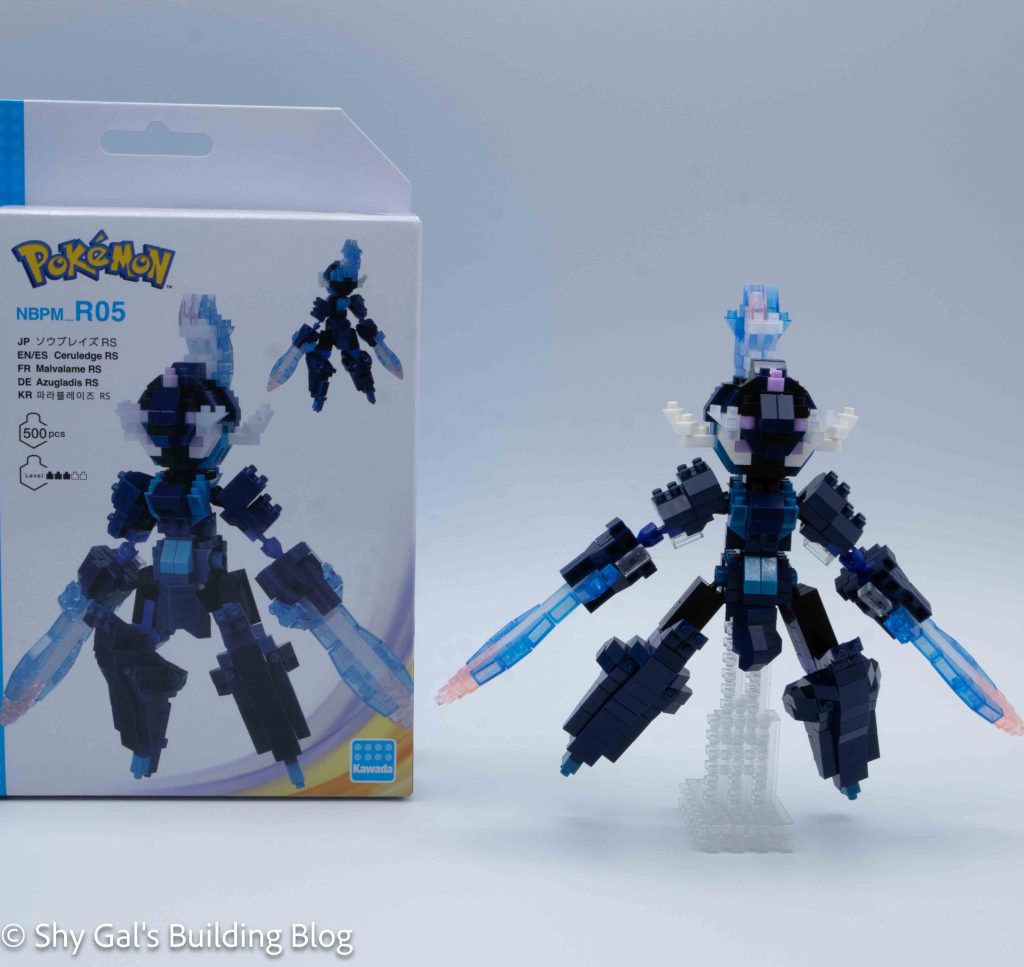
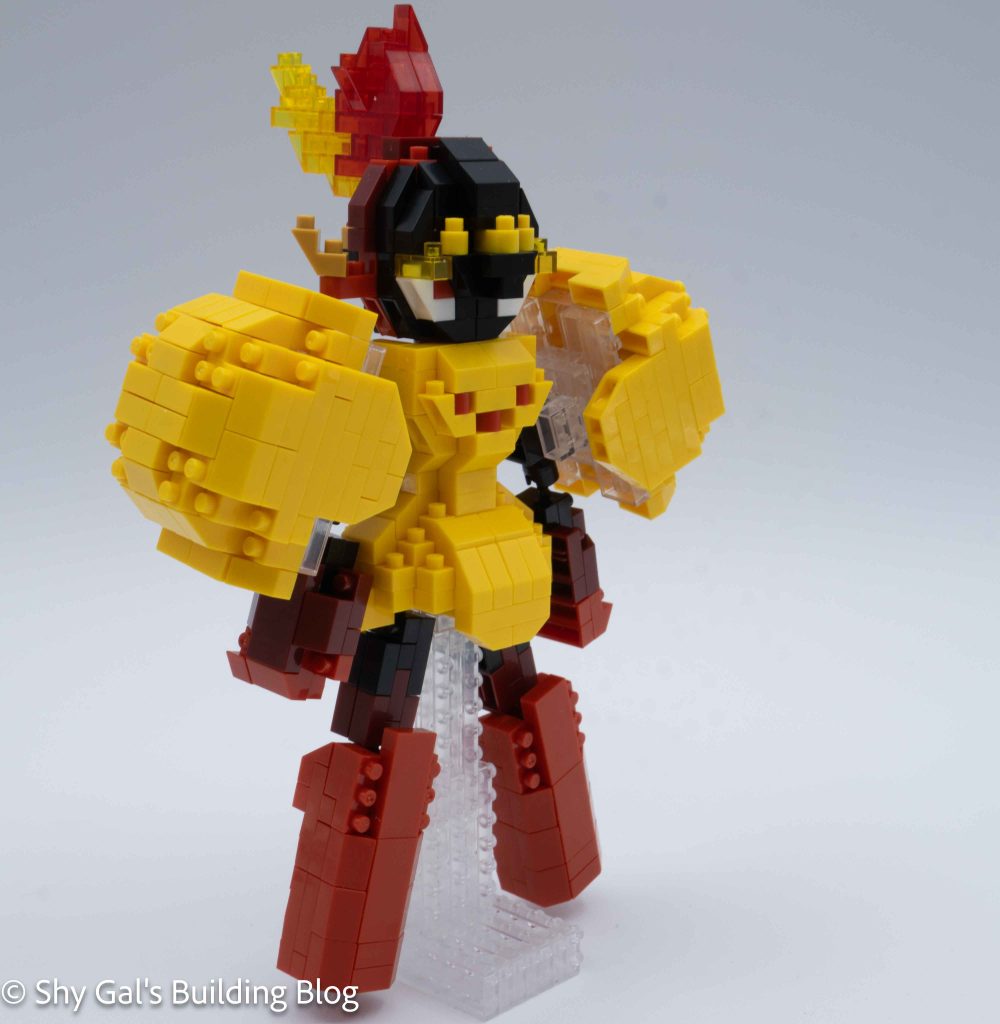
This post is a review of the nanoblock Ceruledge RS build. Ceruledge RS is part of the nanoblock Pokemon collection. Wondering what else is part of the Pokemon collection? Click here for a list.
Number: NBPM_R05
Number of Pieces: 500
Difficulty Rating: 3/5
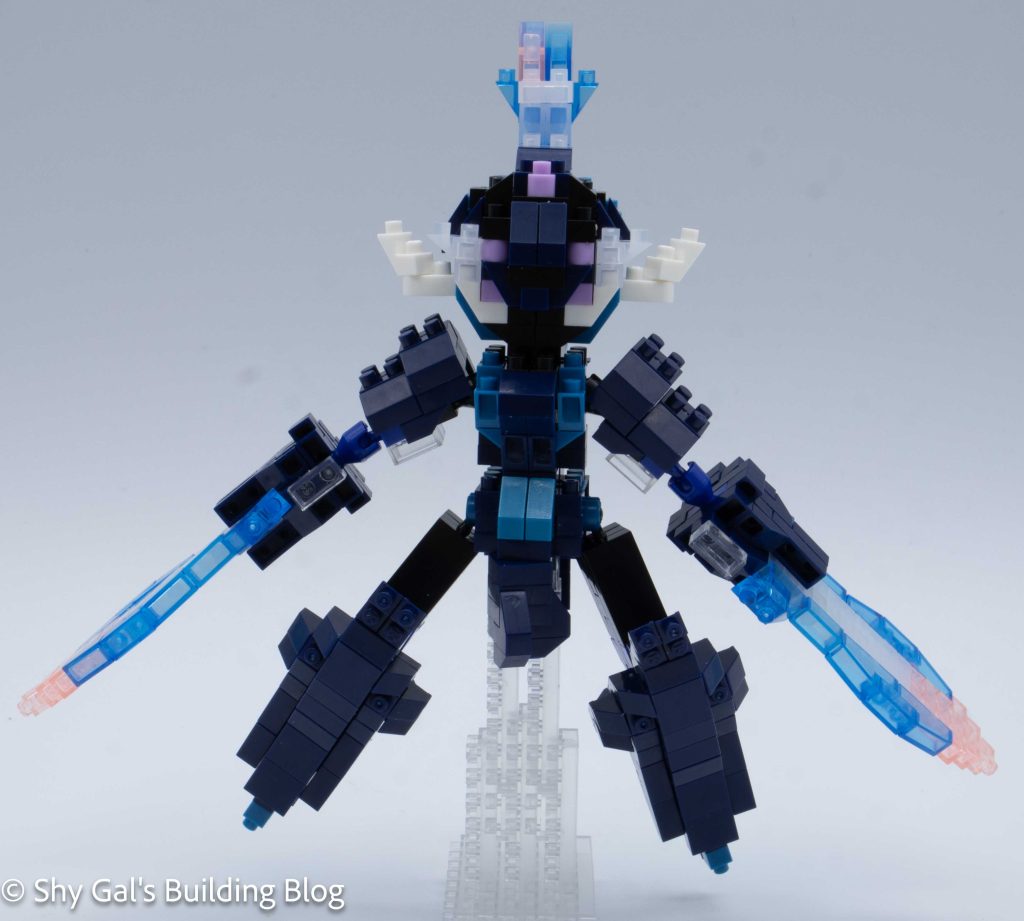
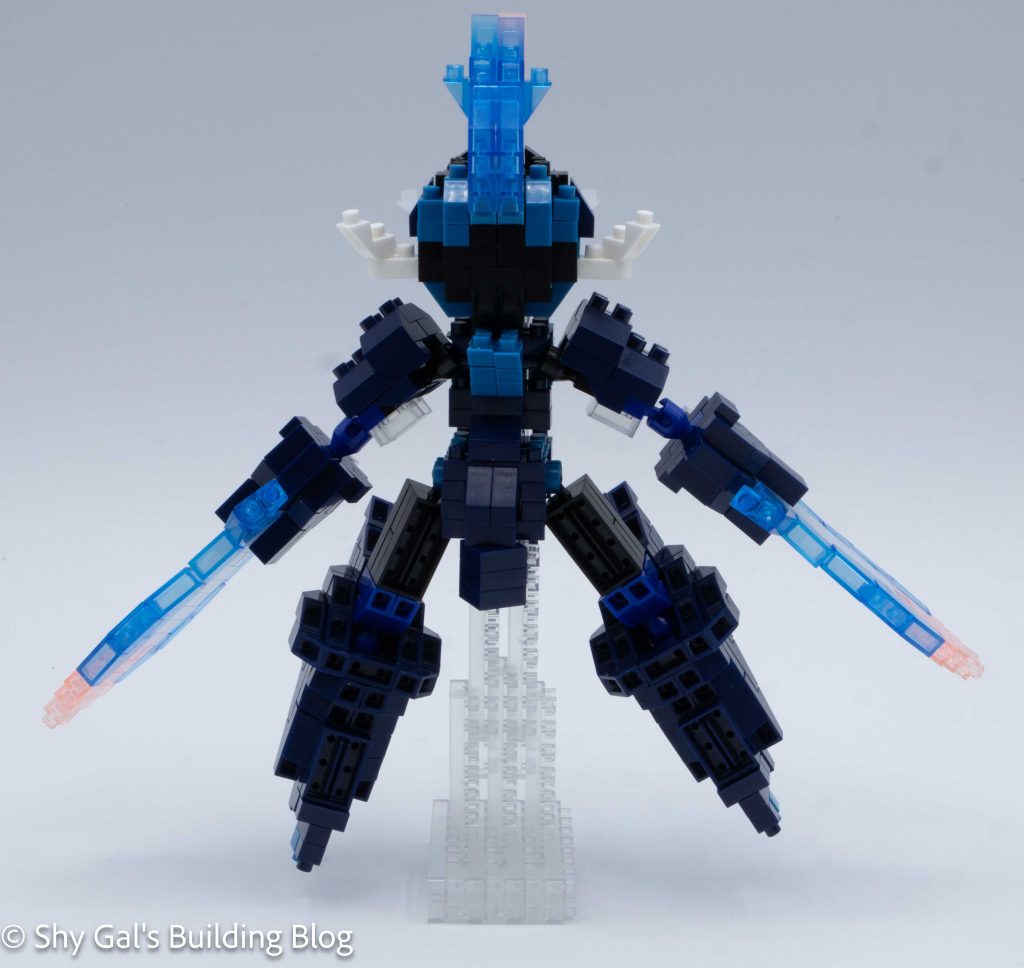
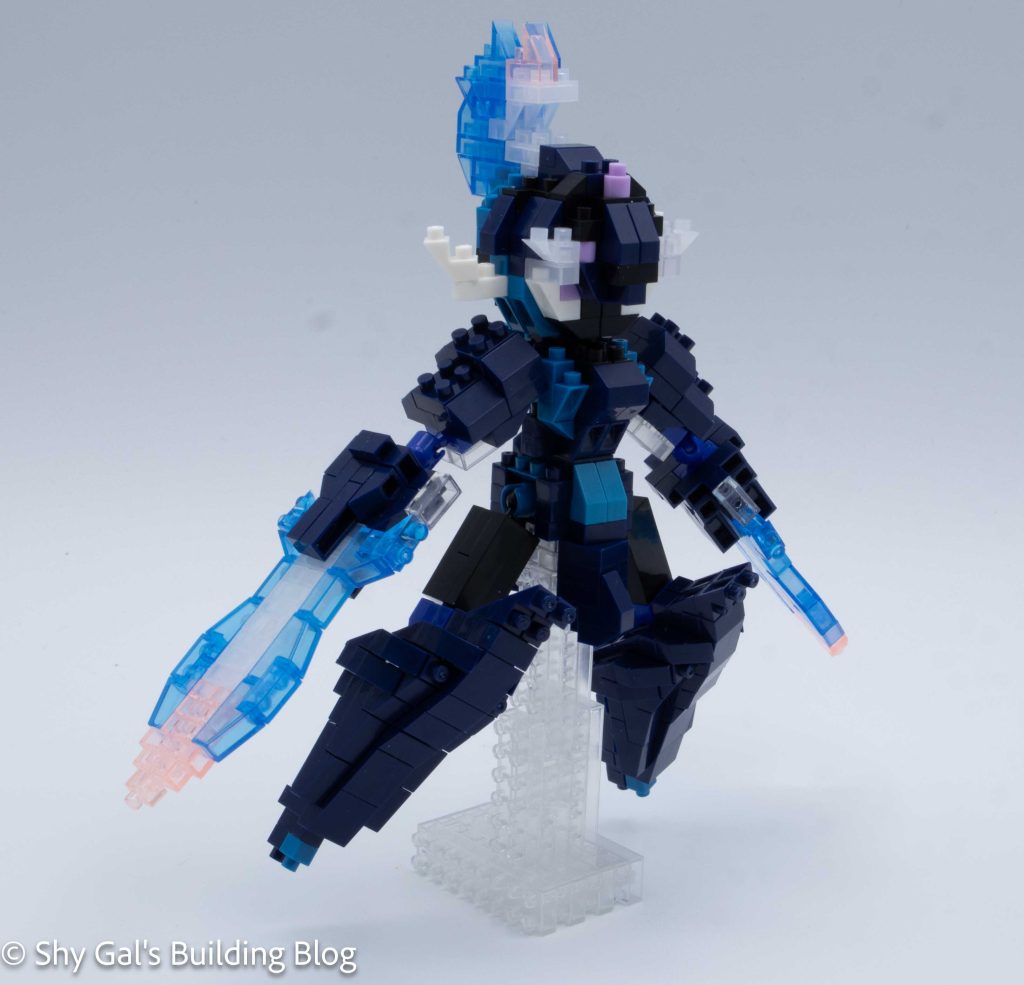
Ceruledge is built in several small pieces that are all connected to each piece. Other than telling whether bricks were navy or black, each step was very straightforward.
Ceruledge was a bit more tricky than Armarouge because of the use of navy and black pieces and the fact that it is hard to tell the difference between the two colors in poor lighting.
The first step is to build the hips. These are only a few steps that are quickly completed.
The next step is to build is to build the 2 legs. There is one set of directions for each leg so that the legs are correctly mirrored.
The next step was to build the torso. It added the ball joints for the arms and the head connection.
The next step is to build the arms. I really like the use of clear bricks to make the blades. Once again, each arm has a set of directions to ensure things are correctly mirrored.
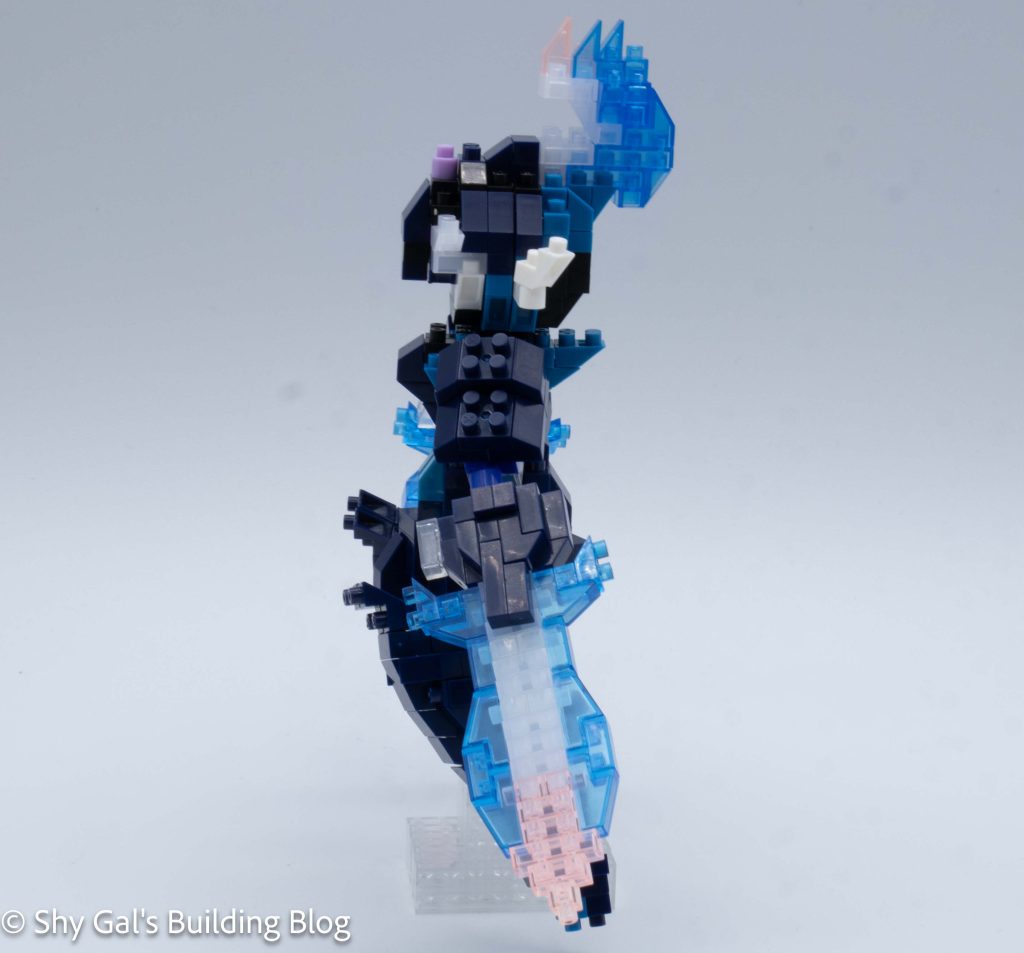
The next step is to build the stand. I really like how they gave Ceruledge a stand since there is no way it would be able to stand on its own.
The final step was to build the head. For some reason, I suddenly started having difficulty telling which blue to use based on the printed instructions. I was able to figure out which colors to use and was able to build the head.
Things I liked:
I really like that they gave you a stand so the model is able to stand up
Things I didn’t like:
I didn’t like how it was hard to tell which shade of blue to use looking at the instructions, and not every step said which blue to use
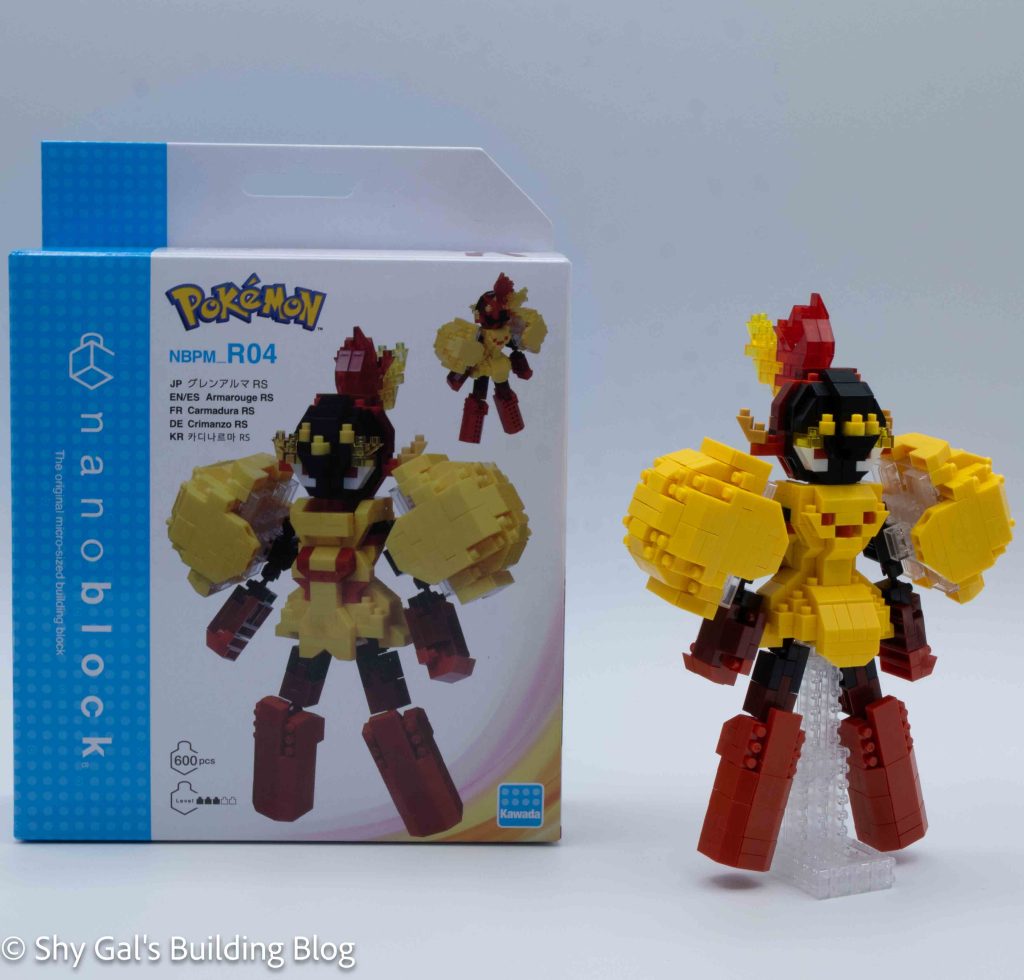
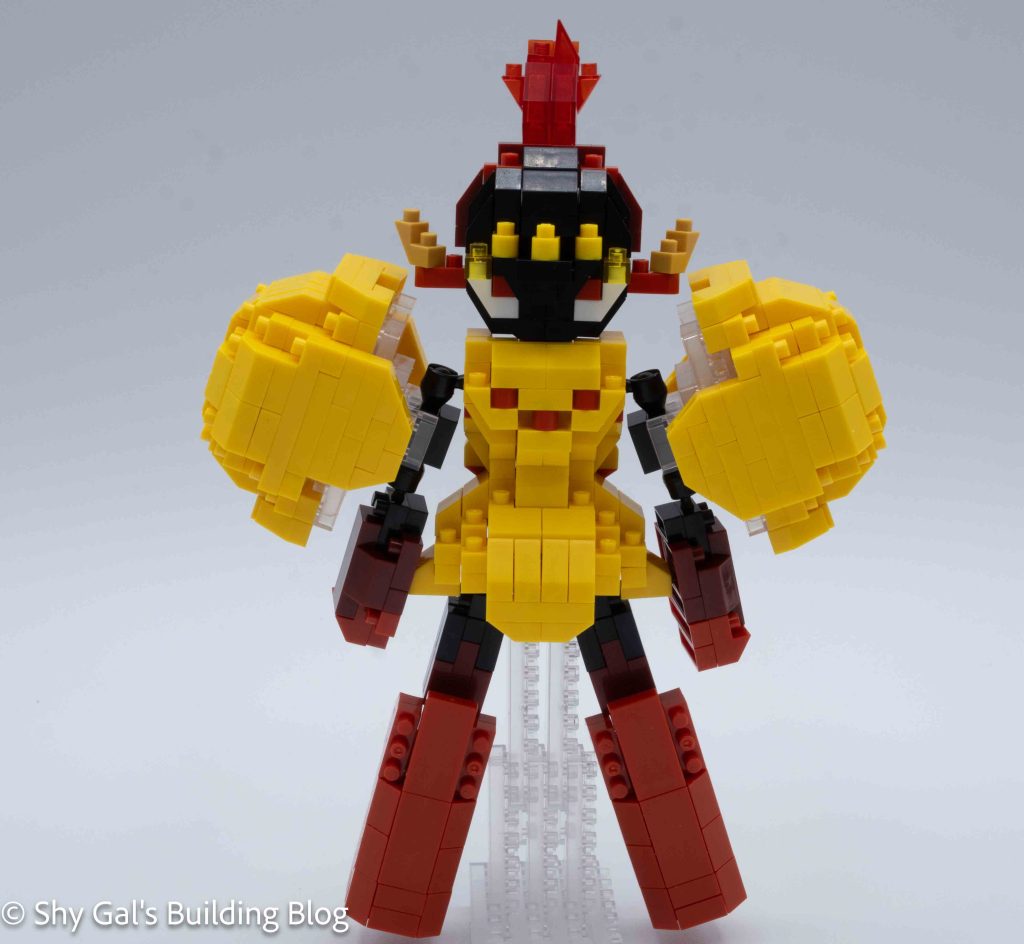
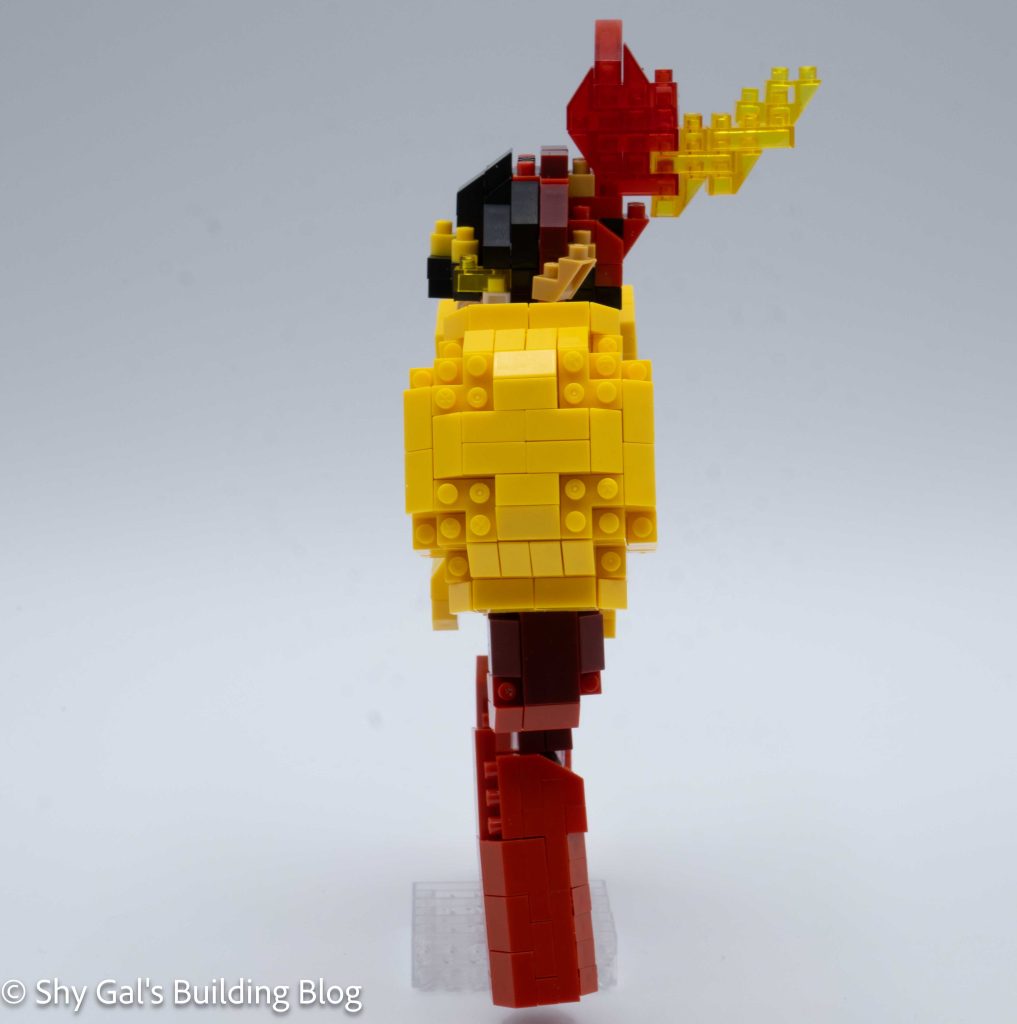
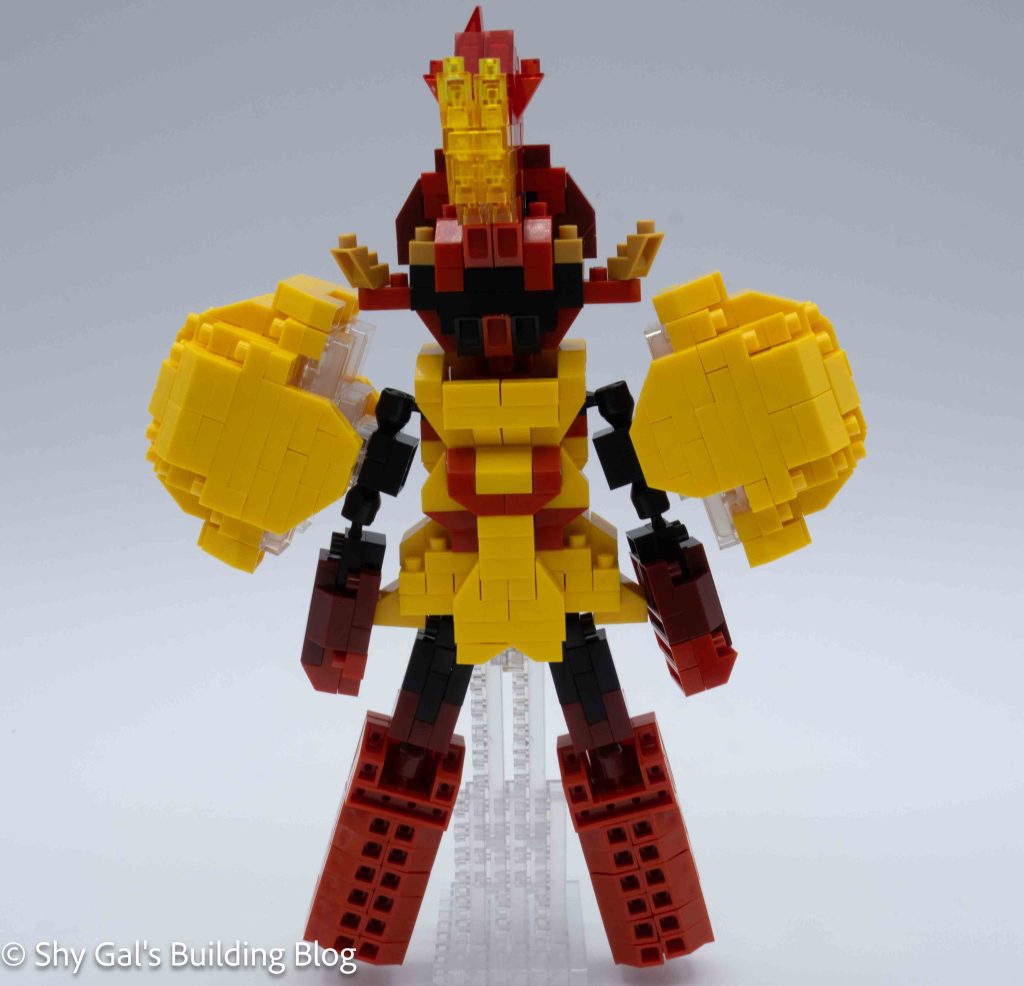
This post is a review of the nanoblock Armarouge RS build. Armarouge RS is part of the nanoblock Pokemon collection. Wondering what else is part of the Pokemon collection? Click here for a list.
Number: NBPM_R04
Number of Pieces: 600
Difficulty Rating: 3/5
The first step is to build the center body. I built it on my nanoblock pad. It began by laying the base out on my nanoblock pad. It went up very straightforwardly in layers.
The next step is to build the legs. There is an independent direction for each leg. I built each on my nanoblock pad. The directions for each leg are slightly different to get the correct piece to show in the upper leg section.
The next step is to build the hands and arms. There are 2 sets of directions, one for each arm. They are mirrored so that the hands appear correctly.
The next step is to build the shoulder guards. These are straightforward. I like how the arms are poseable even though such large guards are on the shoulders.
I was super excited to see that there was a stand for this kit. Based on how the legs are built, it would be super hard to get the build to stand on its own. The stand was very straightforward to build and attach.
The hardest part of this build was putting the head together. After building the base of the head, it goes up in layers. As I was placing bricks, the placement seemed kinda random, so I had to trust the process. After building the front of the head, I built the flame coming off the back of the head.
Things I liked:
I really like that the build comes with a stand because it was clear that the build wouldn’t stand on its own
Things I didn’t like:
Surprisingly, I had difficulty making the head, so I had to remove and redo several layers. I’m still not sure that the head is 100% right
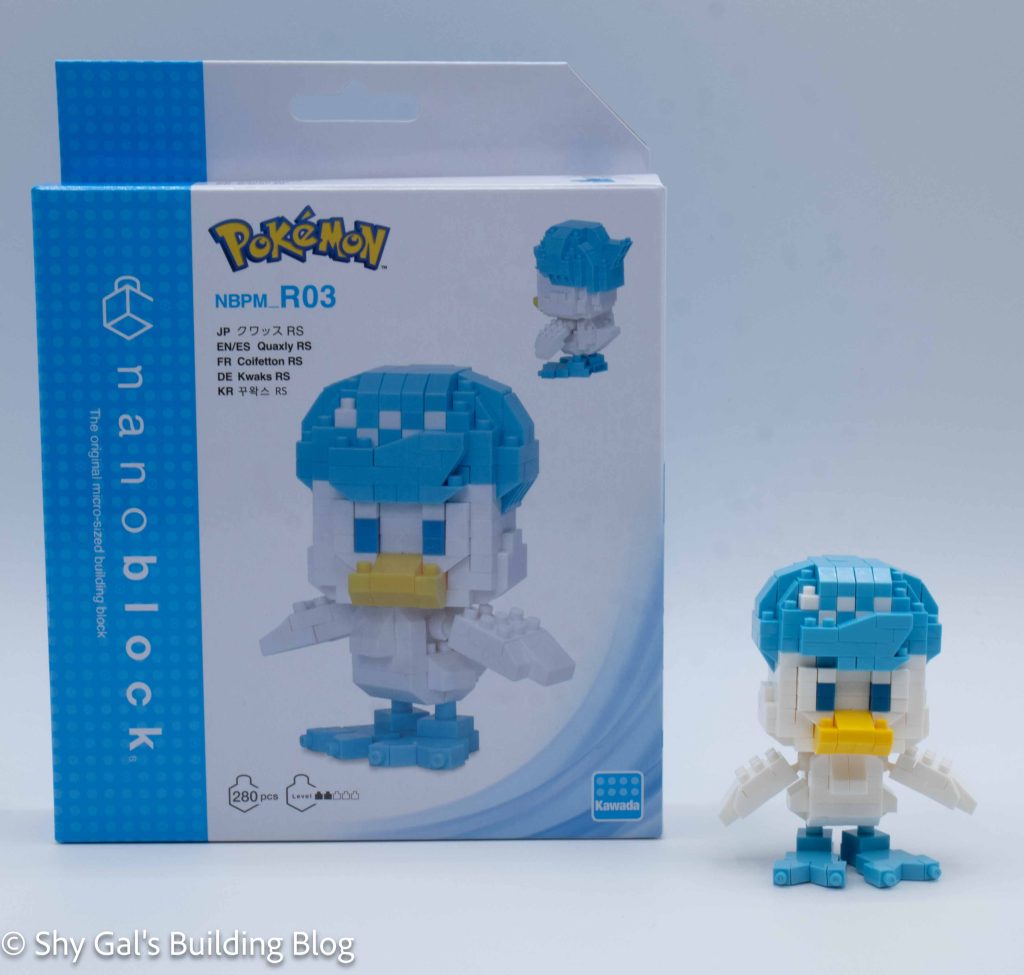
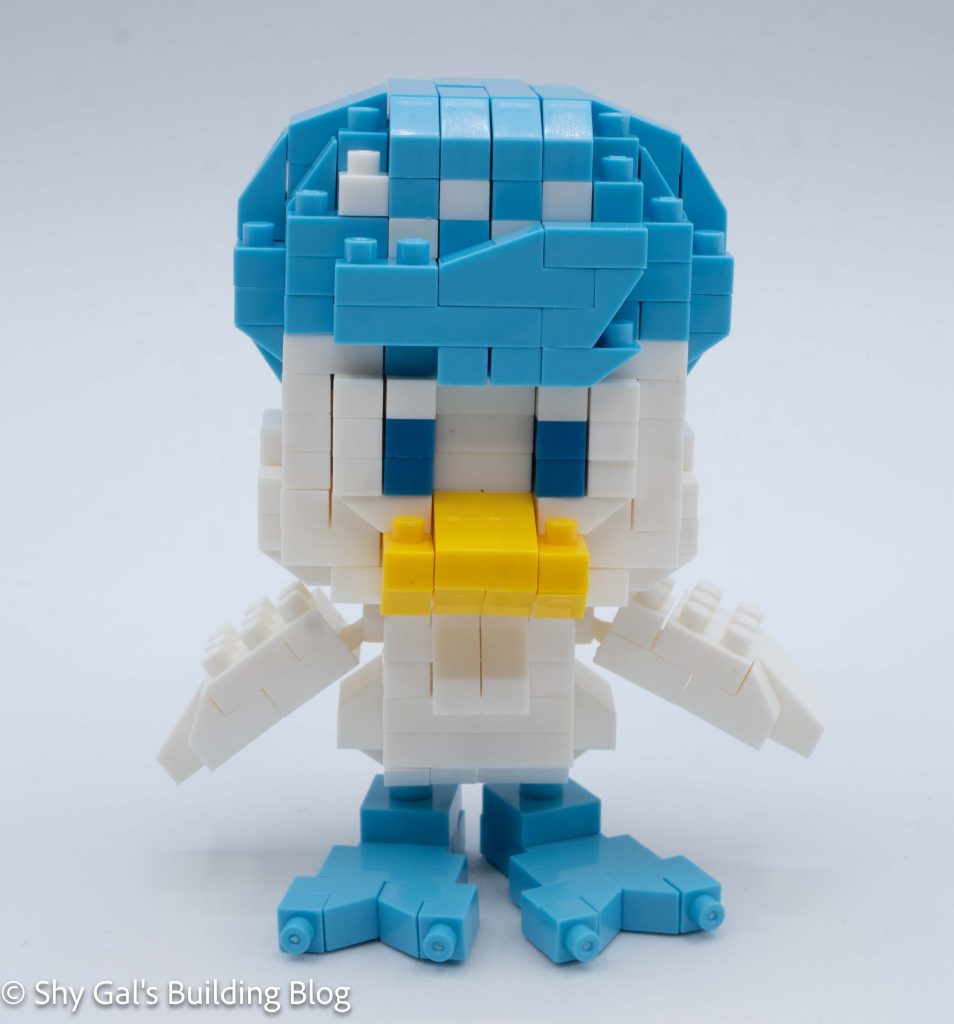
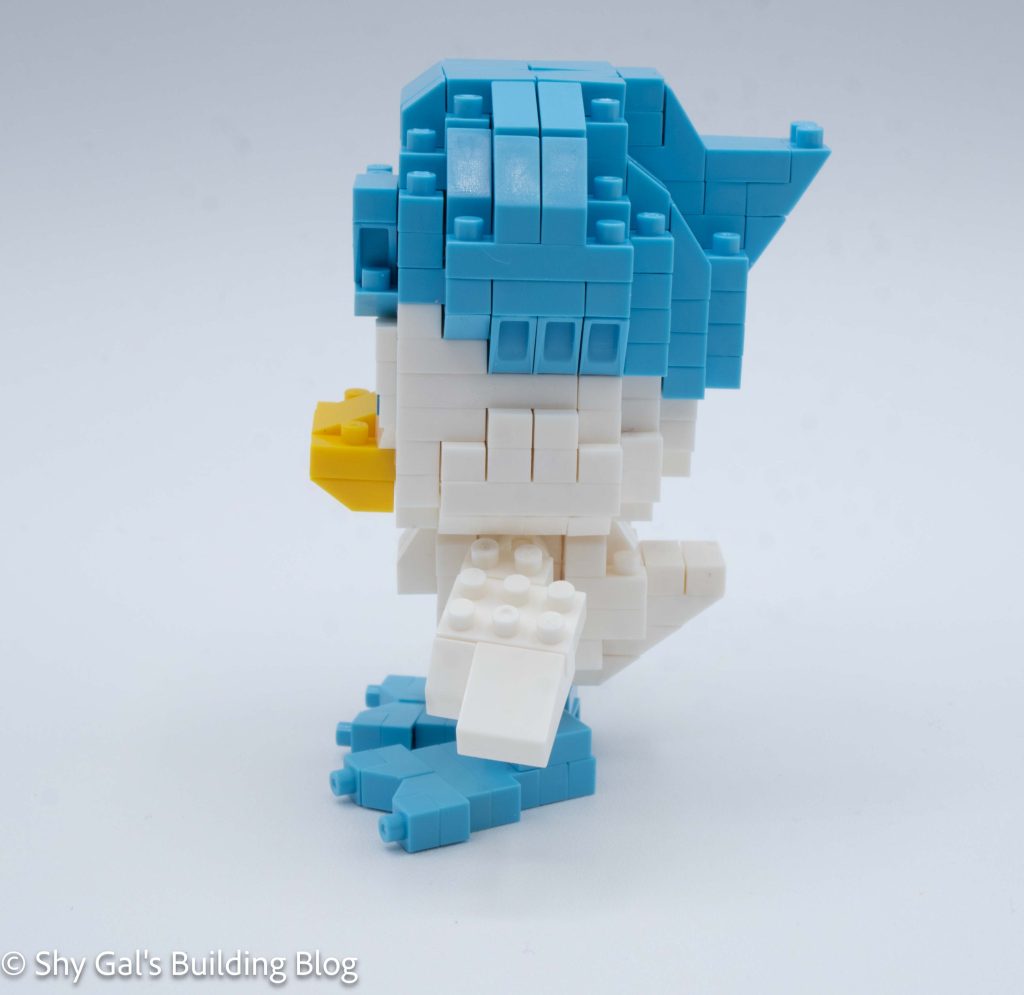
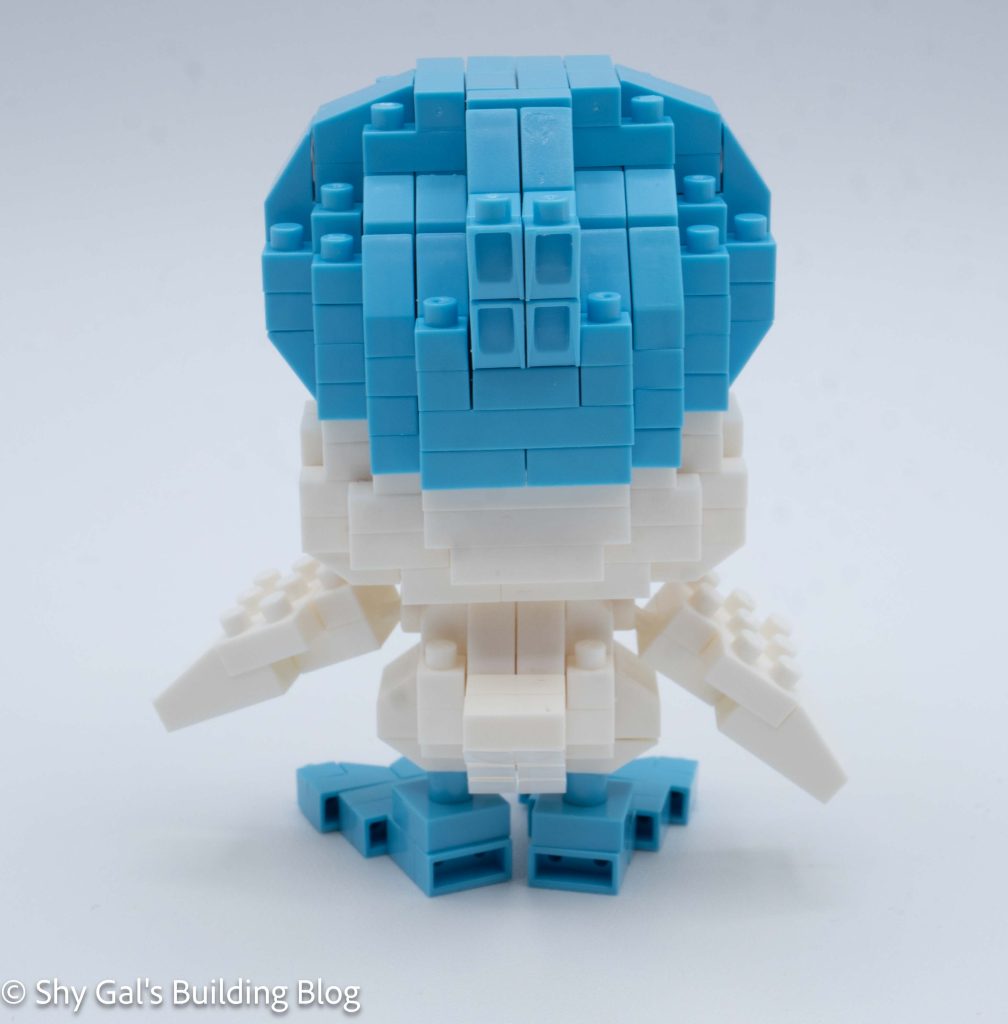
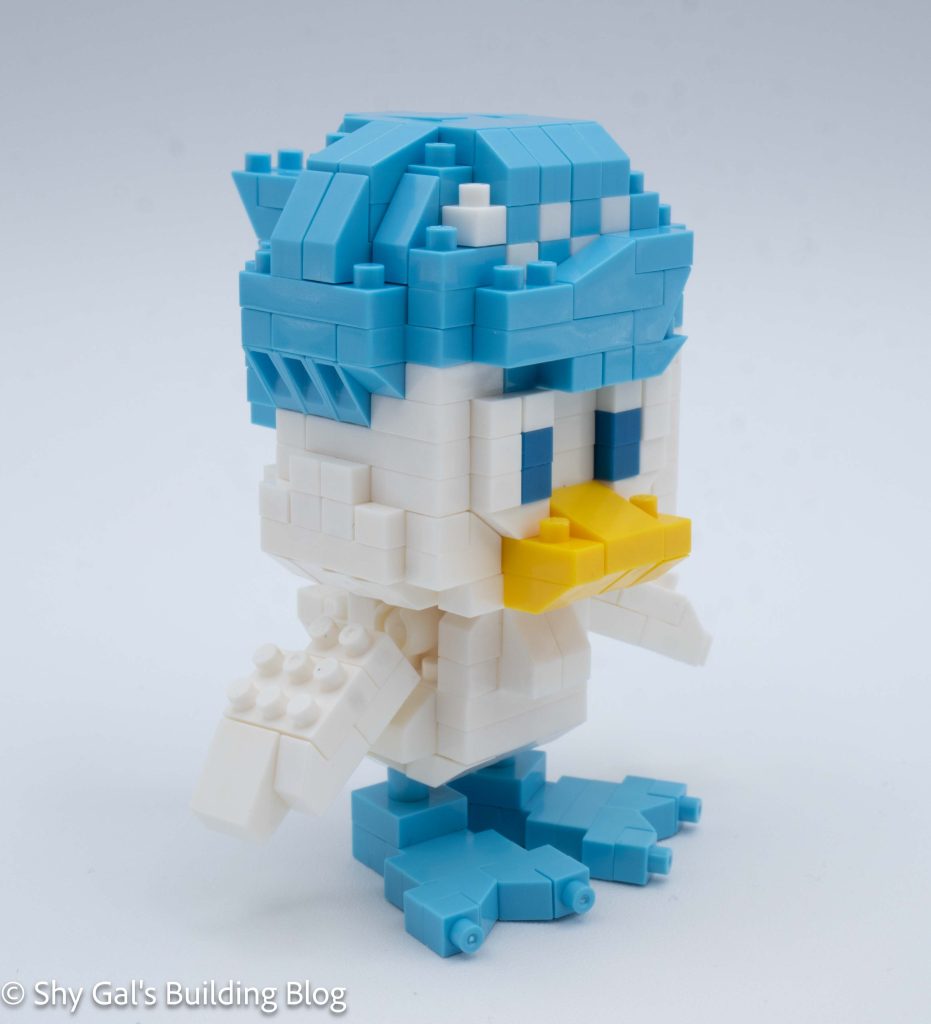
This post is a review of the nanoblock Quaxly RS build. Quaxly RS is part of the nanoblock Pokemon collection. Wondering what else is part of the Pokemon collection? Click here for a list.
Number: NBPM_R03
Number of Pieces: 280
Difficulty Rating: 2/5
This kit begins with building the main section of the body. It is building the front and back of the body with a gap in the middle. The entire section I was able to build on my nanoblock pad.
The next section is to build the wings. There is a center pillar that has some ball joints for the wings to attach. Then, I built the wings and attached them to the ball joints.
Now that the body is complete, it is time to add the feet. I built 2 identical feet and attached them to the bottom of Quaxly’s body.
The next major section is to build Quaxly’s head. I was able to build the first several steps on my nanoblock pad. The base was fairly straightforward. At some point, I added the dark blue eyes.
After building a lot of the head, it is time to build Quaxly’s most distinguishing feature, his hair. The steps to build the hair are very clear. Building the hair adds a checkerboard pattern in front, which I think looks a little odd. I do like how there is a wave in the front of the hair.
The final step is to add some details to the bottom of the head and to attach the head to the body.
Things I liked:
I like how poseable the figure is between the wings and feet
Things I didn’t like:
I don’t like the checkerboard in front of the hair
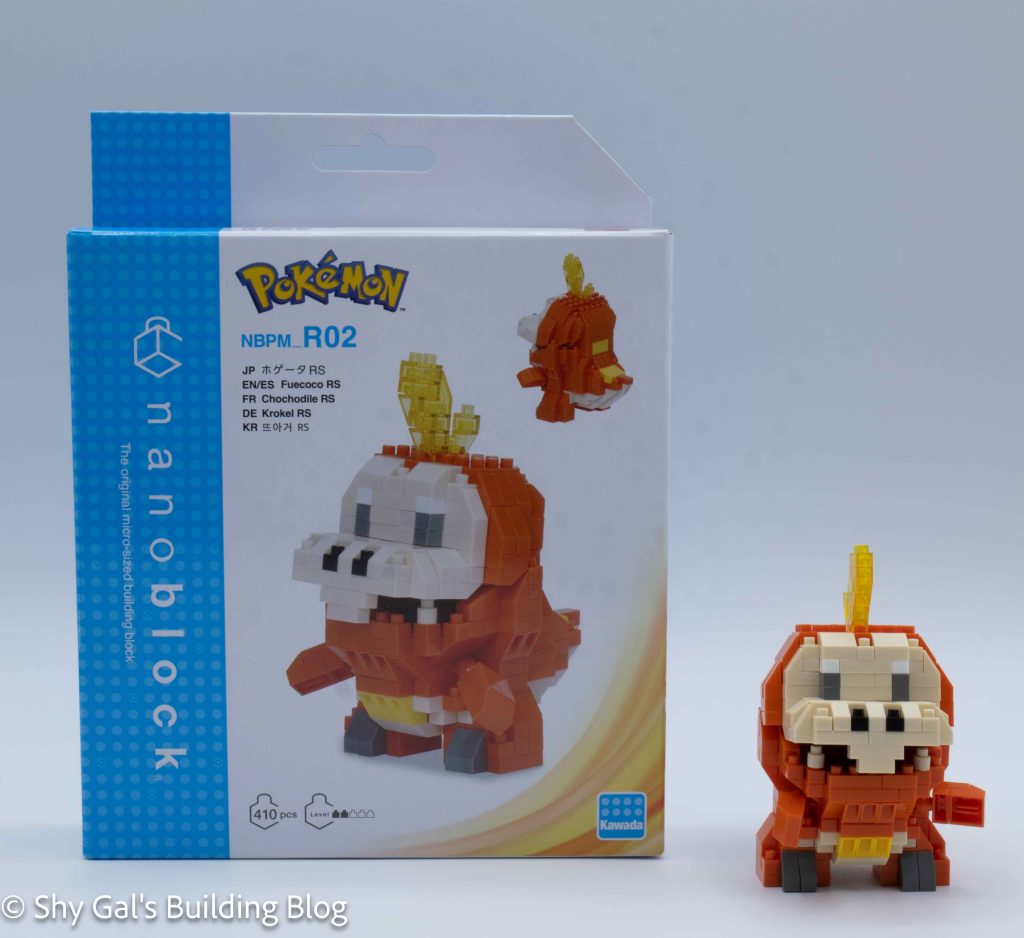
This post is a review of the nanoblock Fuecoco RS build. Fuecoco RS is part of the nanoblock Pokemon collection. Wondering what else is part of the Pokemon collection? Click here for a list.
Number: NBPM_R02
Number of Pieces: 410
Difficulty Rating: 2/5
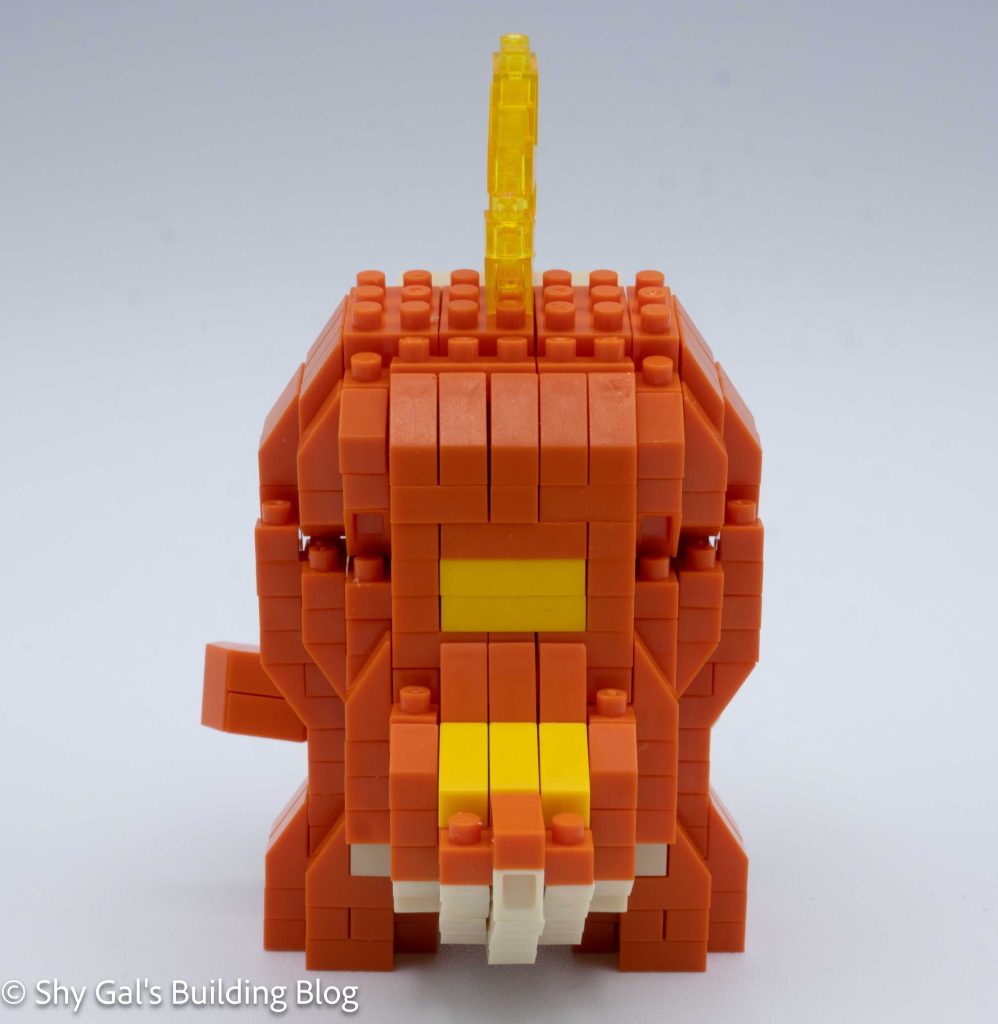
The first thing I noticed when I looked at the directions was how cramped the directions were. This meant that I needed to be more careful as I was building the set since there were so many little cutouts in the directions.
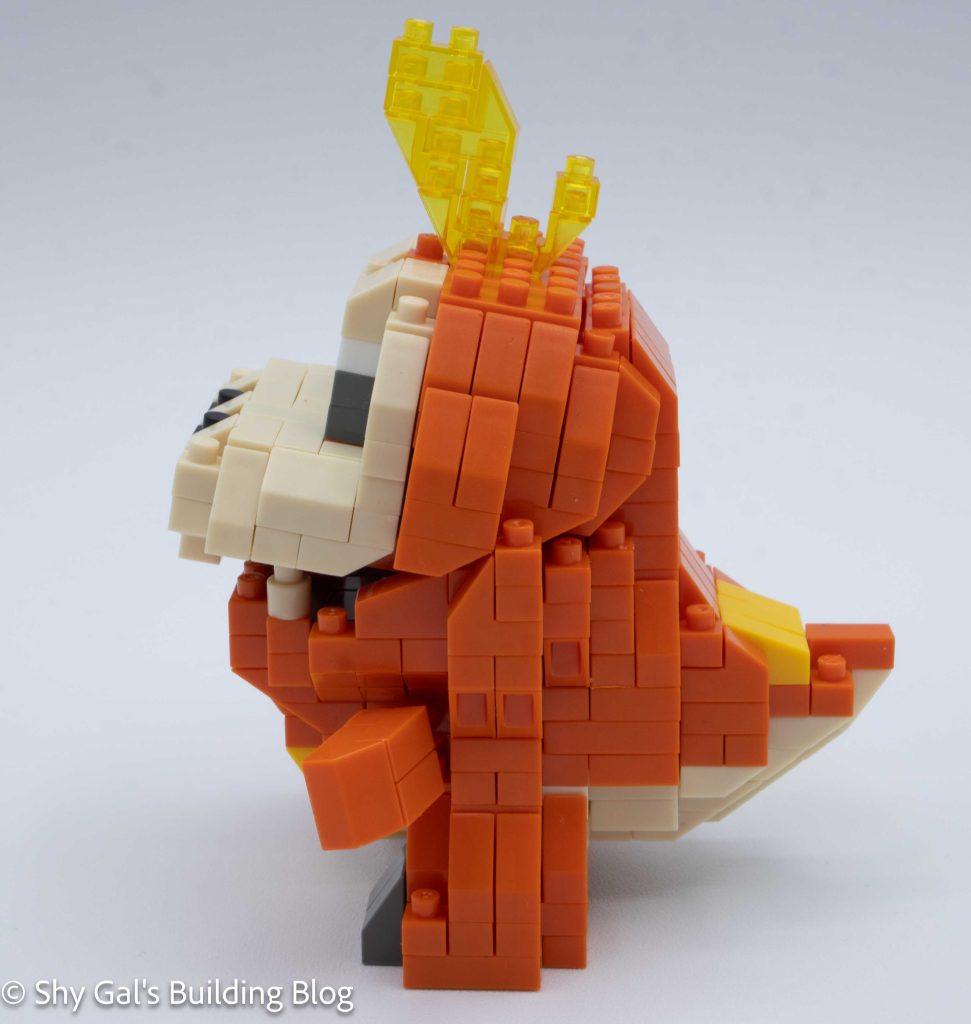
The build begins with building one side of the base of the Fuecoco. Over the next several steps the base of the Fuecoco is built. Once the entire base was built, I began to build the body section in layers. There was one step where it took me a while to figure out what brick was needed. This is because it appeared to be slanted in the directions and I had missed there was a flat piece used in the step.
The next step is to build the stubby little legs off the body and attach them. Overall, the legs are clear on how to build them and attach them.
The next step is to add the little arms.
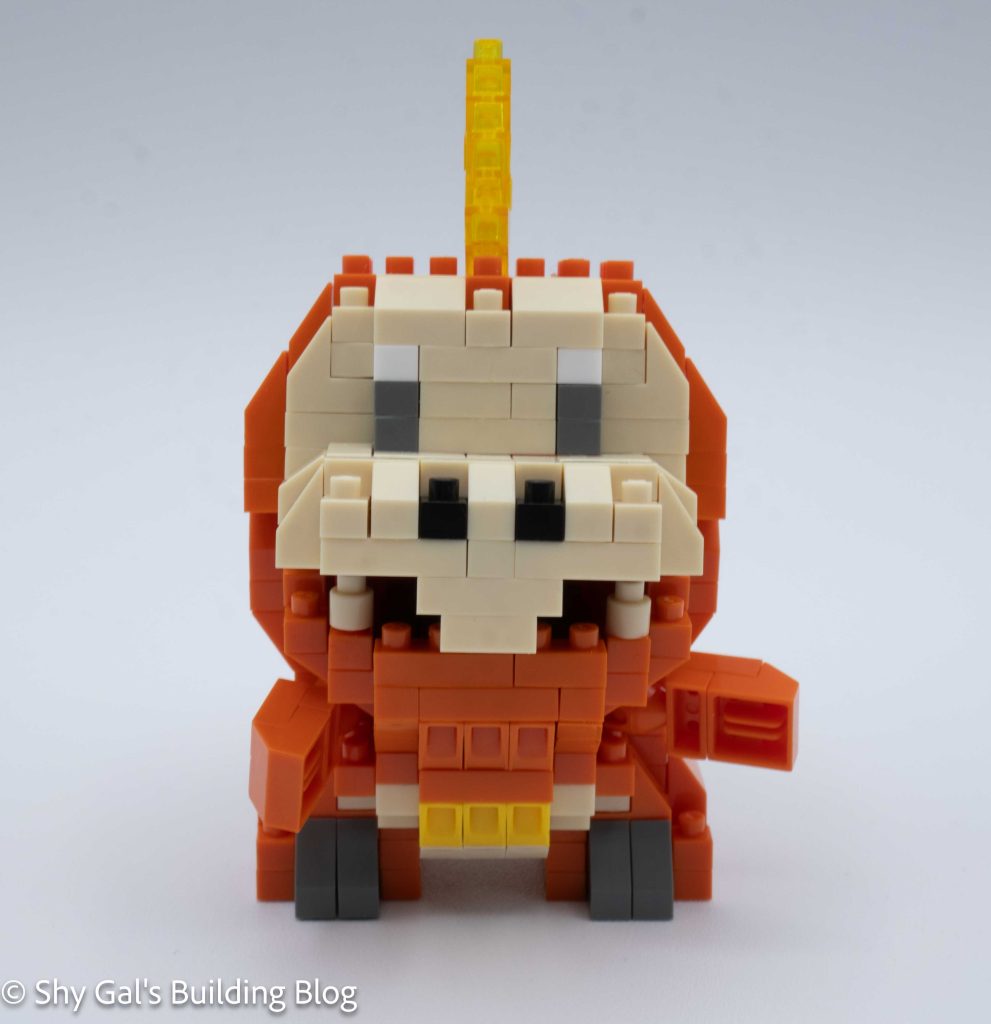
Next, I built the head. It started from a maroon base of the mouth. Once again, it begins with a corner and builds out to create a base of the mouth. After building the entire base, the rest of the head goes up in layers. Fuecoco has dark grey eyes, which is unusual in Pokemon builds, which typically feature black eyes.
The final step is to build the neck section. The following section is straightforward, and it is clear where to connect the pieces. I really like how Fuecoco can have his mouth open a little bit. I’m not sure I’ve ever seen a photo where Fuecoco has closed its mouth all the way
Things I liked:
I really like how the mouth is slightly open because that is how the Pokemon is usually seen
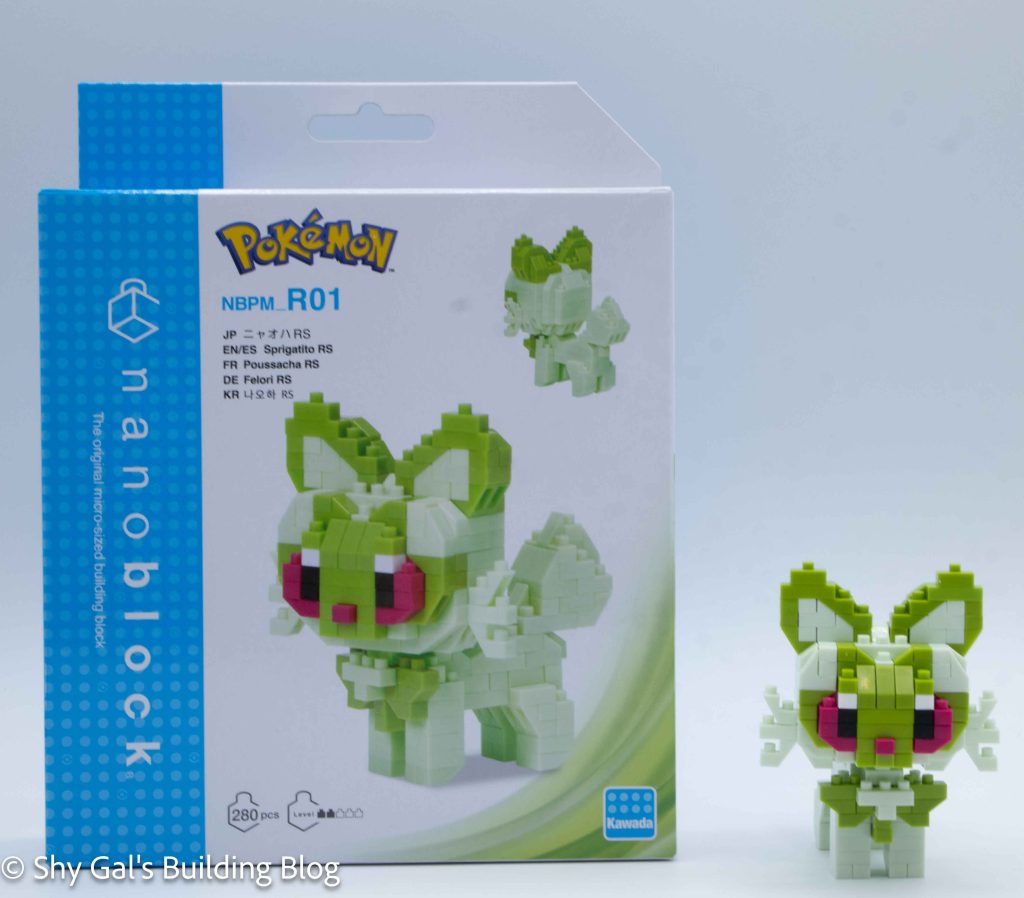
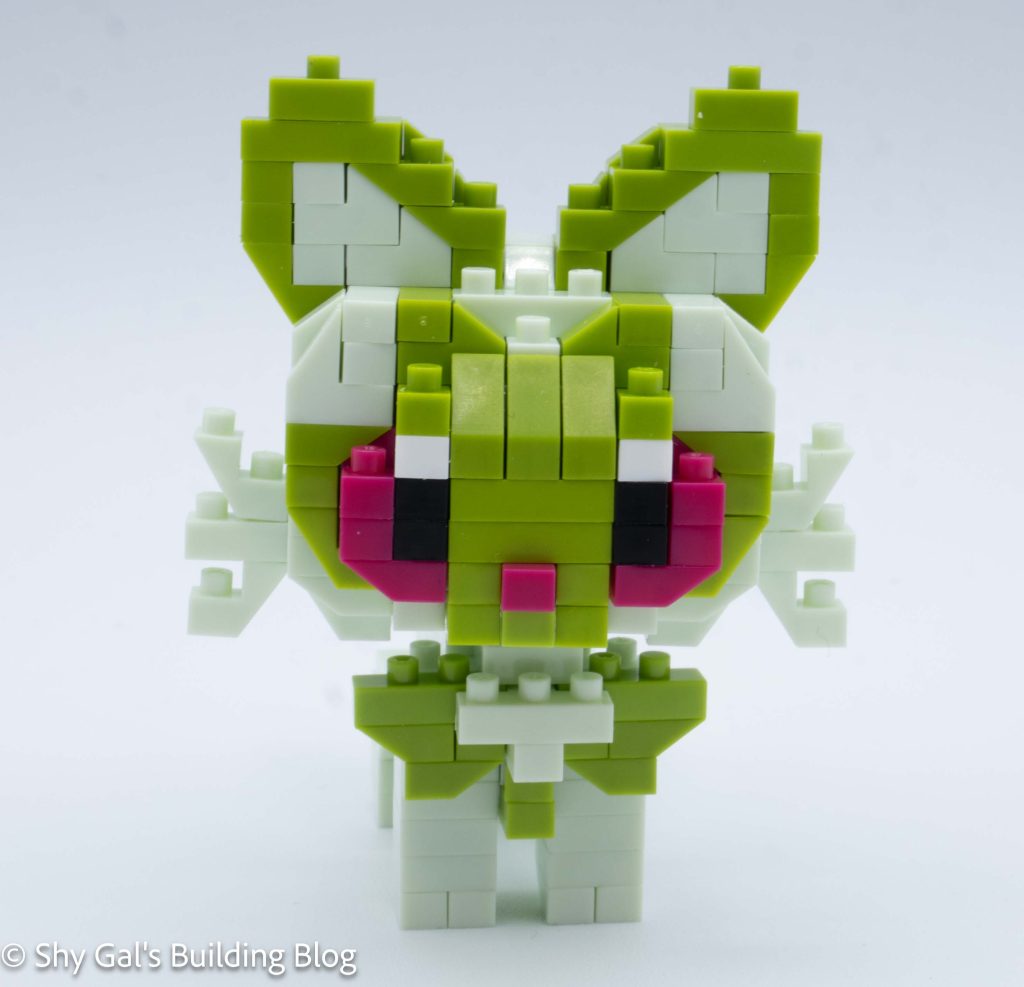
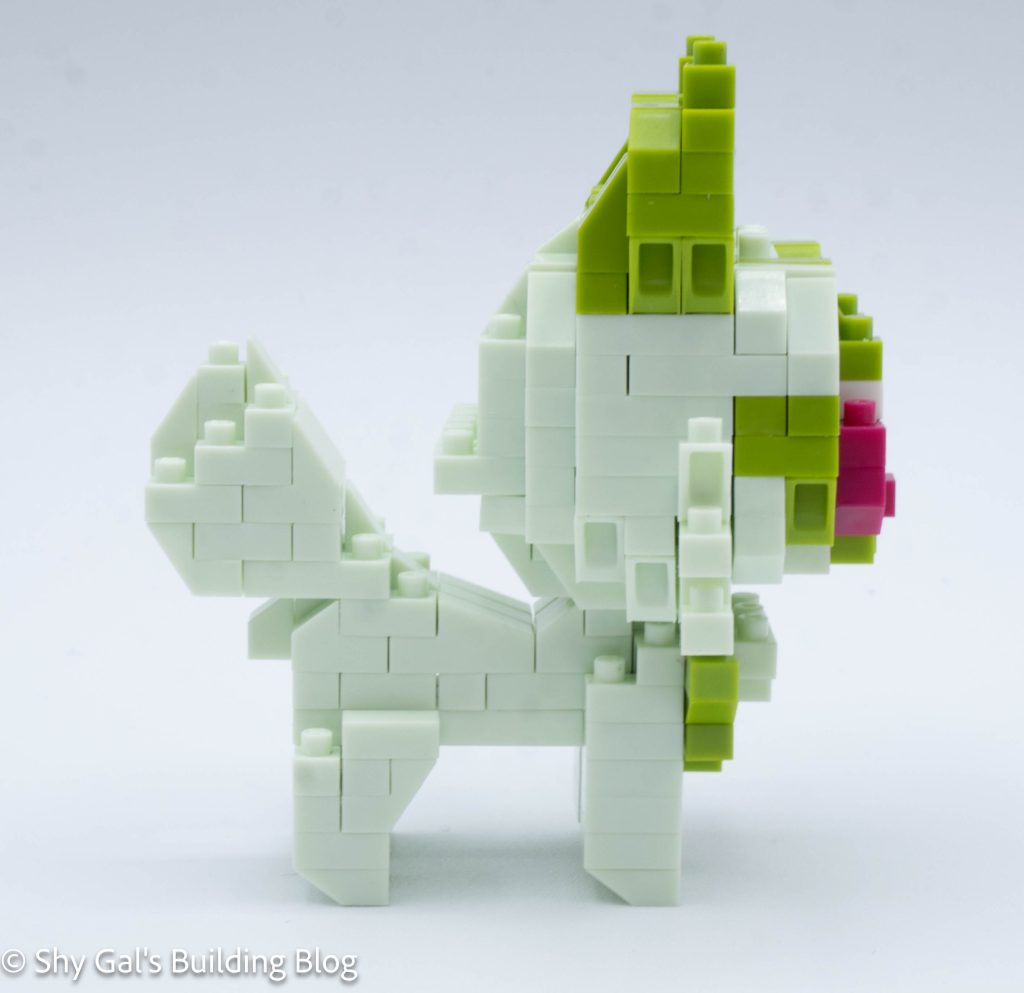
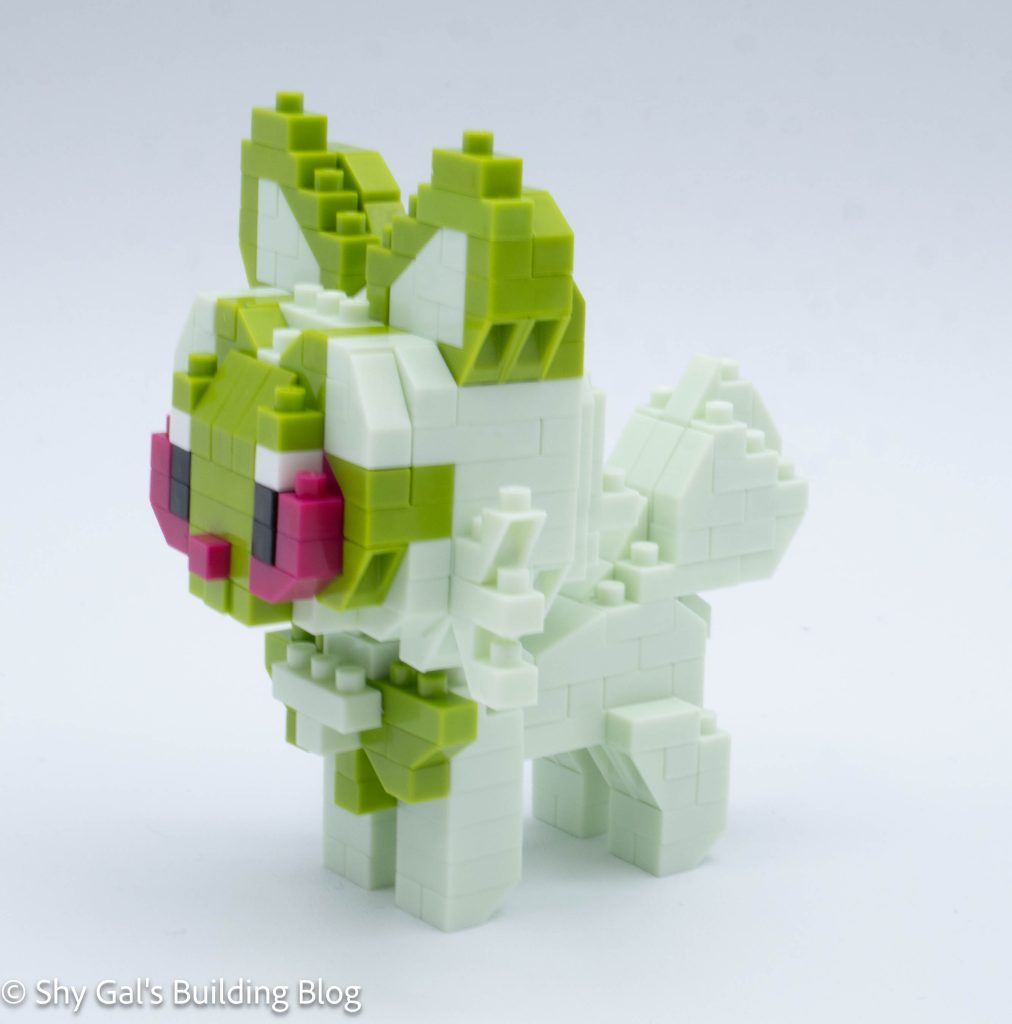
This post is a review of the nanoblock Sprigatito RS build. Sprigatito RS is part of the nanoblock Pokemon collection. Wondering what else is part of the Pokemon collection? Click here for a list.
Number: NBPM_R01
Number of Pieces: 280
Difficulty Rating: 2/5
Sprigatito is the grass starter for Generation 9. This kit features a custom brick color for the lighter green.
The build has 3 sections, the body, tail, and head.
The build begins with building the body. I lay the body out on my nanoblock pad. The body is very straightforward.
After building the body, I flipped the body over and added the legs.
The next section to build is the tail. It is also very straightforward.
The last major section is the head. The beginning of the head is a bit unusual because it takes about 10 steps to create the entire base building from the back to the front.
Once the base of the head is created, the rest of the head is fairly straightforward. I just needed to be careful about which slanty pieces I used. The eyes were also a bit tricky to connect because it wasn’t clear where things lined up or when higher than the base.
Things I liked:
I really like the custom green color that nanoblock created for this build
Things I didn’t like:
I wish the instructions were a bit clearer for the eyes
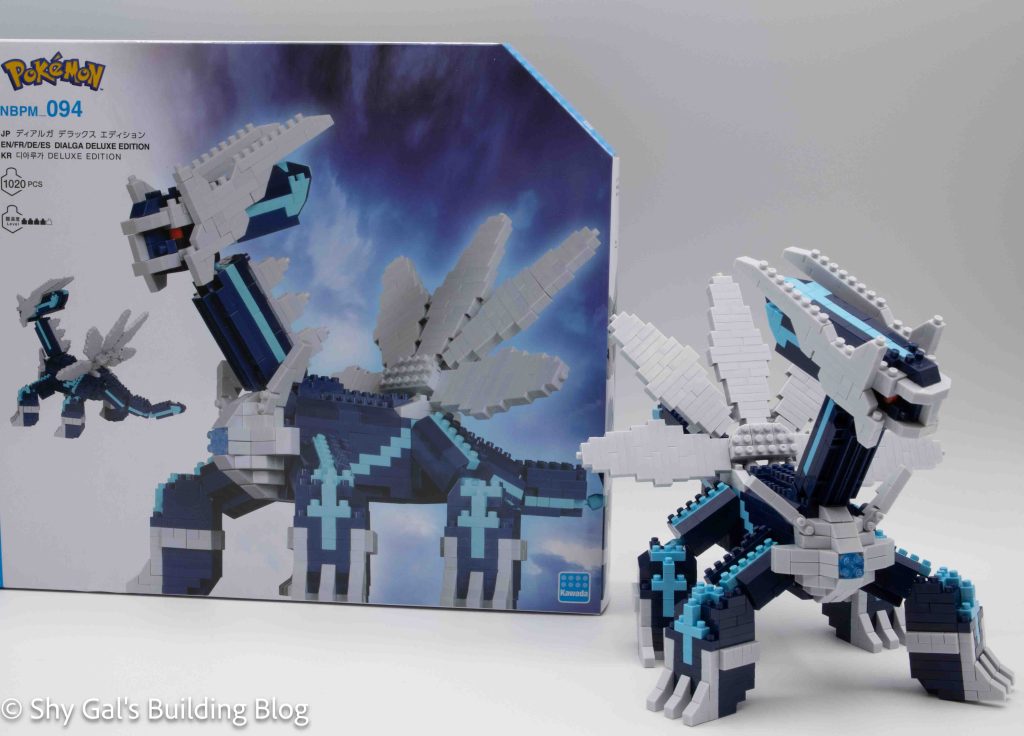
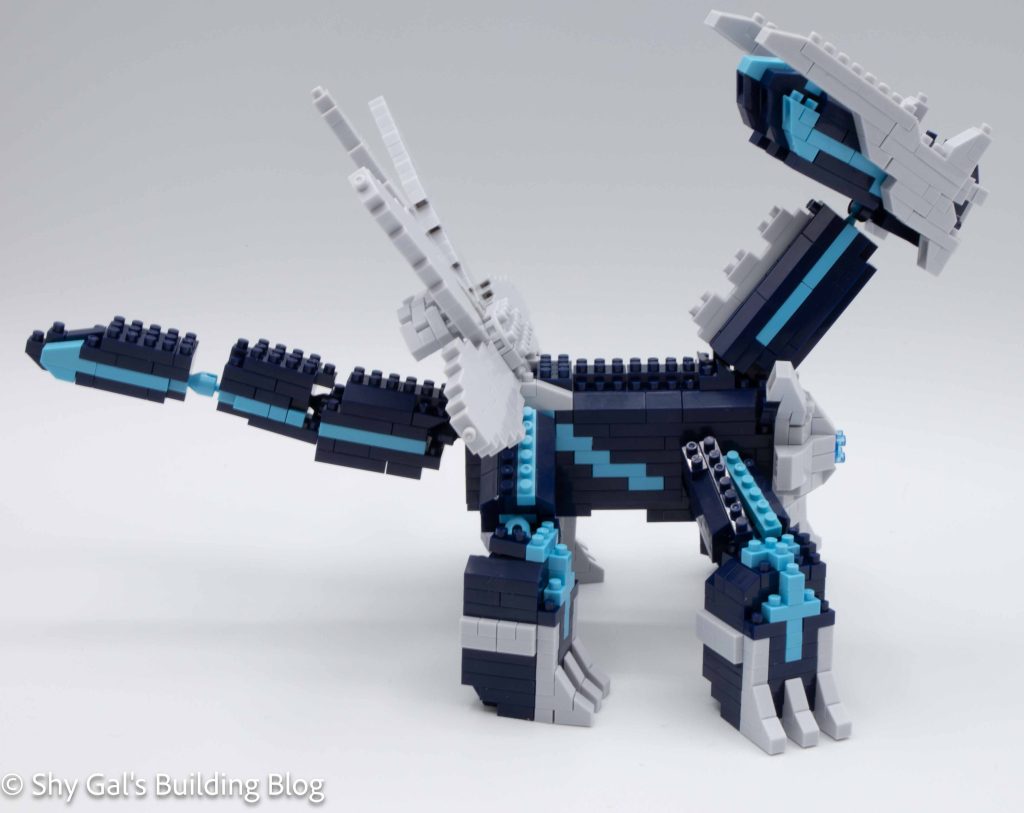
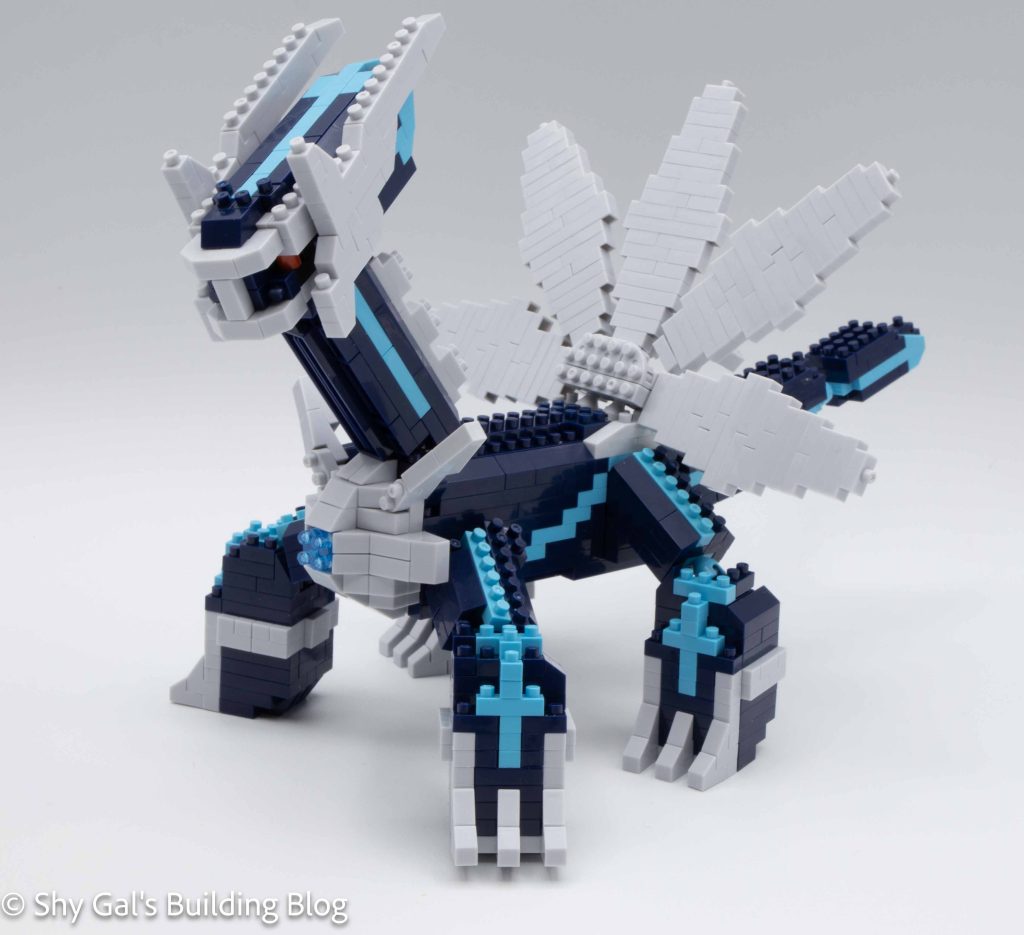
This post is a review of the nanoblock Dialga Deluxe Edition build. Dialga is part of the nanoblock Pokemon collection. Wondering what else is part of the Pokemon collection? Click here for a list.
Number: NBPM_094
Number of Pieces: 1020
Difficulty Rating: 4/5
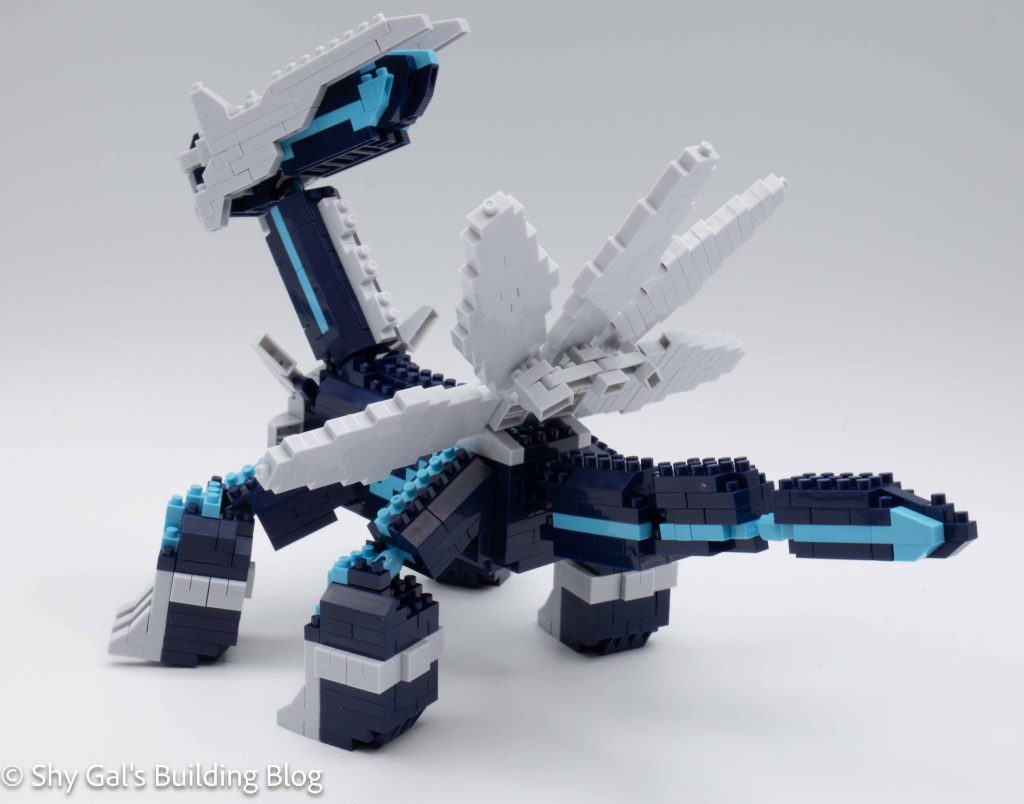
Dialga is one of the generation 4 box legendary Pokemon. It is the master of time. Dialga and Palkia are the only Deluxe nanoblock Pokemon that don’t have also have standard builds.
When I opened the box, I was sad to see that the instructions were printed on a huge piece of paper instead of a booklet. Some of the deluxe kits I’ve built have had booklets and I prefer those. There were 13 bags of bricks so I knew I needed to build the Dialga on my table instead of my tray table.
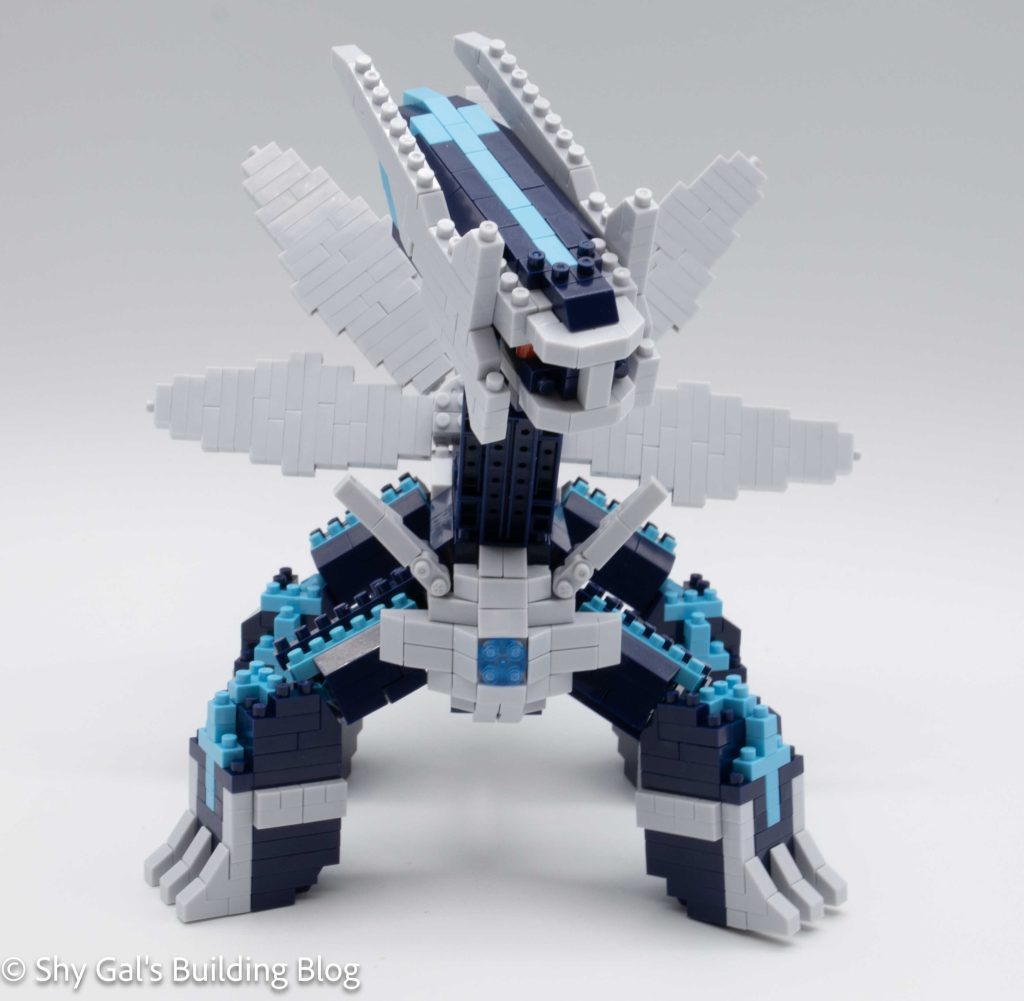
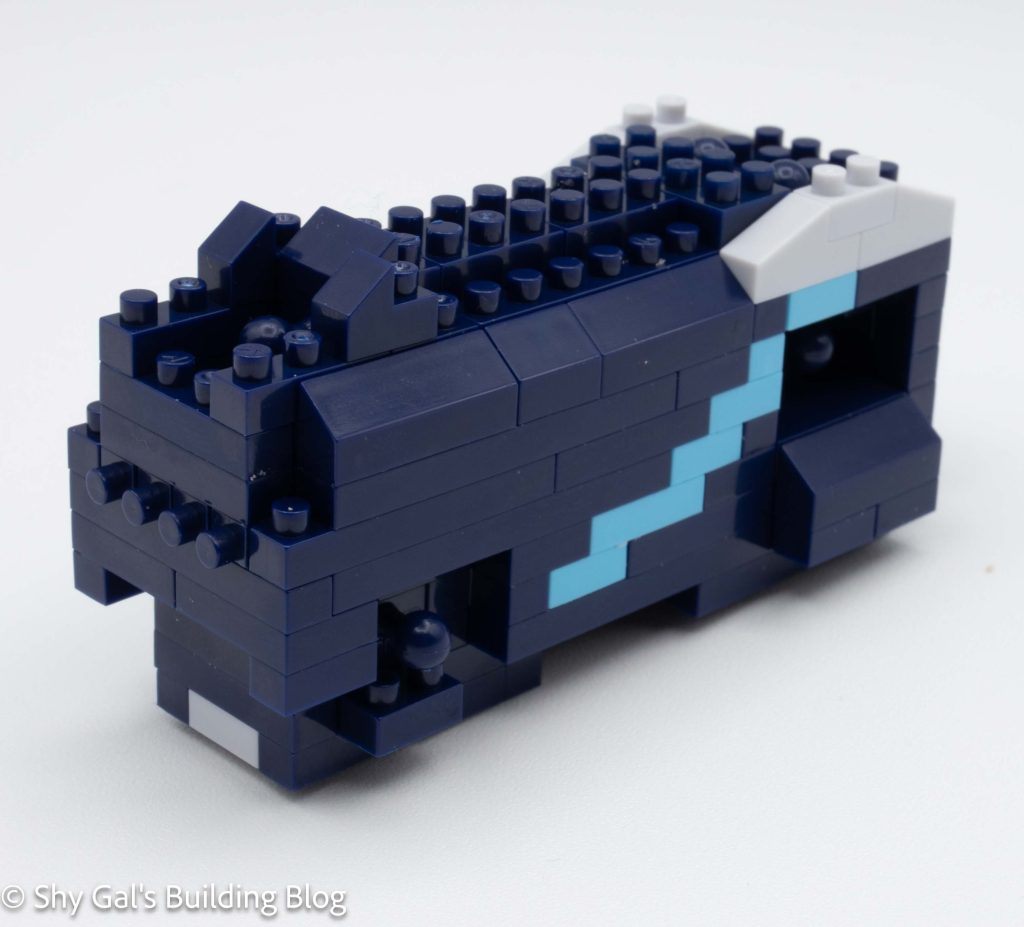
Dialga is built primarily made from navy bricks. While building, the navy bricks appear to be black when I’m digging around in the bags to find the bricks. There are handful of black brciks in the head. After I realized there was black I checked each bag with a flashlight to find the black and noted which bricks were black.
The first section is the main body. The body is very straightforward and I could easily build the body on my nanoblock pad. I was surprised by how many ball joints were in the body while I was building it. I waited until the end to connect the large section together so that I was trying to balance a build and could attach them in a way that made sense.
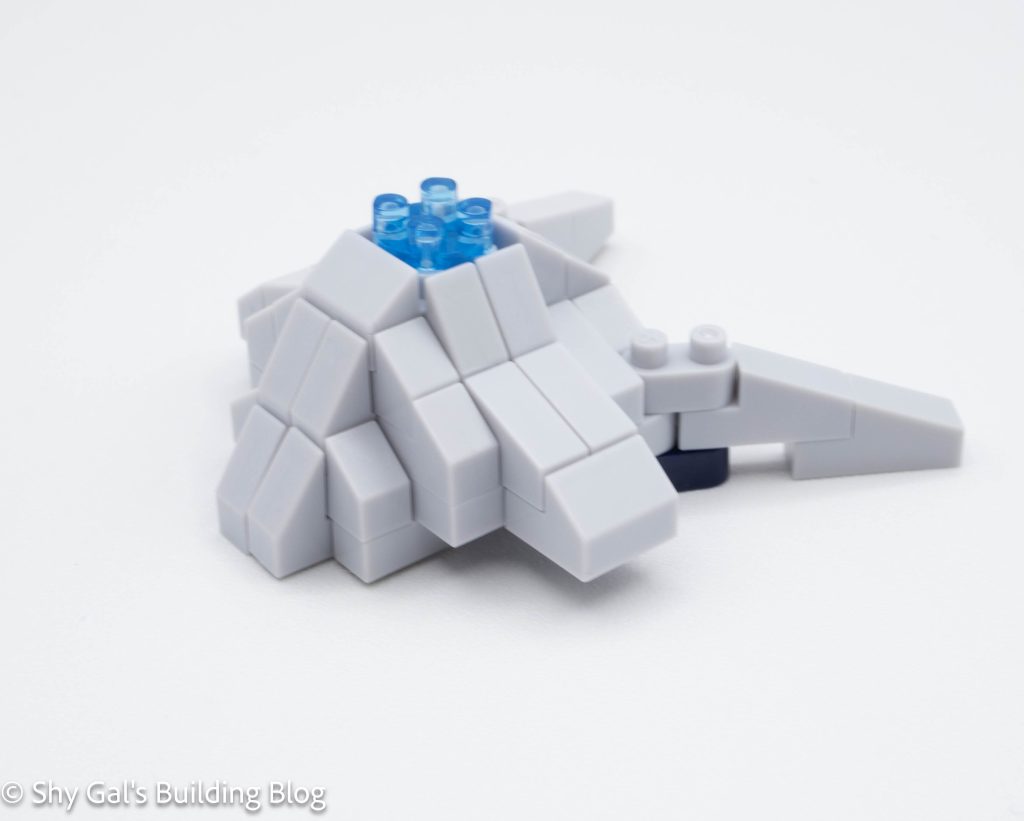
The second section is the gem on Dialga’s chest. It is a bit tricky to keep track of which slanty pieces are needed for each step. All of the grey slanty pieces are in the bag so it’s a bit tricky to find the right piece. Once again I built this section on my nanoblock pad.
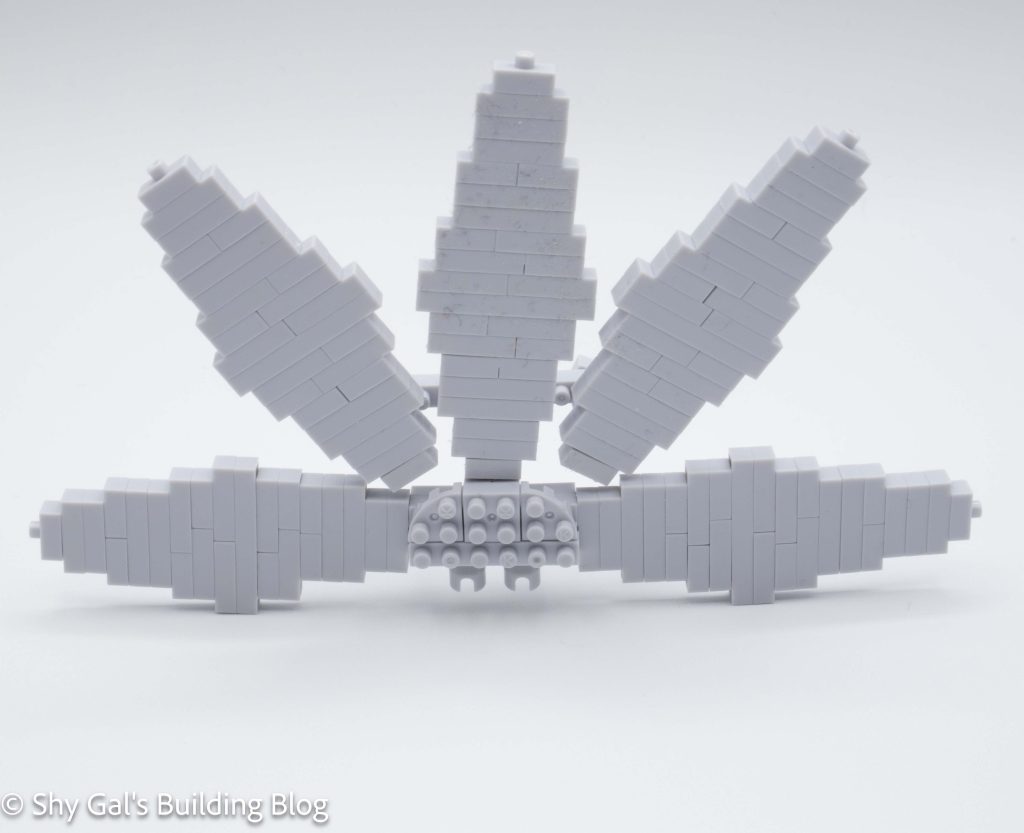
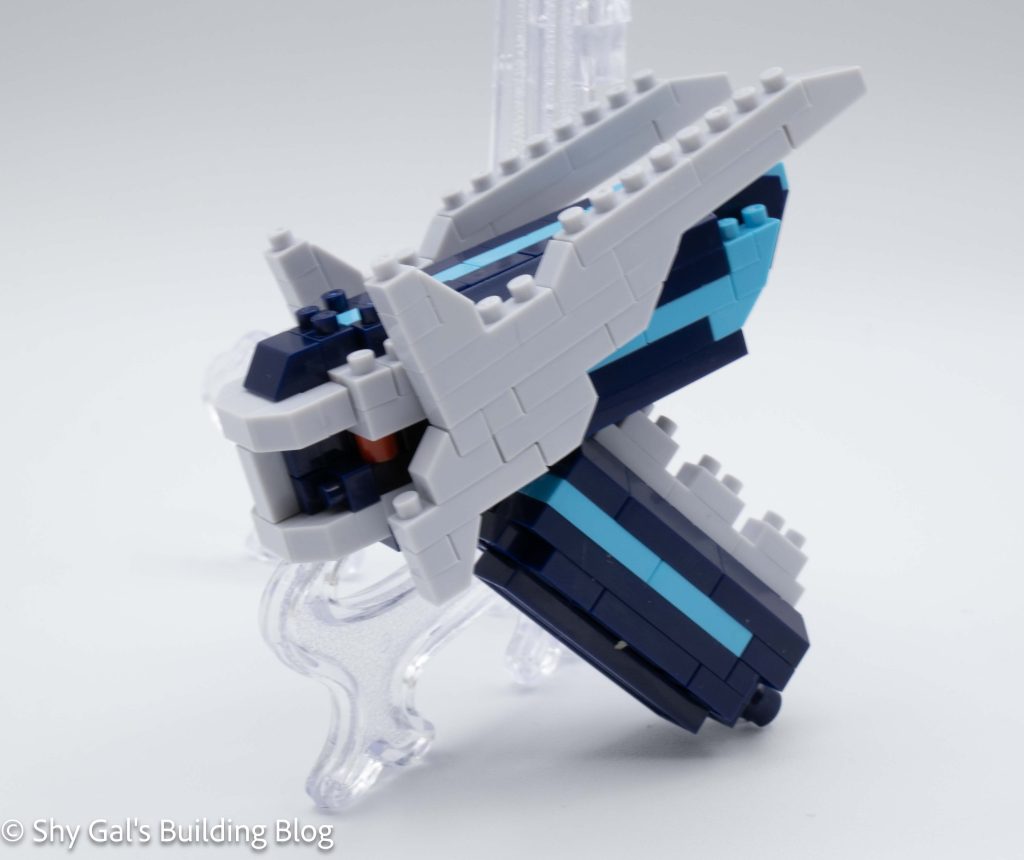
The next section is the fin on Dialga’s back. Each large section of the fin is a tower of nanoblocks. The hardest part of the tower is making sure the layers are properly overlaid so gaps are minimal. However, what makes the fin truly tricky is the center core where all the towers attach. Getting the fins properly spaced out and not overlapping or pushing on each other depends on having everything centered perfectly which is tricky.
The next step is the base of the 4 feet. Each foot is identical and goes up in layers. Each foot is a solid tower of bricks. I was able to lay all 4 feet out on my large nanoblock pad which made it easier to make sure I didn’t miss any steps on any foot because I was looking at all 4 feet at once.
The next step is to build all 4 of Dialga’s legs. Each leg is a combination of adding the leg connection to the foot and the actual leg itself. all of the brick work is fairly straightforward. The biggest problem I had was getting the leg and foot to nicely attach due to how the ball joint was lined up. I wanted the moveable areas on the socket to be at angles but the actual socket only allows for 90 degree movements.
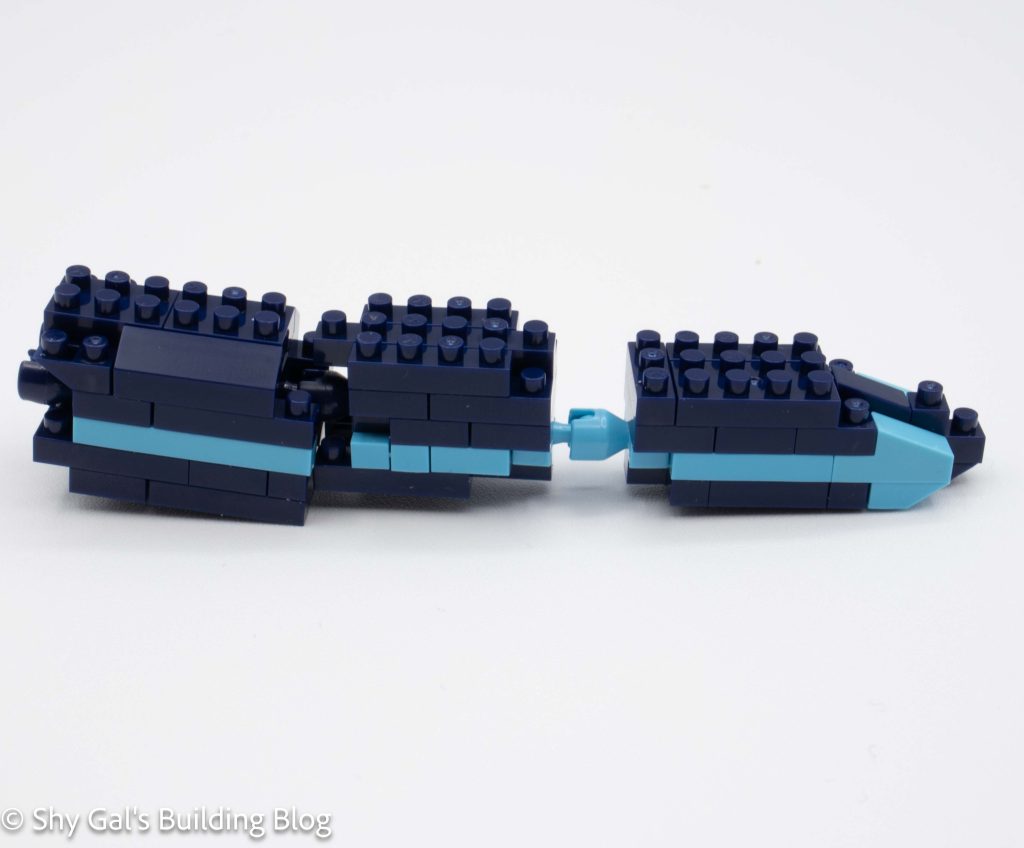
The next 2 sections are the tail and the neck. Both are fairly straightforward with the only real difference being the tail is 3 sections connected with ball joints.
The head is very straightforward to build. The instructions also make it very clear the couple of steps that used black bricks instead of the navy. I really like that the initial head build has studs sticking out the front which allows for building on and creating Dialga’s curved face instead of it being a block.
The final step is to build the head decorations on both sides of Dialga’s head. They are identical other than 1 brick which has a side stud that is used to connect the piece to the head. Both pieces are connected by inserting a round 1×1 into a socket. This is my favorite way of connecting bricks, but I think it works in this case.
After building all the sections I needed to connect them. I would recommend getting a second pair of hands for this part so that each ball joint can be added but pressure can be kept off the already connected ball joints. First I connected the head to the neck and added the head decorations. Next, I connected the tail to the body. Then I attached the fin. Next, I attached the feet. Finally, I attached the head unit to the body.
Things I liked:
The batch builds. Building multiple identical items at once instead of having split-up identical directions.
Things I didn’t like:
I wish the instructions had been in a booklet instead of a huge piece of paper.
I wish the handful of black had been marked in some way. There are so many bricks that the few black ones were difficult to find.
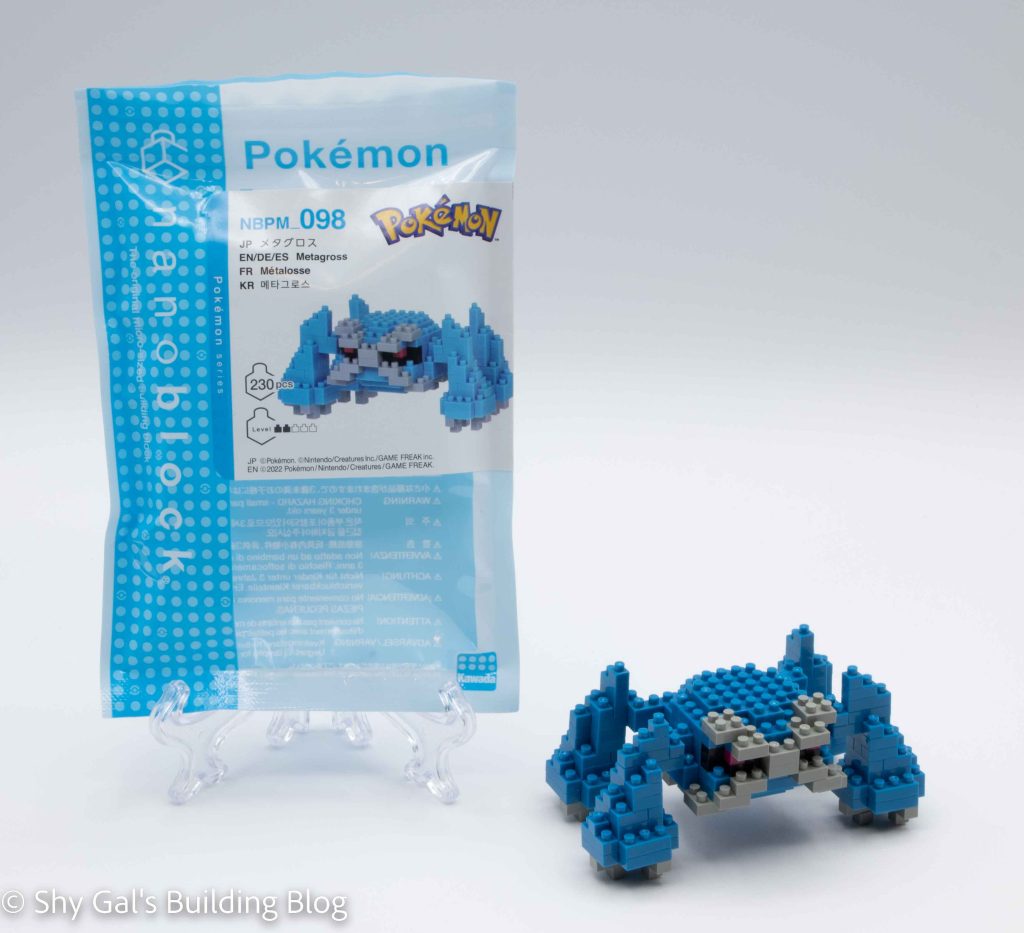
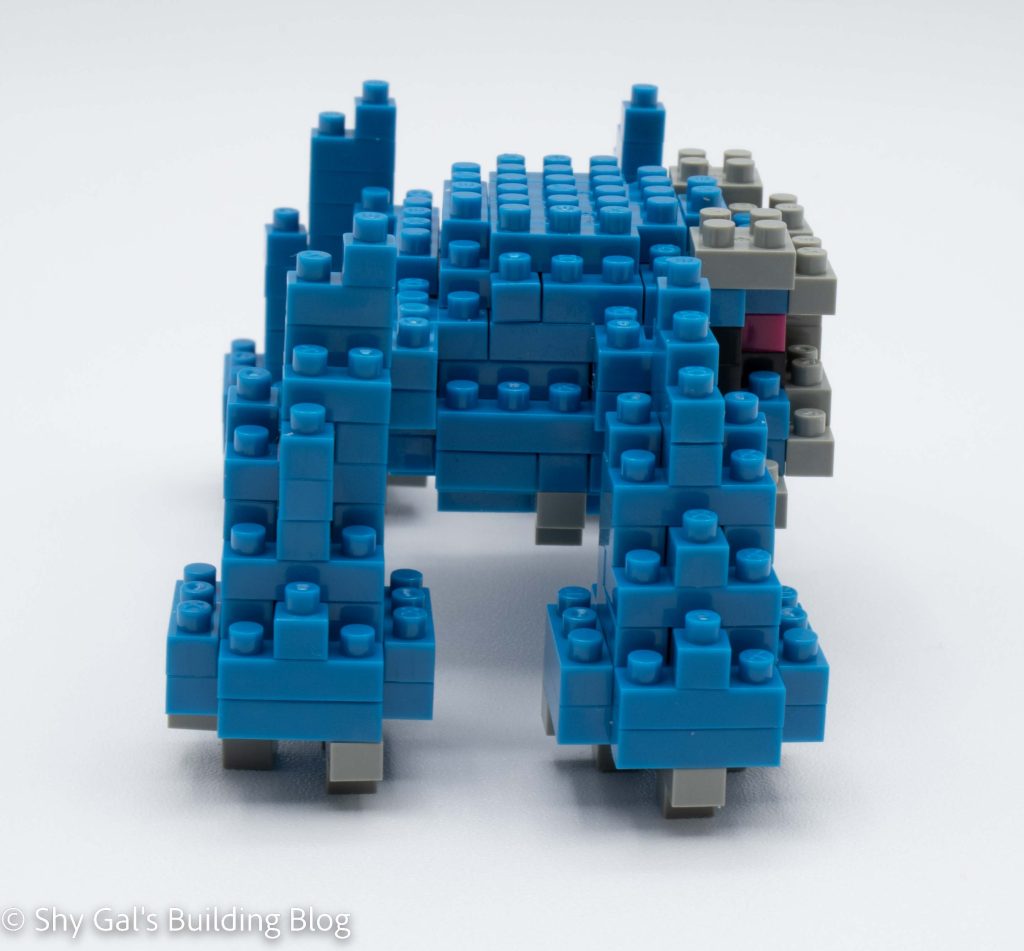
This post is a review of the nanoblock Metagross build. Metagross is part of the nanoblock Pokemon collection. Wondering what else is part of the Pokemon collection? Click here for a list.
Number: NBPM_098
Number of Pieces: 230
Difficulty Rating: 2/5
Metagross was introduced in generation 3. It is the final evolution of Beldum, and the evolutions are all triggered by leveling up.
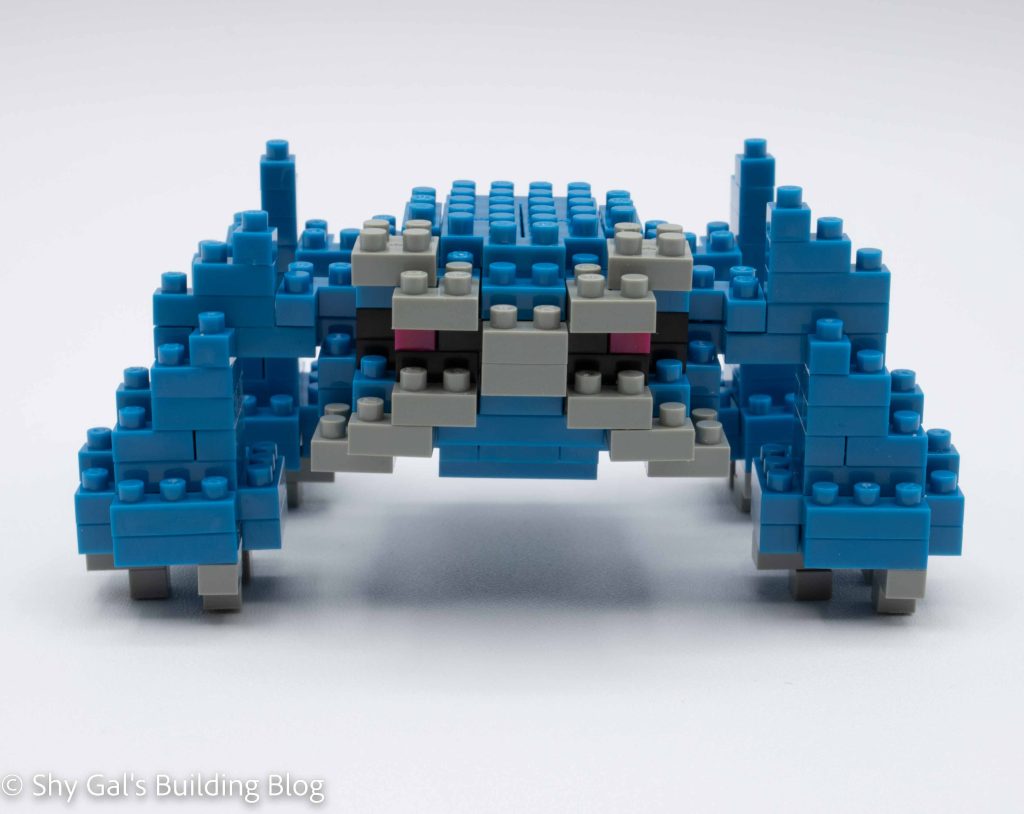
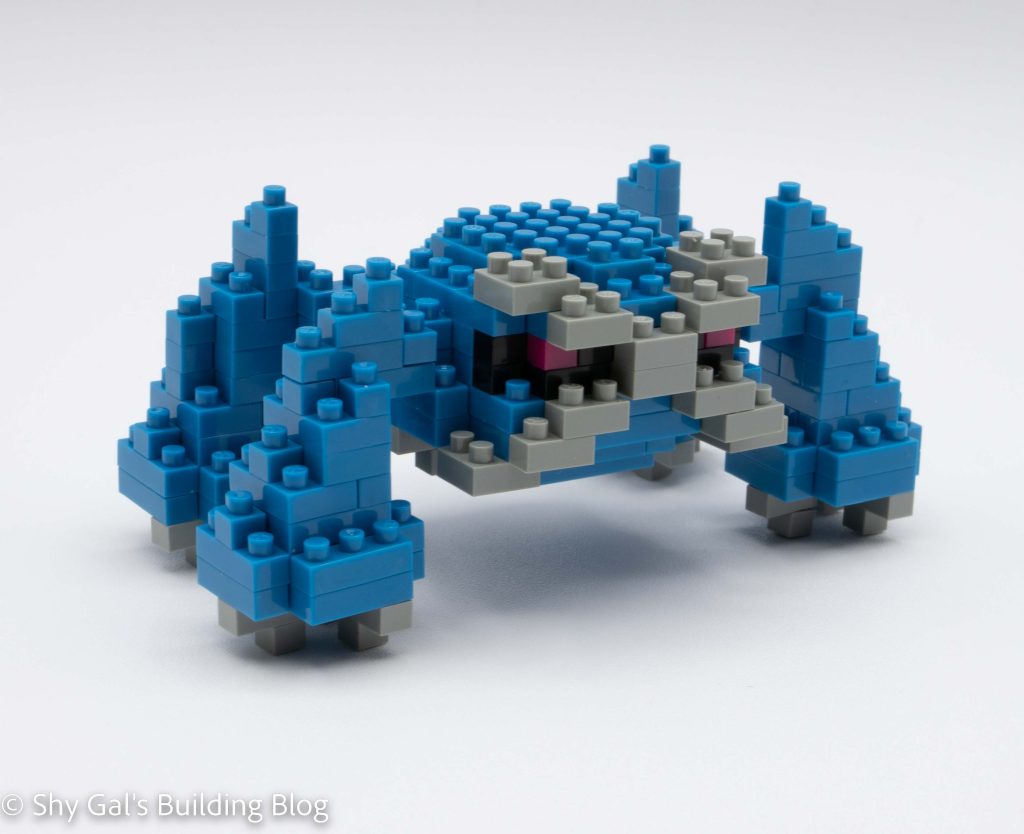
This build is made up of the main body section and Metagross’s 4 legs that are attached to the main body.
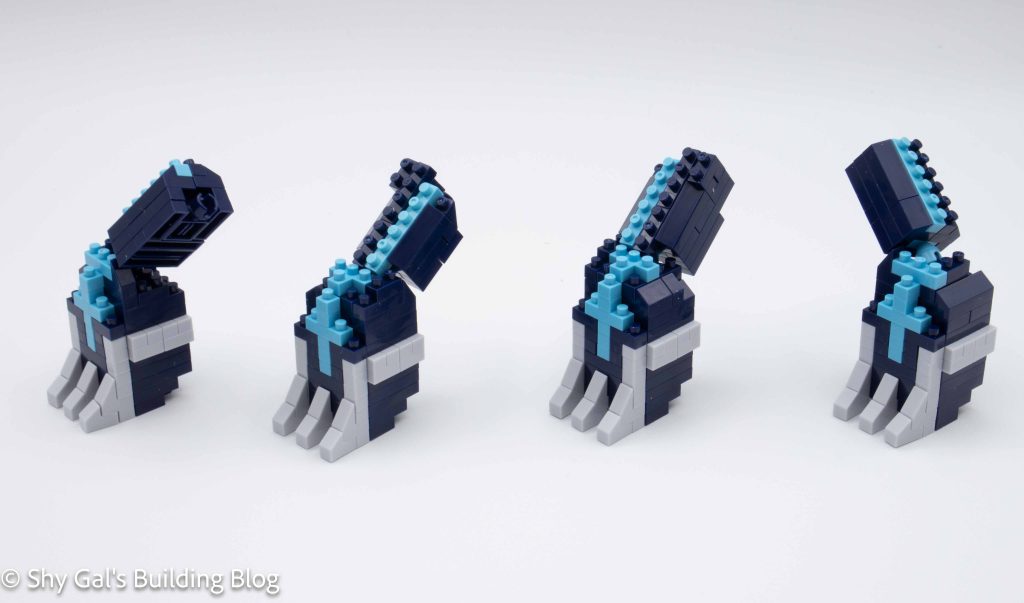
To build the main body section, I began by laying the base layer out on my nanoblock pad. The body went up in straightforward layers. I really like the depth of the grey X that makes up the front of the face. I also really like how the eyes peak out of build depending on the angle you look at the build.
The next step is to add the 4 legs. They are similar, with there being differences between the front and back legs. While building, I noticed it was easier to build the top and bottom half of the legs and connect the sections. After building the entire leg, I would attach the legs. I found this made the legs more sturdy.
Things I liked:
I really like the detail in the face and how it changes depending on how you look at the build
Things I didn’t like:
The legs aren’t pinned in via the top, so the legs can easily fall off while building or moving Metagross