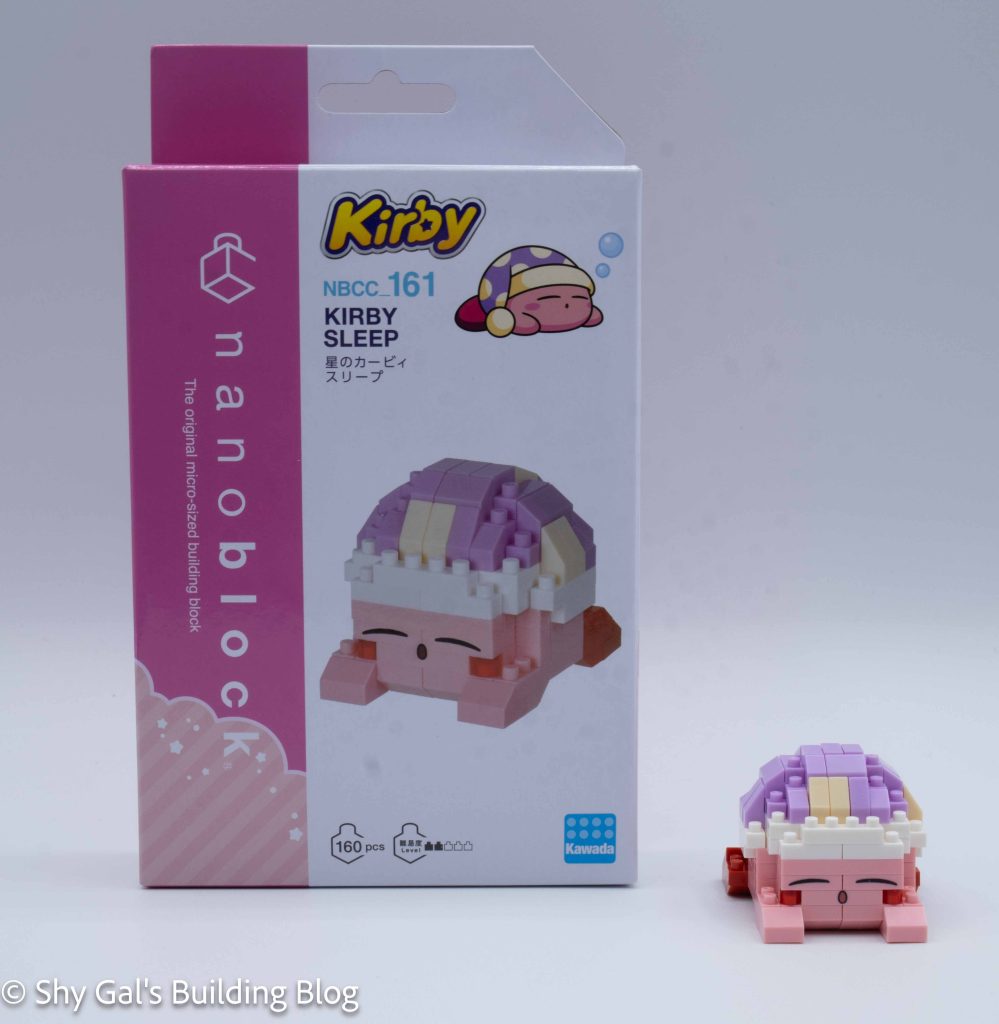
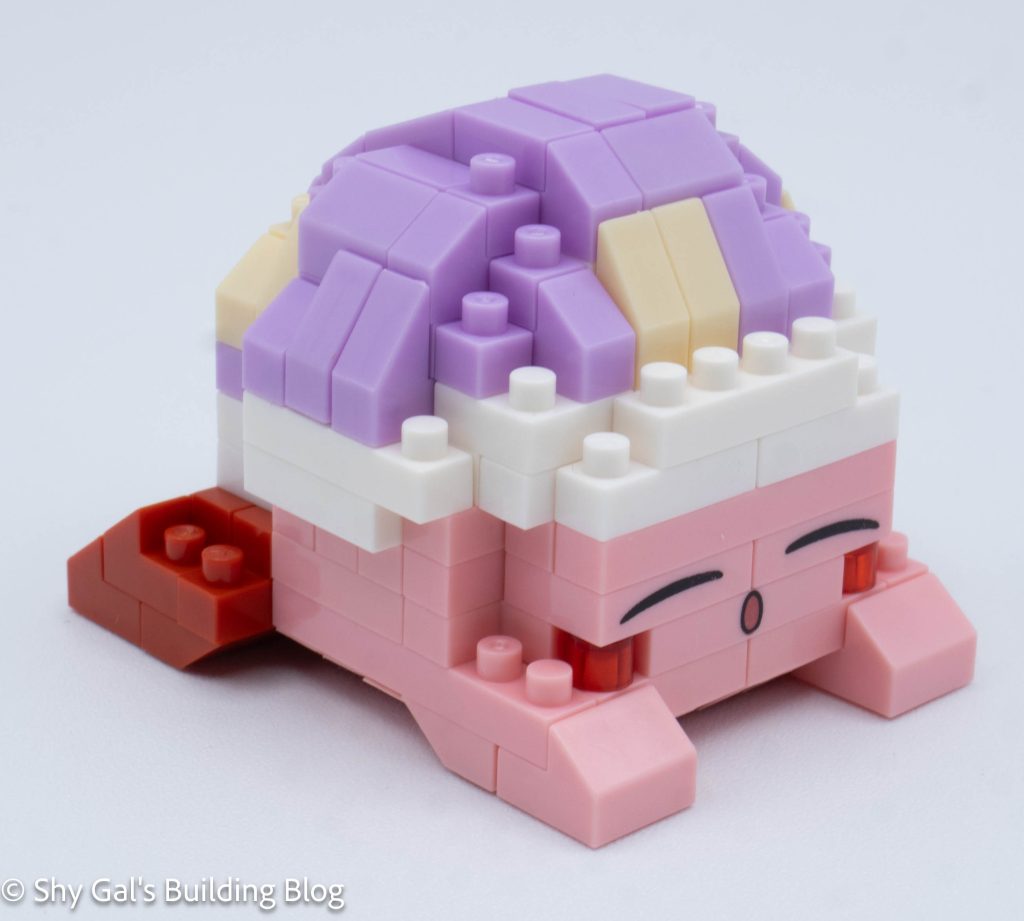
This post is a review of the nanoblock Kirby Sleep build. Kirby Sleep is part of the nanoblock Character collection. Wondering what else is part of the Character collection? Click here for a list.
Number: NBCC_161
Number of Pieces: 160
Difficulty Rating: 2/5
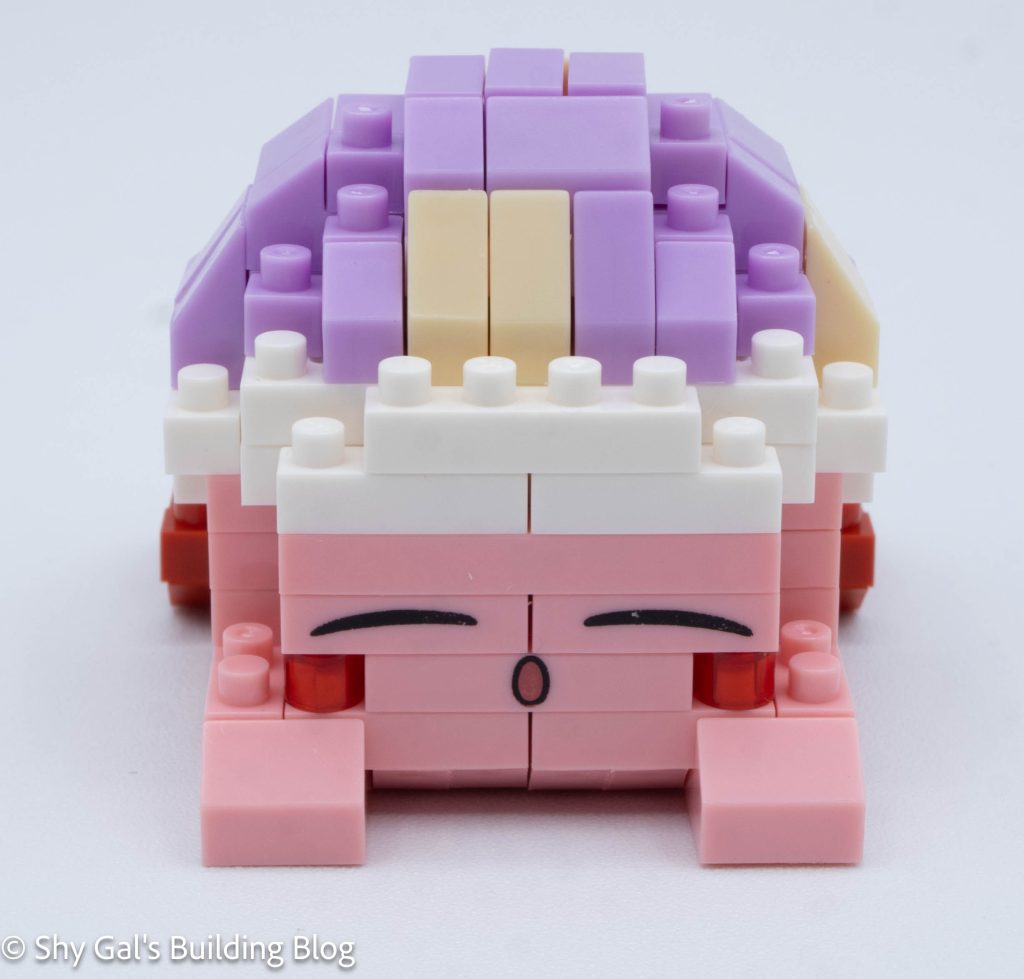
This kit begins with creating Kirby’s base. Over the first three steps, the entire base is created.
Step 4 adds the custom-printed face when the next layer is added.
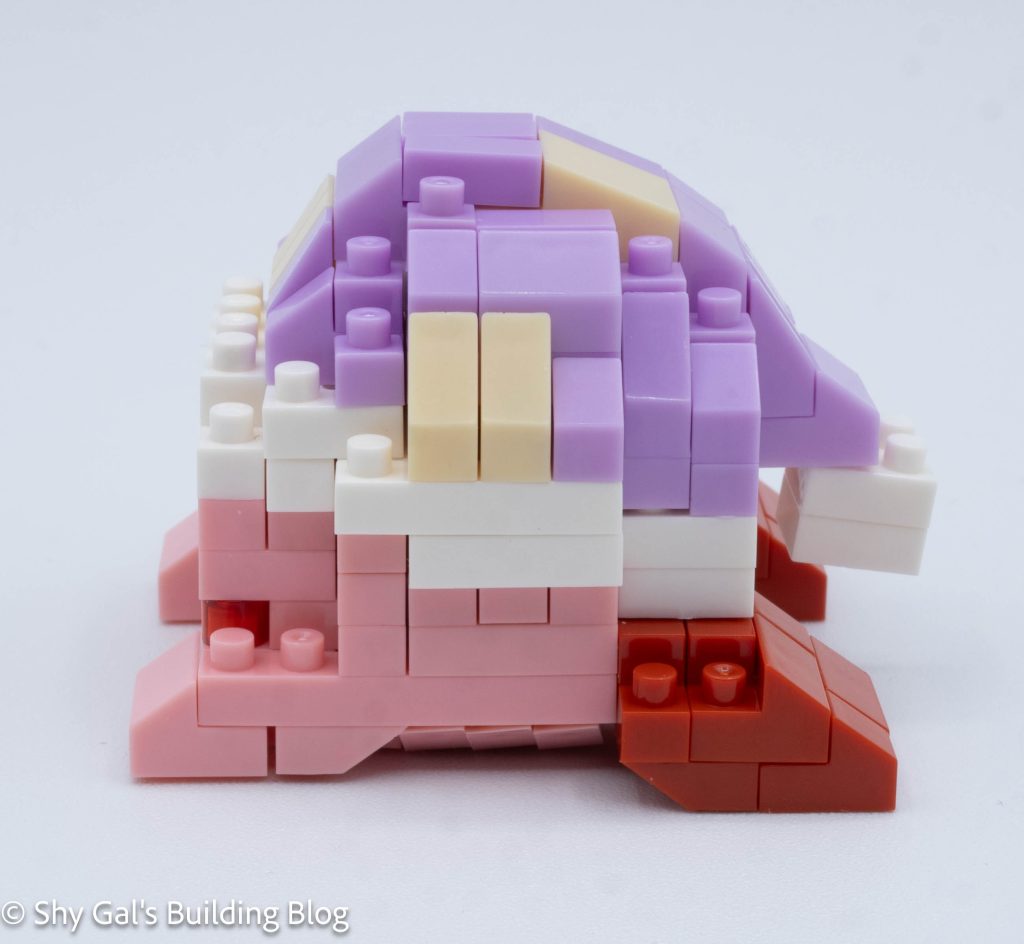
Then, I began to build the hat from the back. Starting at that point, Kirby ends and the hat begins.
The hat was a little tricky because of all the slanty pieces. I needed to be careful to use the correct slanty pieces, which changed every brick. Other than the slanty pieces, the hat was pretty straightforward.
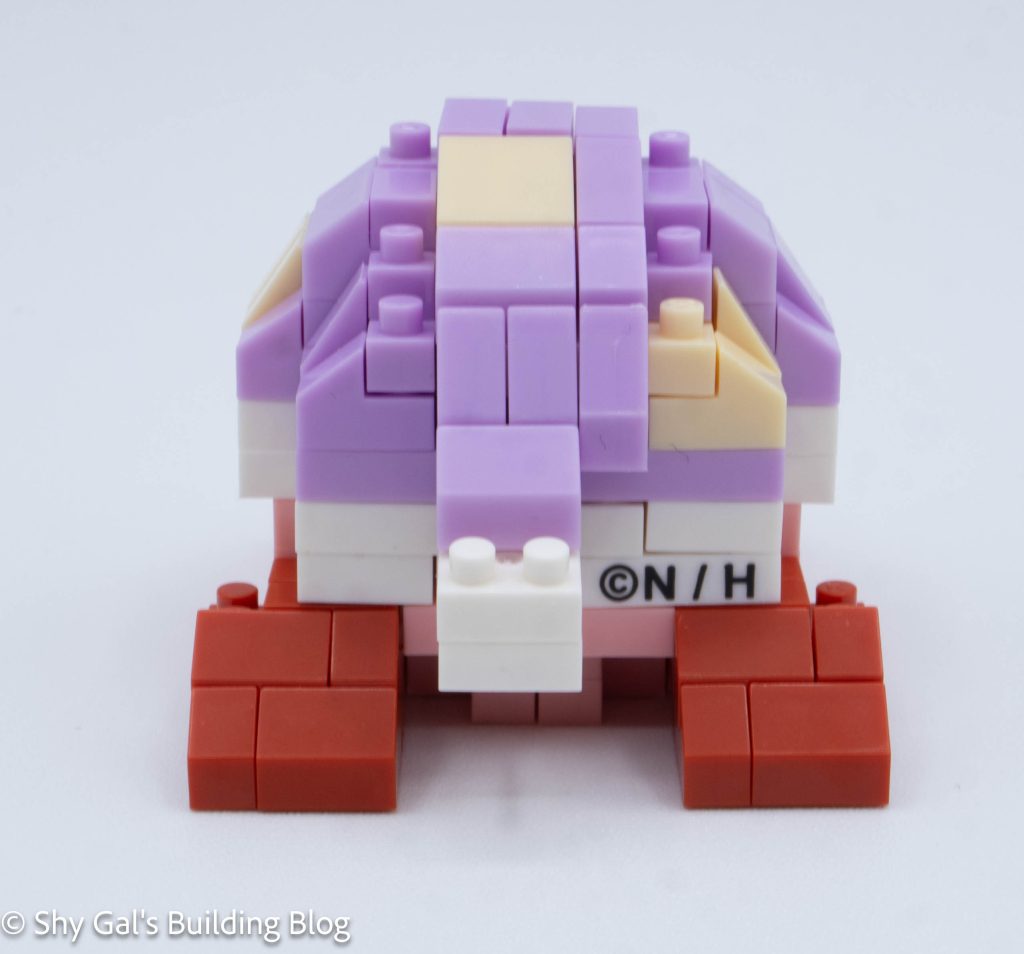
Then I flipped Kirby upside down to add the details to round out his bottom.
Next the tassel to the hat was added.
The final step is to build and add Kirby’s feet.
Things I liked:
I like the hat I feel that it looks like fabric
Things I didn’t like:
I didn’t find the instructions for adding the feet very clear
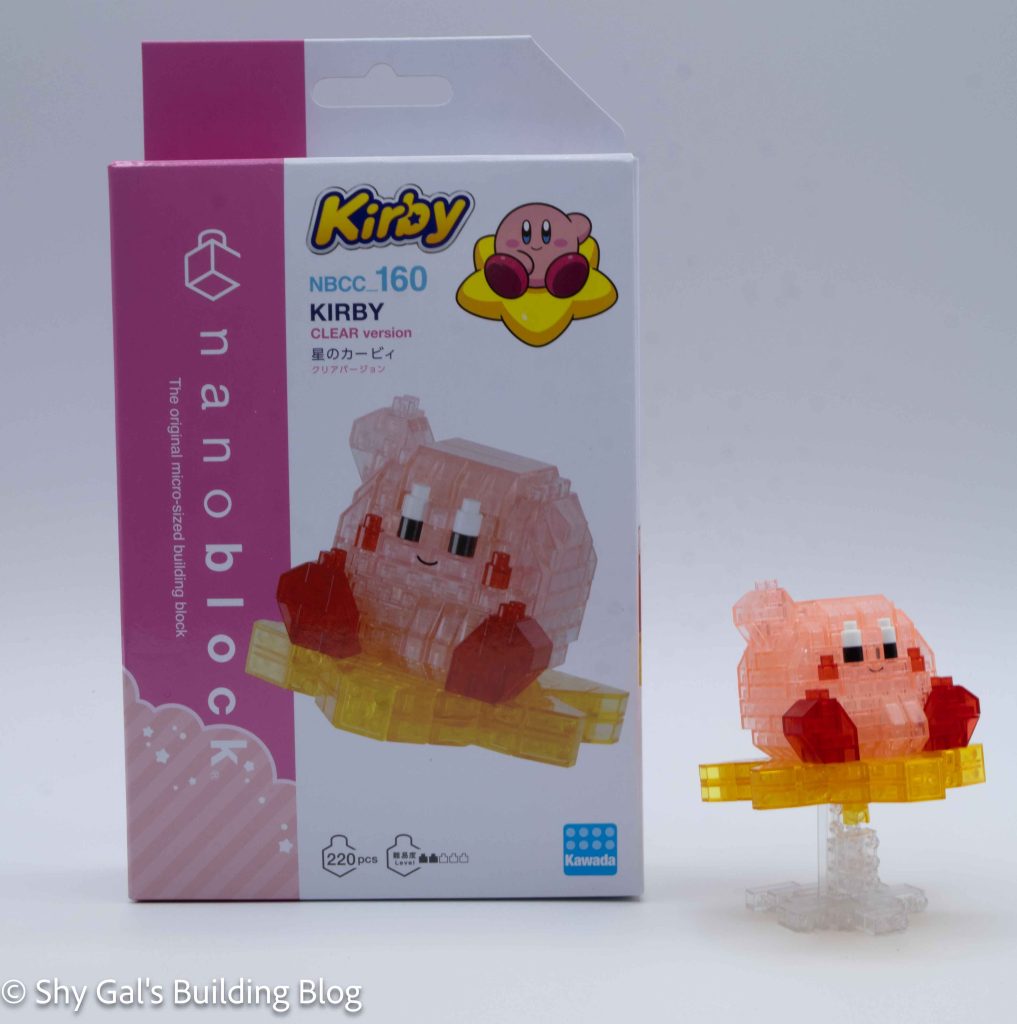
This post is a review of the nanoblock Kirby Clear Version build. Kirby Clear Version is part of the nanoblock Character collection. Wondering what else is part of the Character collection? Click here for a list.
Number: NBCC_160
Number of Pieces: 220
Difficulty Rating: 2/5
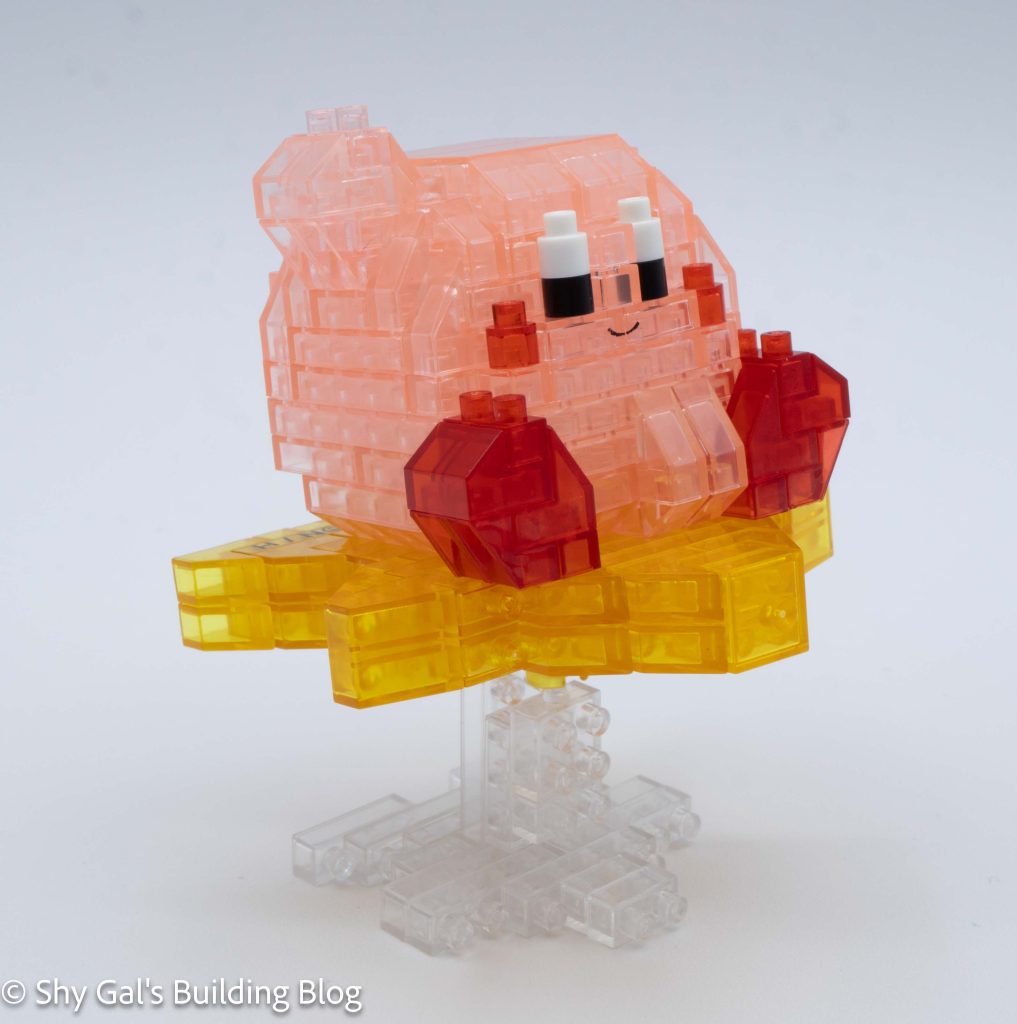
This kit is identical to NBCC_140, except it is made of clear bricks. Finding the correct bricks to use was a bit more difficult because the light pink and clear looked very similar, even on my white-backed tray.
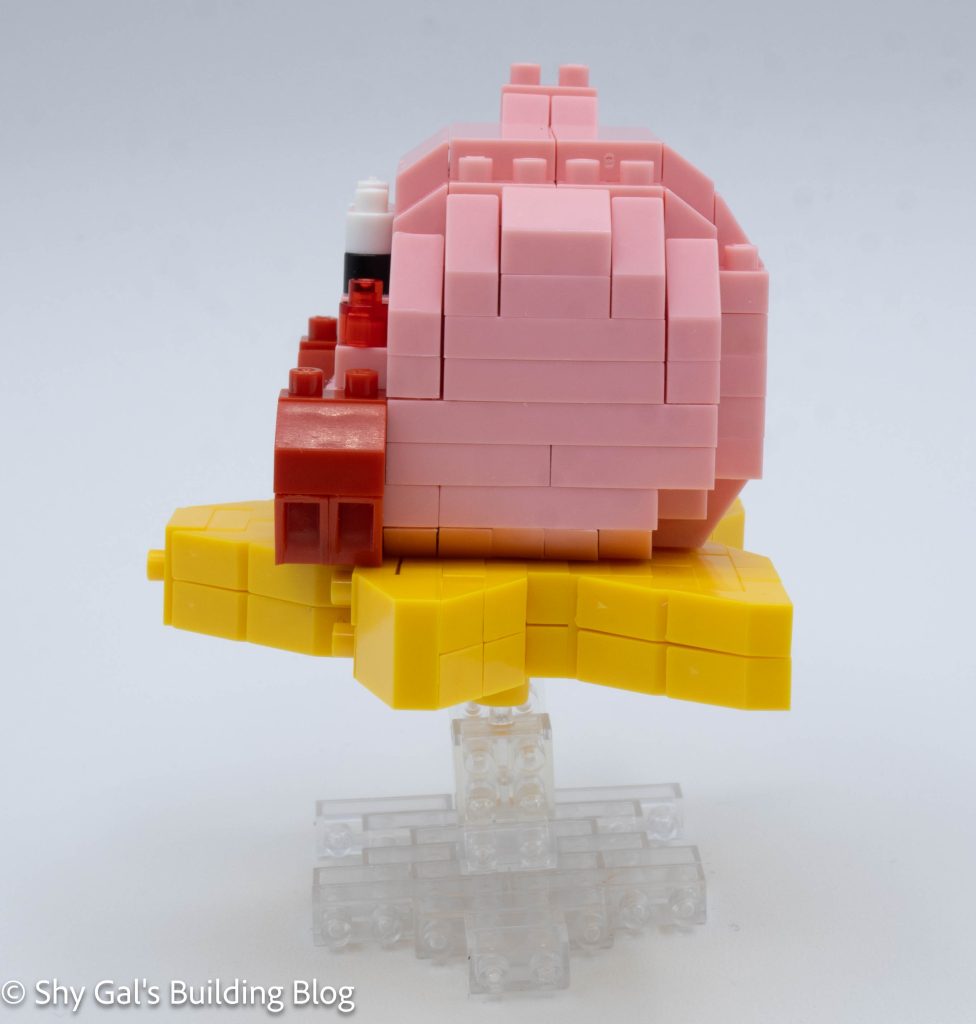
This build is made up of 3 sections. There is Kirby, the star, and the stand.
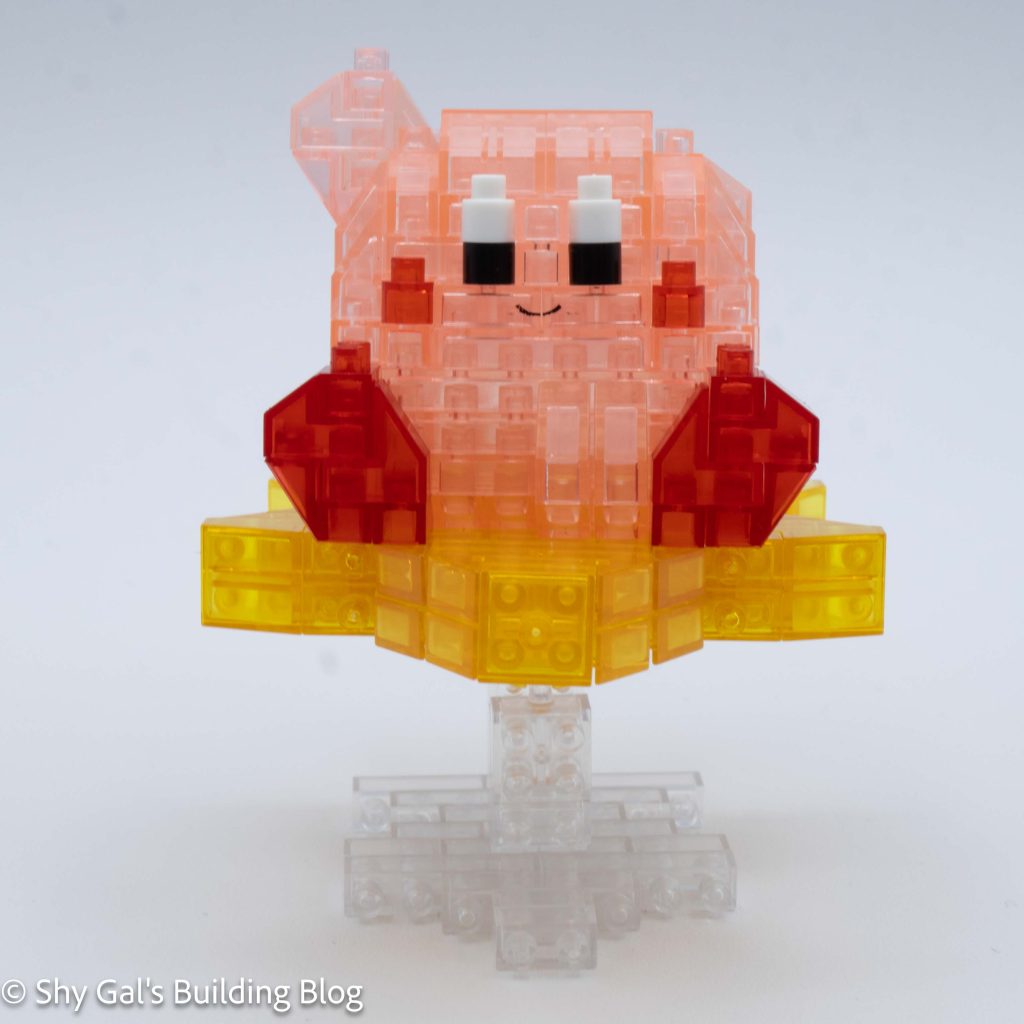
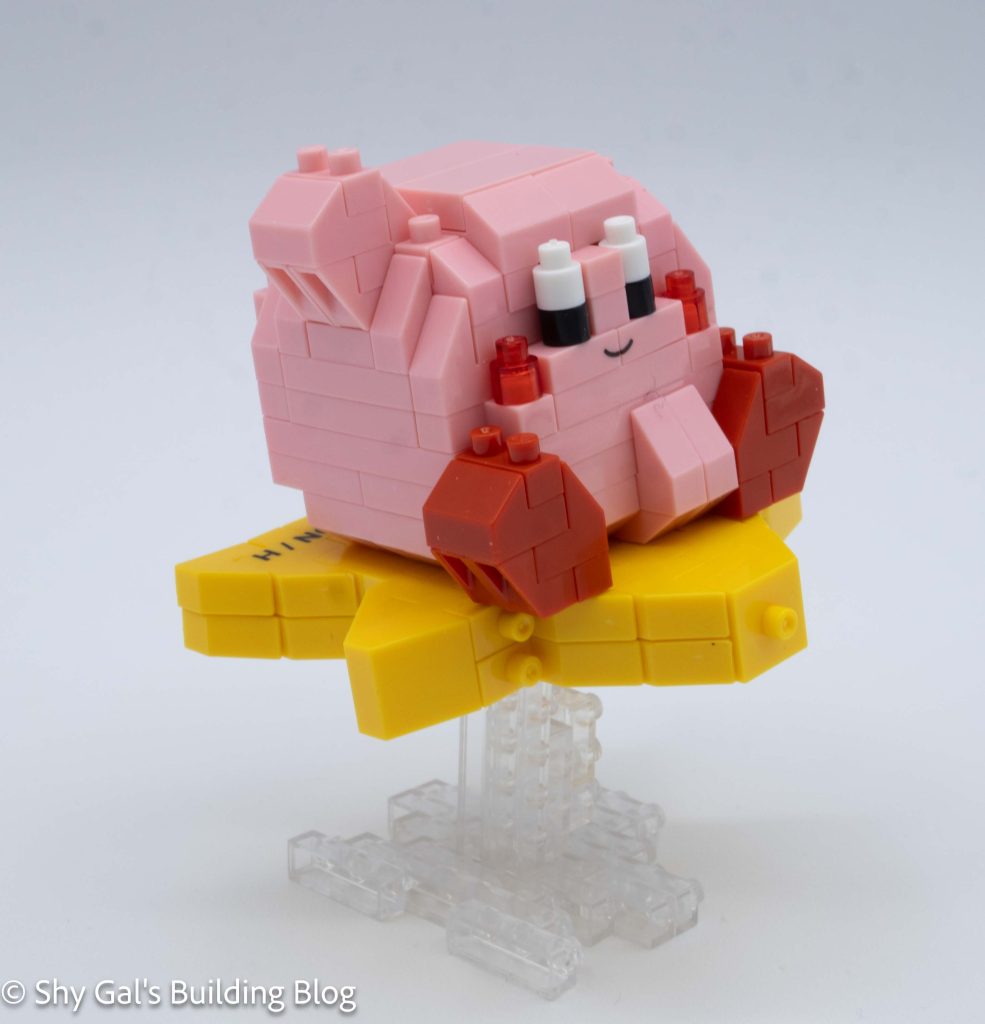
Kirby begins by making a base in pink bricks. Then, the feet are added to the base. After that, Kirby begins going up in layers. Overall, things are fairly straightforward. In the step that adds Kirby’s mouth, I didn’t understand from the instructions that there was a custom piece with the mouth printed. Once I found the piece, the only other concern was the slanted pieces.
Kirby has 2 different slanted pieces. I appreciated that the colors in the instructions were different enough that it was very clear when to use which slanted piece.
The final step to building Kirby is to finish his hand and smooth out the top of his head.
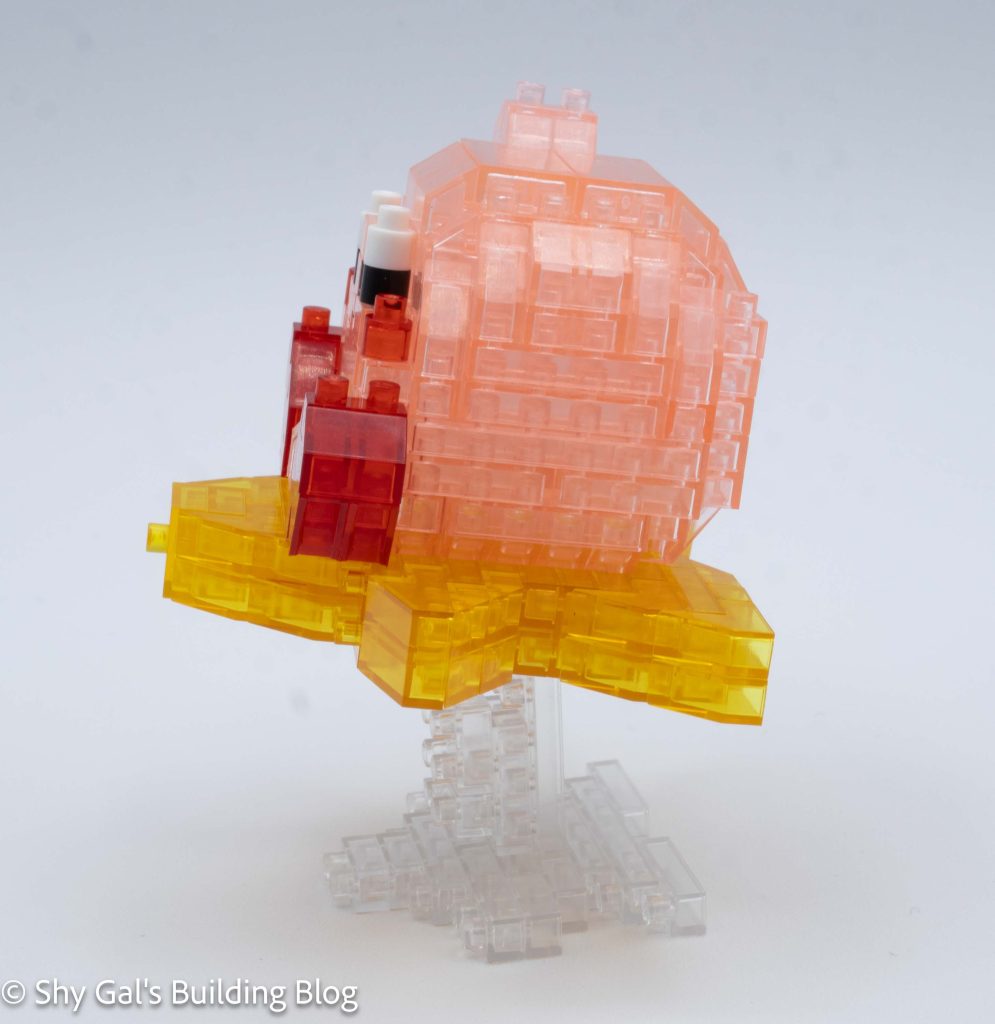
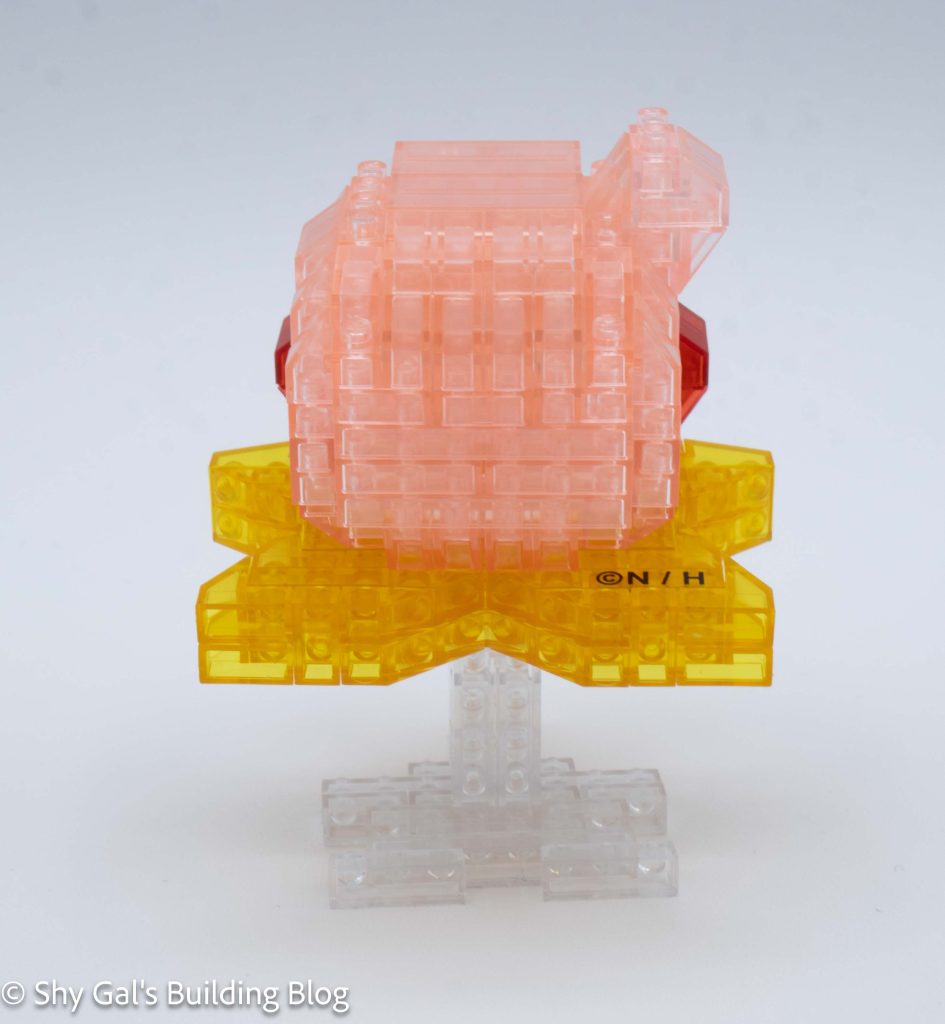
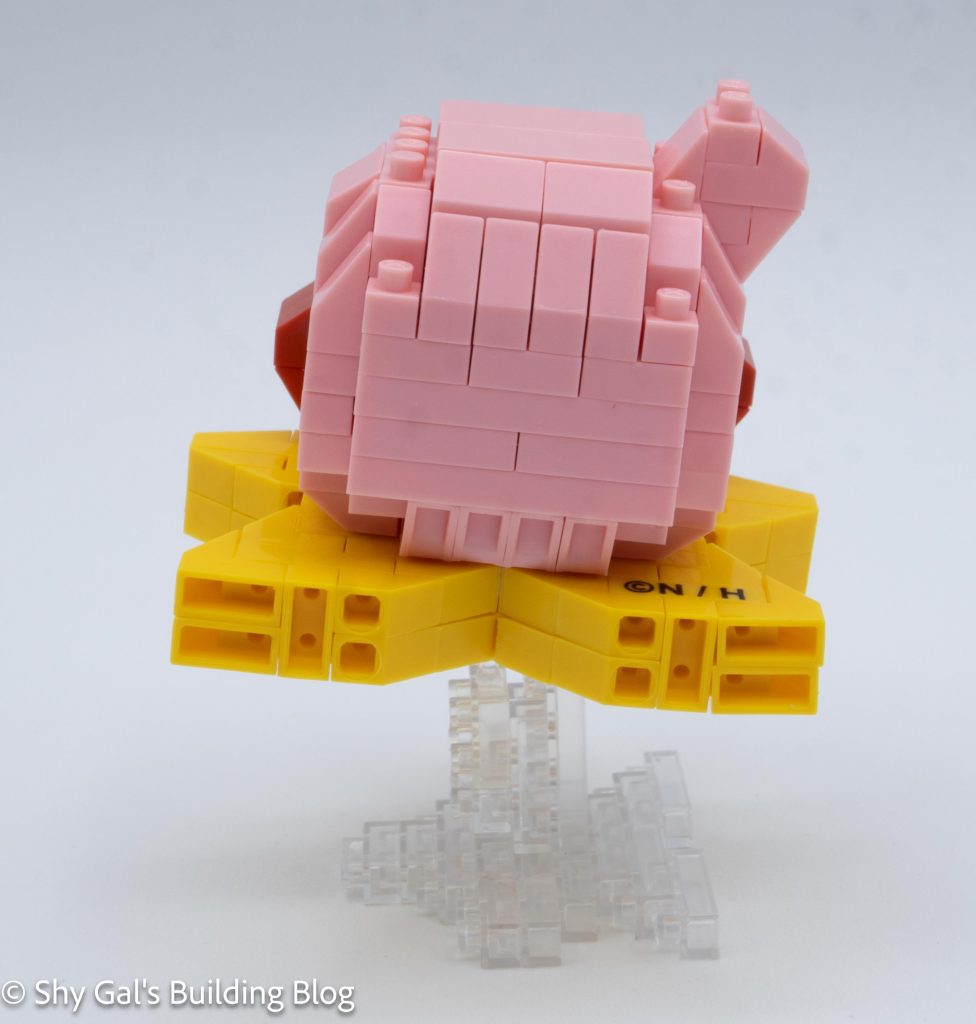
The star is created by several layers of yellow bricks with a width of 2, so the final build is 2 bricks tall. The first step creates a gap in the 2 depth. I wasn’t sure why there was a gap, but it became clear when I put the sections together. The second step adds the socket of the ball joint, which is needed to connect the star to the stand.
After adding the socket, the rest of the star is fairly straightforward until the final step. There are 2 notable things about the final step. First, there is a custom-printed brick. I think it is for copyright, but I’m not sure for what exactly. Secondly, it wasn’t clear that it mattered what order sections were added. It was pretty easy to fix when I realized the order did matter.
Kirby sits on studs that point out the star, so he is very stable.
The stand is fairly straightforward. It begins by building up several layers of clear bricks. After building the layers, some additional bricks are added to the bottom layer. The stand is then laid on its side so the ball joint is up in the air.
Kirby’s star attaches to the ball joint on the stand. The part sticking up above the joint goes into the hole in the star to allow the star to sit at an angle.
Things I liked:
I really like how the final build turned out, and it was worth all the work to find the bricks
Things I didn’t like:
I didn’t like how hard it was to tell pink from clear on my building tray and how much digging I had to find the right piece
This post is a review of the nanoblock Kirby build. Kirby is part of the nanoblock Character collection. Wondering what else is part of the Character collection? Click here for a list.
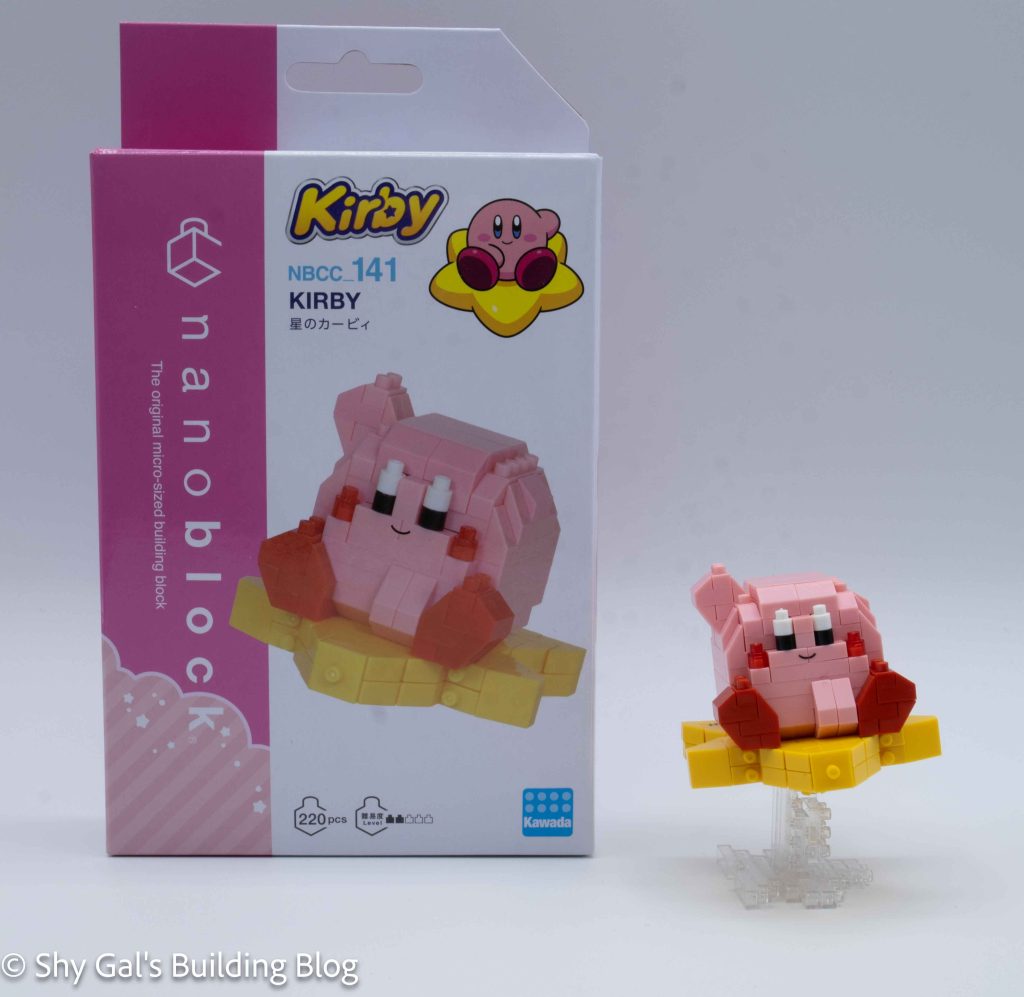
Number: NBCC_141
Number of Pieces: 220
Difficulty Rating: 2/5
This kit is identical to NBCC_140 without the 30th sticker. There is also a clear version number, NBCC_160.
This build is made up of 3 sections. There is Kirby, the star, and the stand.
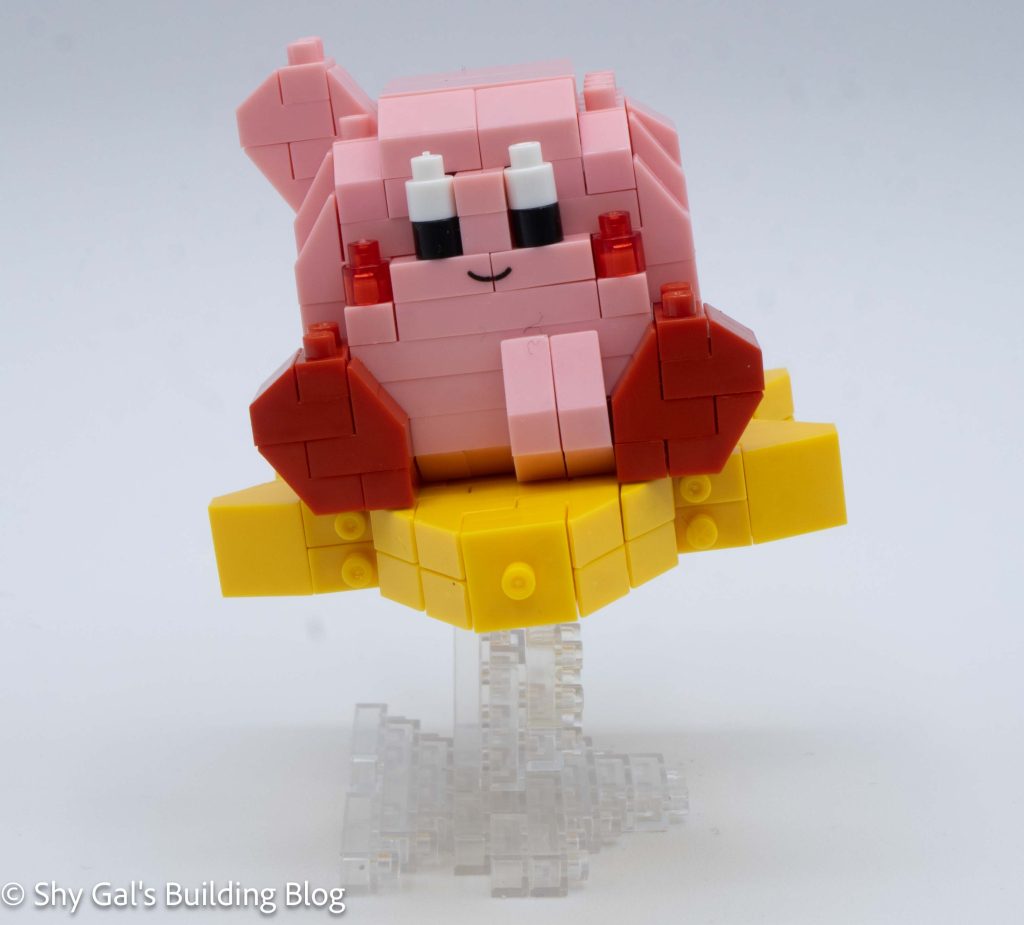
Kirby begins by making a base in pink bricks. Then, the feet are added to the base. After that, Kirby begins going up in layers. Overall, things are fairly straightforward. In the step that adds Kirby’s mouth, I didn’t understand from the instructions that there was a custom piece with the mouth printed. Once I found the piece, the only other concern was the slanted pieces.
Kirby has 2 different slanted pieces. I appreciated that the colors in the instructions were different enough that it was very clear when to use which slanted piece.
The final step to building Kirby is to finish his hand and smooth out the top of his head.
The star is created by several layers of yellow bricks with a width of 2, so the final build is 2 bricks tall. The first step creates a gap in the 2 depth. I wasn’t sure why there was a gap, but it became clear when I put the sections together. The second step adds the socket of the ball joint, which is needed to connect the star to the stand.
After adding the socket, the rest of the star is fairly straightforward until the final step. There are 2 notable things about the final step. First, there is a custom-printed brick. I think it is for copyright, but I’m not sure for what exactly. Secondly, it wasn’t clear that it mattered what order sections were added. It was pretty easy to fix when I realized the order did matter.
Kirby sits on studs that point out the star, so he is very stable.
The stand is fairly straightforward. It begins by building up several layers of clear bricks. After building the layers, some additional bricks are added to the bottom layer. The stand is then laid on its side so the ball joint is up in the air.
Kirby’s star attaches to the ball joint on the stand. The part sticking up above the joint goes into the hole in the star to allow the star to sit at an angle.
Things I liked:
The custom brick for Kirby’s mouth because it means there isn’t a sticker for the mouth
How Kirby sits at an angle on his star ride
Things I didn’t like:
It was really hard to tell about the special brick that had Kirby’s mouth was a special brick
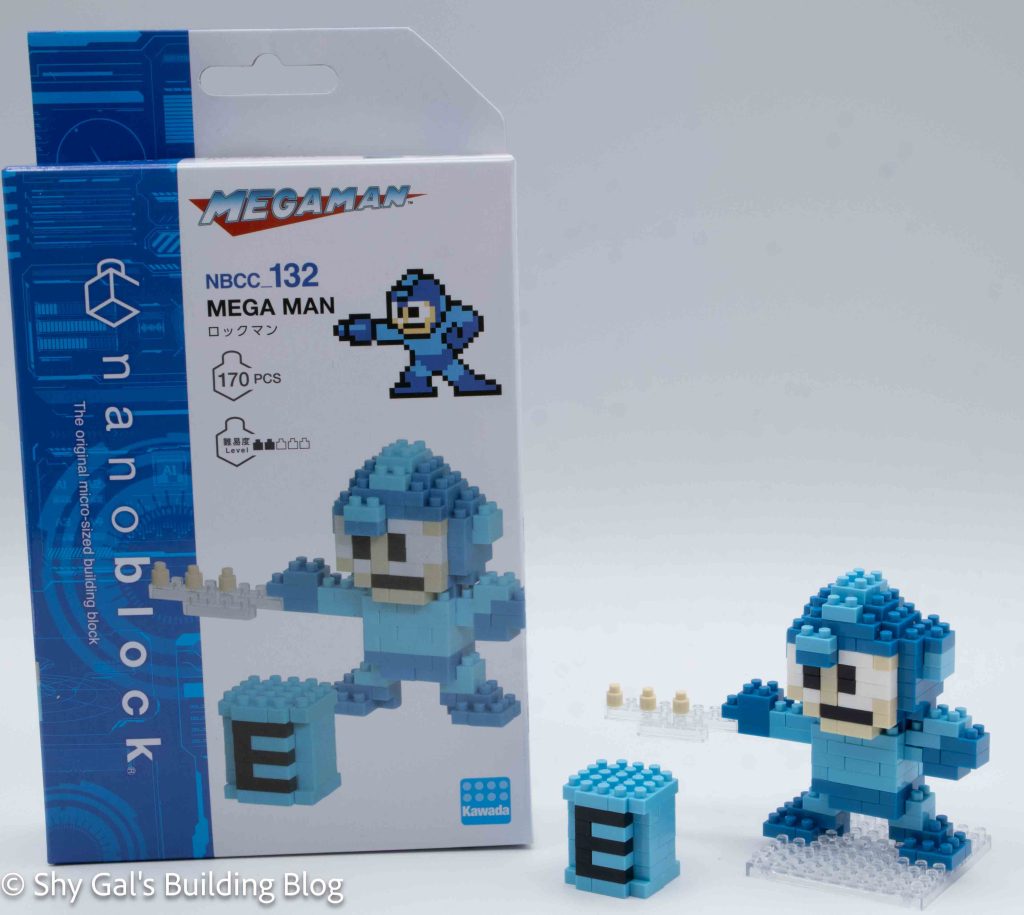
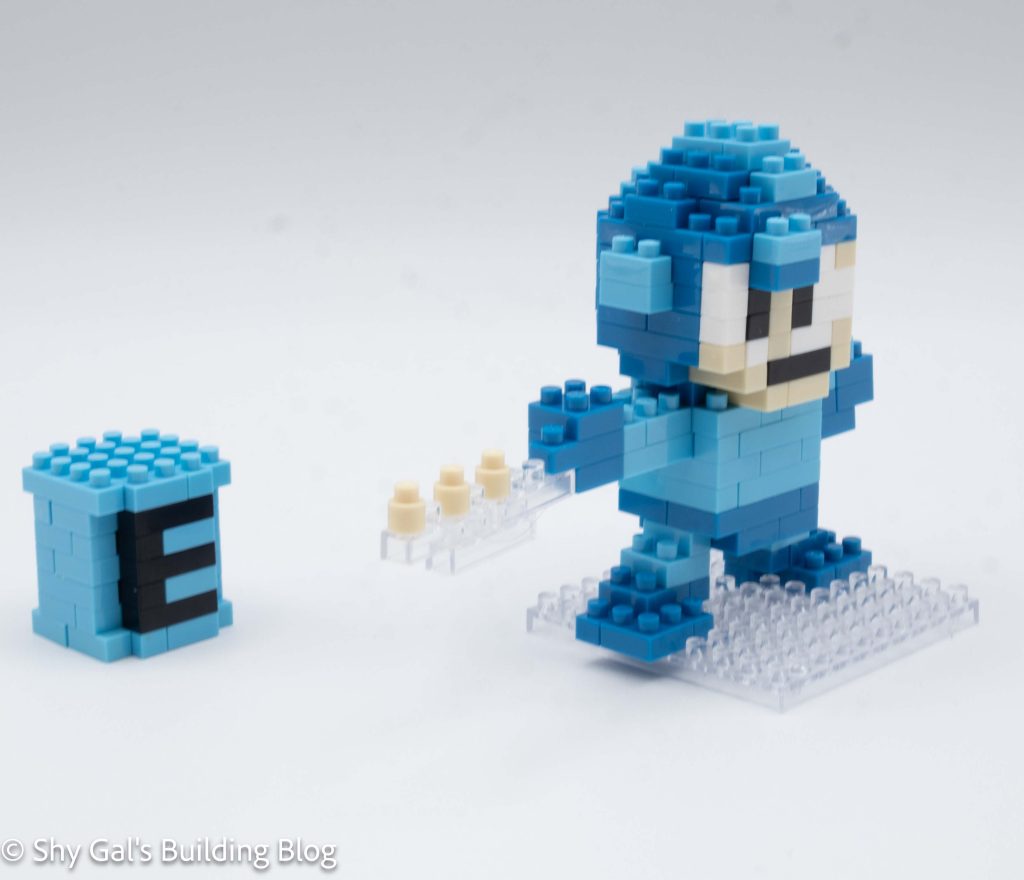
This post is a review of the nanoblock Mega Man build. Mega Man is part of the nanoblock Character collection. Wondering what else is part of the Character collection? Click here for a list.
Number: NBCC_132
Number of Pieces: 170
Difficulty Rating: 2/5
Mega Man is the main hero of the Mega Man video games. The original game came out in 1987. For more information about him, check out his Wikipedia article here.
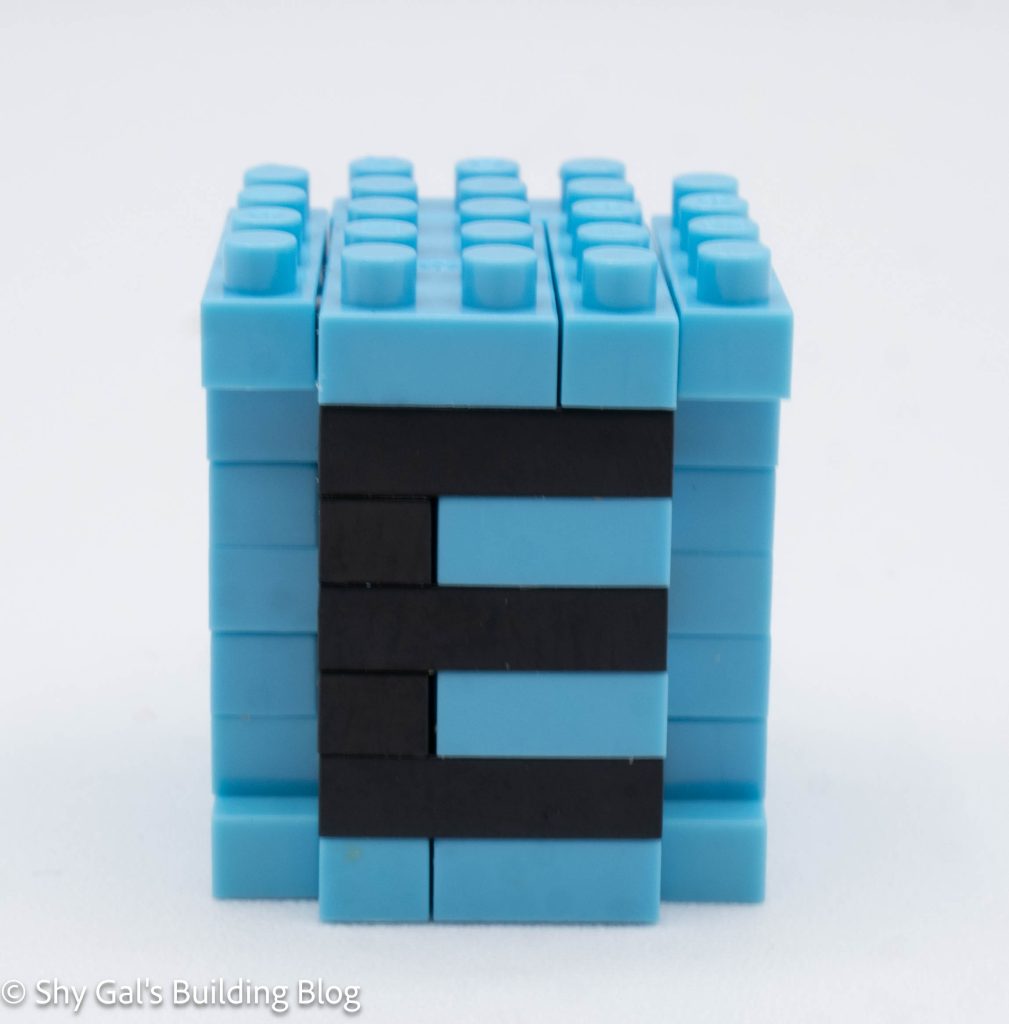
Mega Man is broken into 2 parts. There is Mega Man and an Energy Tank.
Mega Man
The actual Mega Man build is broken up into 4 sections. There is the head, the body, the base, and the shots.
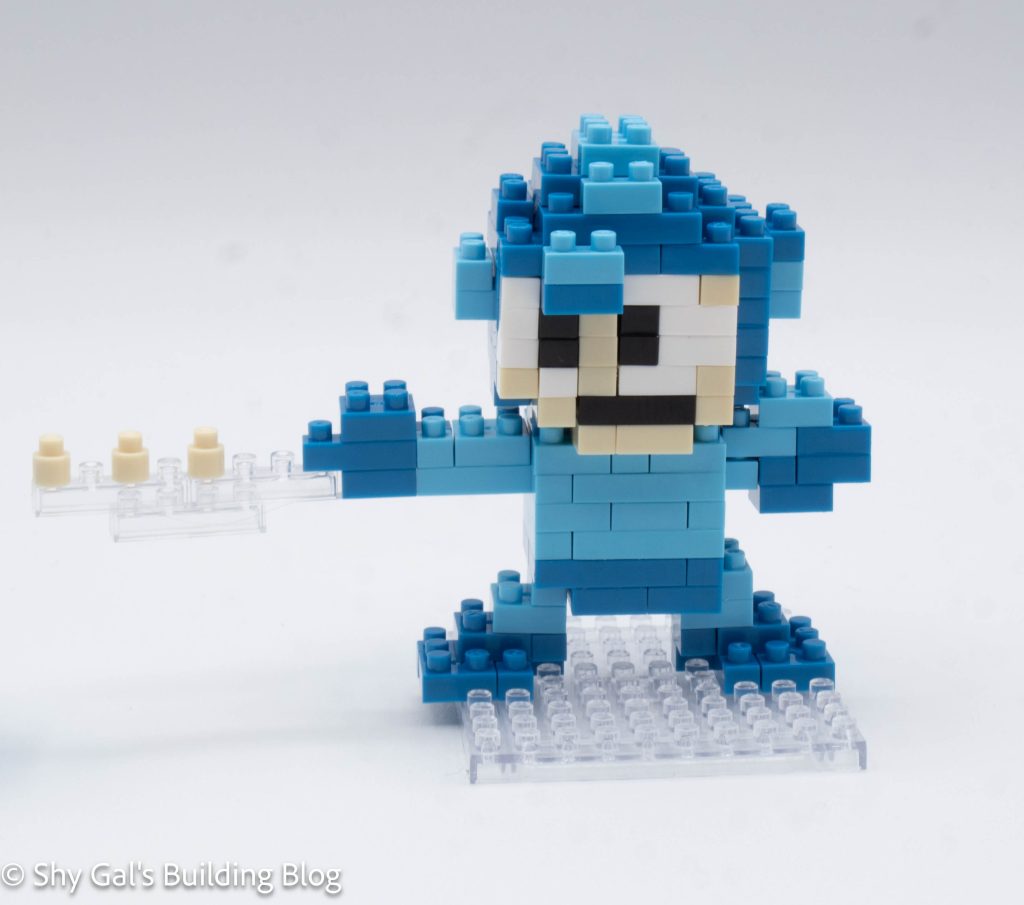
The head goes up in generally straightforward layers. The front builds up a pixilated face, and the rest of the way around builds his helmet. Building the head is a bit tricky because of the face. The face is built with several stacks of single bricks, so it is easy to pop a column out of place and tricky to keep things lined up.
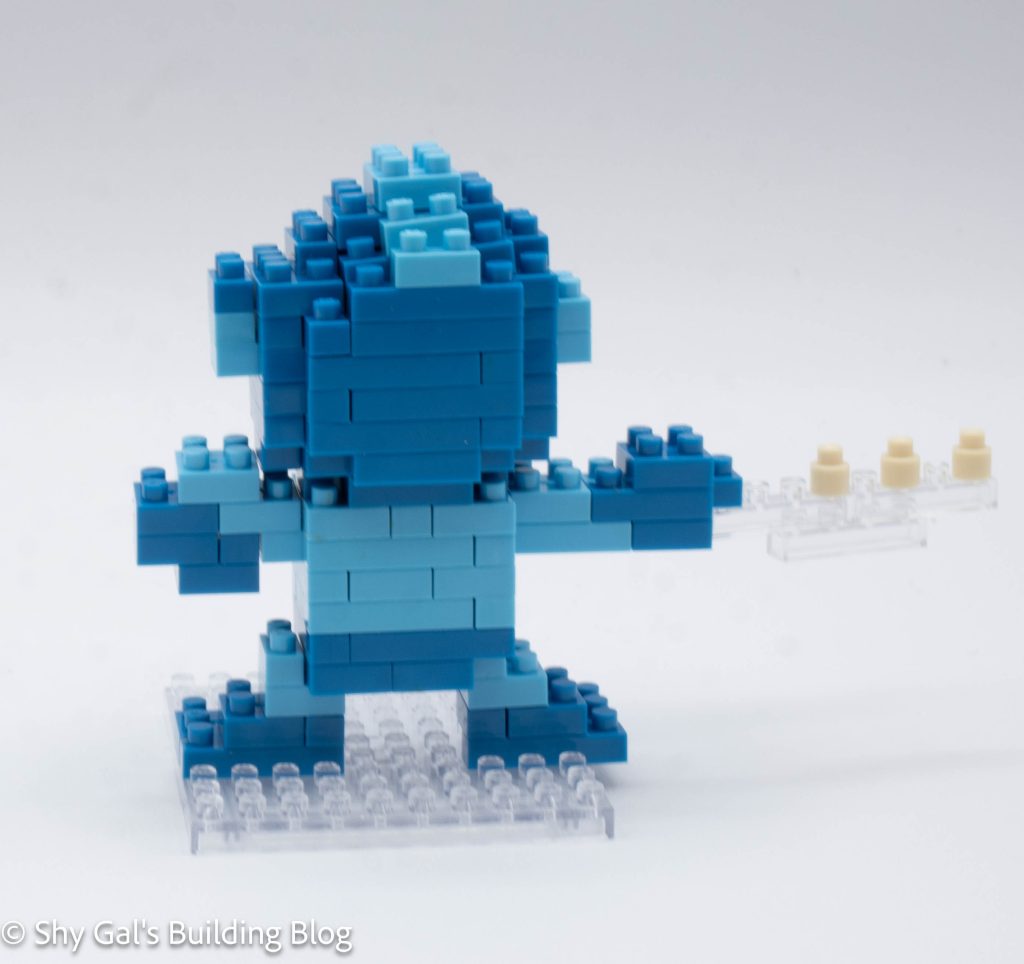
The body begins with a square of dark blue. The body goes up in several layers. Unlike many nanoblock builds, Mega Man isn’t square because he is turning backward, so the body layers aren’t square. The body is finished by adding the arms. One arm is curved under his body, and the other is going backward, held out to shoot.
The shots are extremely straightforward. They are a chain of clear bricks with the shots on top of the chain.
The last section is the base. The feet are laid out on the base. The legs are then added in layers to the feet.
The next step is to put the 4 sections together. There is a great side-view diagram to get the base, body, and head lined up properly. The last step is to attach the shots to the outstretched arm.
Energy Tank
The energy tank is a simple collection of layers to build the tank. The only challenge is that you can’t build it on the nanoblock pad because the base layer isn’t square.
Things I liked:
I like that he isn’t square and sifted on his hips
Things I didn’t like:
I don’t love the face because the eyes are so big, but it does look like the original pixel video game image
This post is a review of the nanoblock Blinky and Inky build. Blinky and Inky is part of the nanoblock Character collection. Wondering what else is part of the Character collection? Click here for a list.
Number: NBCC_106
Number of Pieces: 180
Difficulty Rating: 2/5
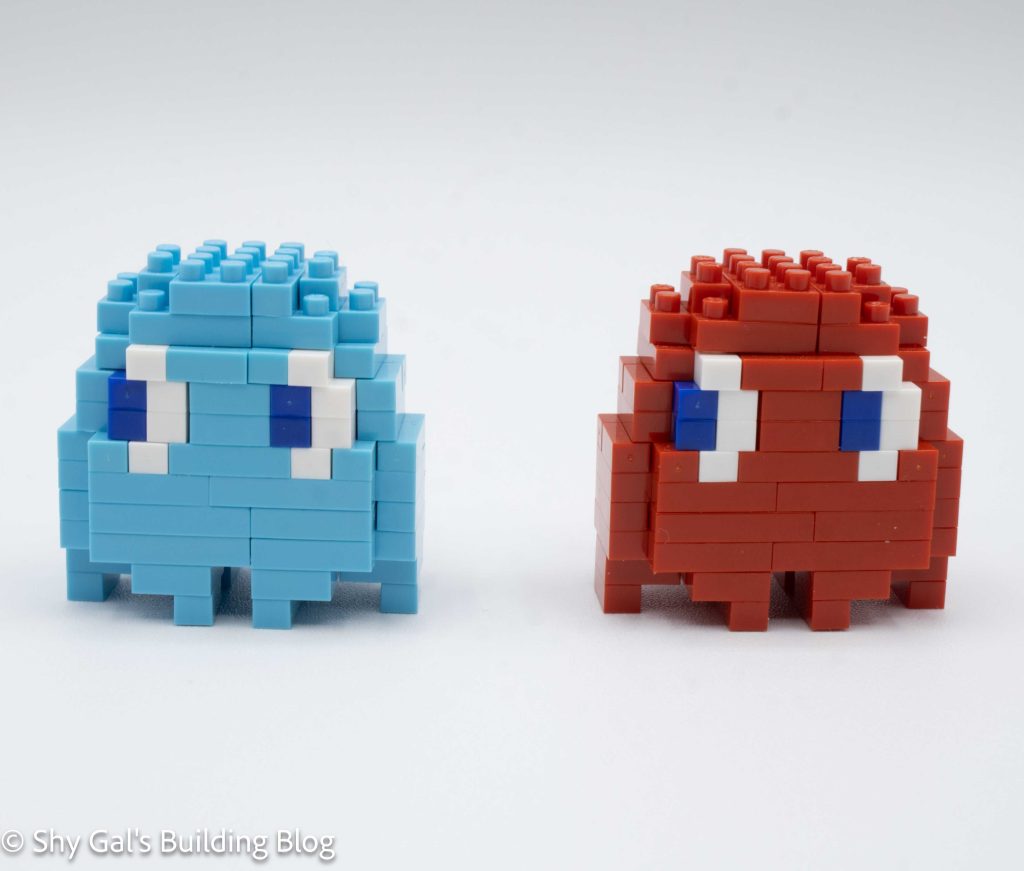
Blinky and Inky are 2 of the ghosts from the Pac-Man video game. They travel around the map trying to kill Pac-Man.
There are 2 other ghosts in the video game, Pinky and Clyde. However, there isn’t a kit for Pinky and Clyde. I have looked at the parts required for each ghost, and currently, the bricks required to build Pinky and Clyde are not produced, so it doesn’t seem possible to make the ghosts at this point in time.
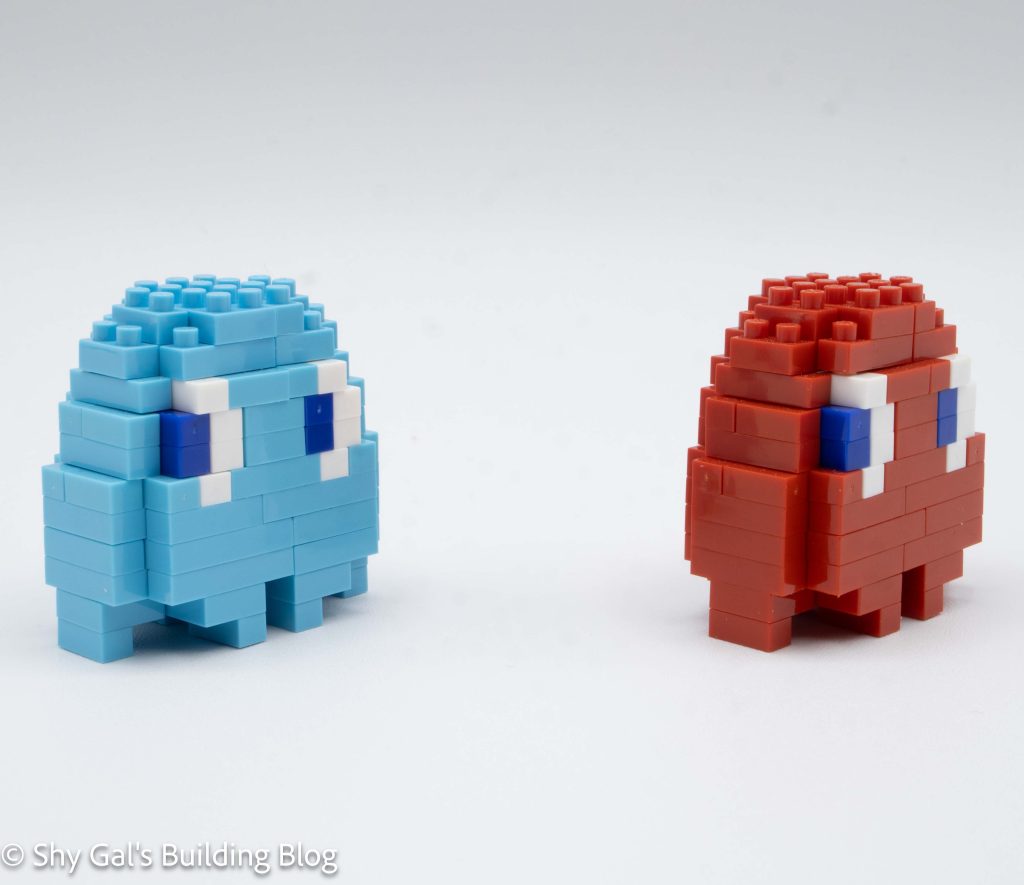
Blinky and Inky are identical builds, except 1 build is in light blue for Inky, and 1 build is in red for Blinky.
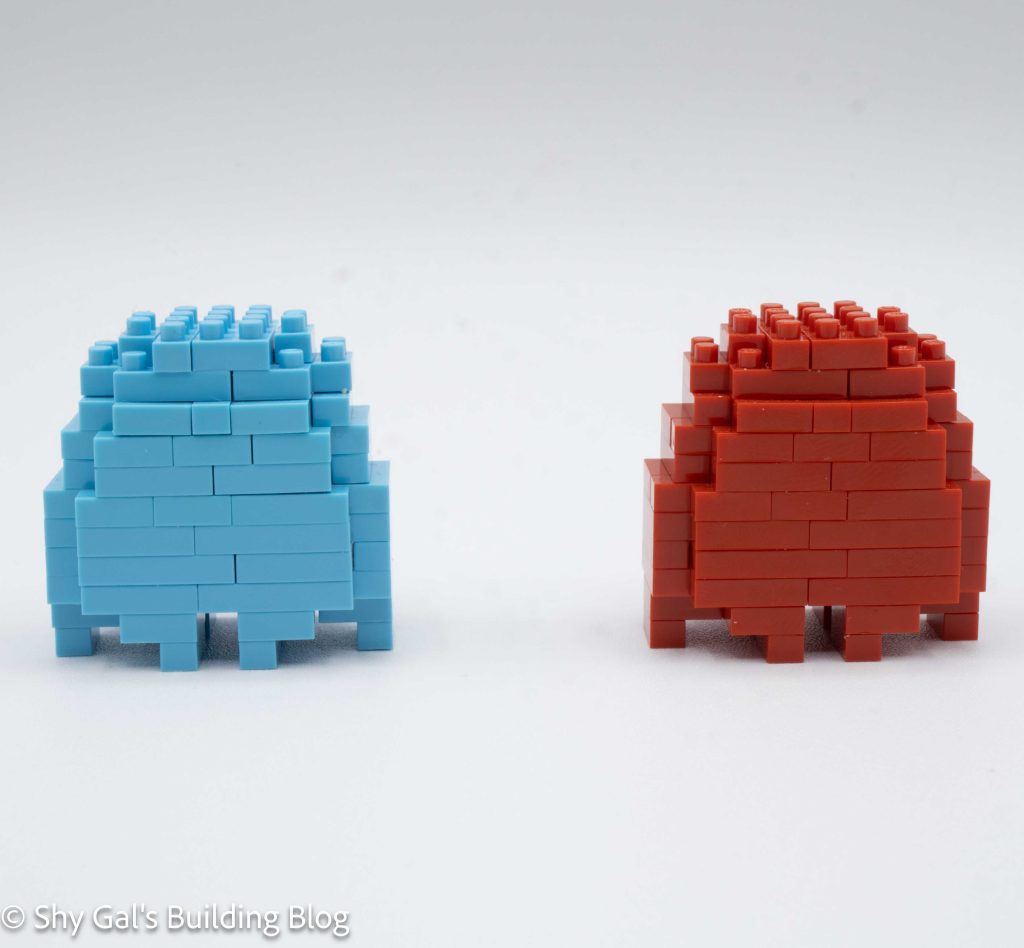
The build is made of several smaller sections that are stacked on top of each other to create the main body of the ghost.
First, there is the base layer that creates an outline of the base of the ghost.
Next is a section of a few layers that creates the back of the ghost.
Next is a section that creates the eyes.
The final section is a hat that closes up the eye section and the back section.
Once the main body of the ghost is complete, the build is flipped over, and the little legs are added to the bottom of the build.
Things I liked:
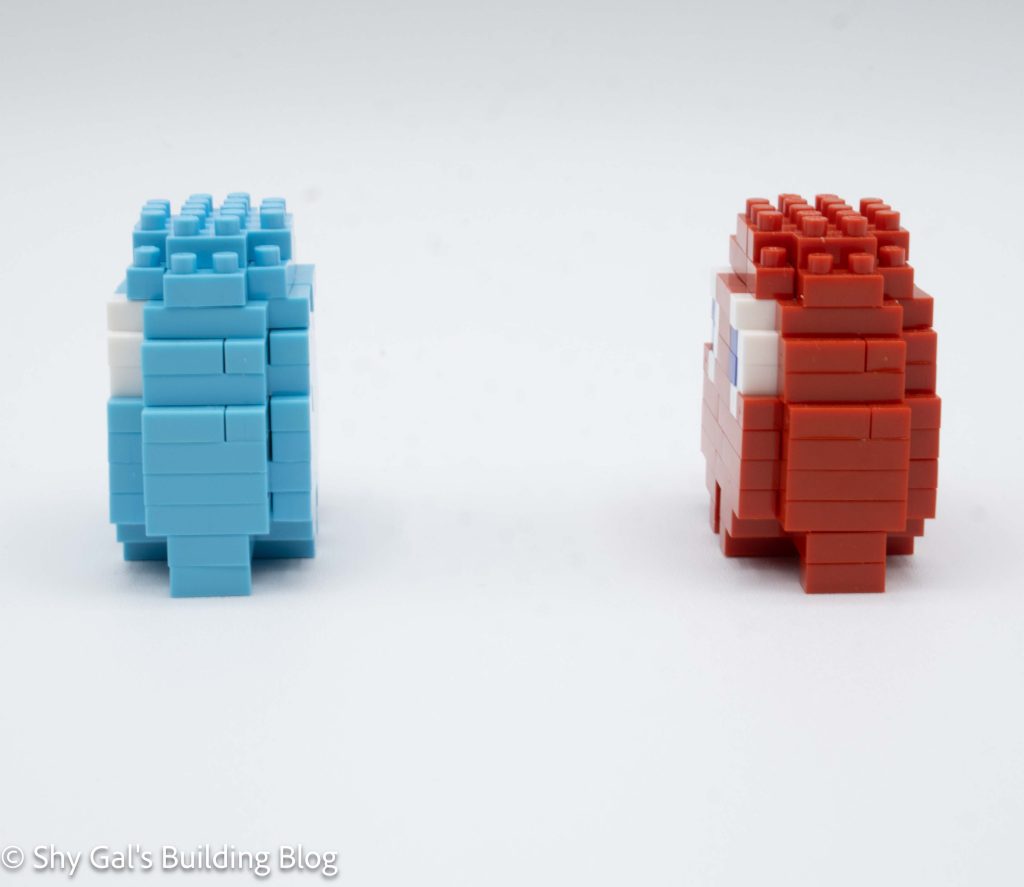
I really like how the eyes are offset and how the angles are created sadly, this means special blocks are needed, so special blocks are needed to build the other 2 ghosts
Things I didn’t like:
That only 2 of the ghosts are represented, and the other 2 can’t be created with leftover parts
This post is a review of the nanoblock Pesuke build. Pesuke is part of the nanoblock Character collection. Wondering what else is part of the Character collection? Click here for a list.
Number: NBCC_026
Difficulty Rating: 1/5
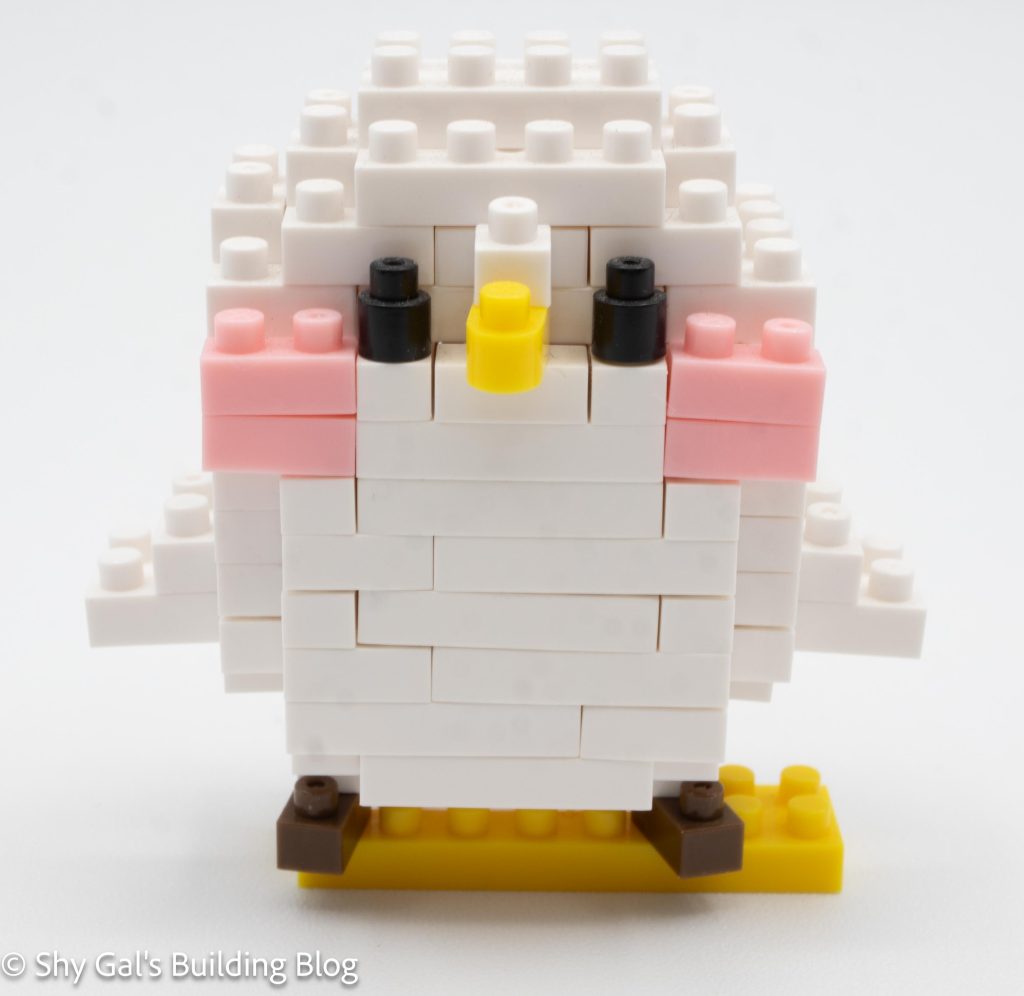
Pesuke is from “Pesuke and Usagi.” I’m not sure if he is a chick or a ghost, but I think both the anime style and nanoblock build are cute.
Since this kit is so old, I had a hard time finding the kit. I was able to find a kit that had been completed with the instructions. The kit arrived prebuilt in a Tupperware container. I don’t have the packaging for the kit. I’ve written my description of the build based on the directions.
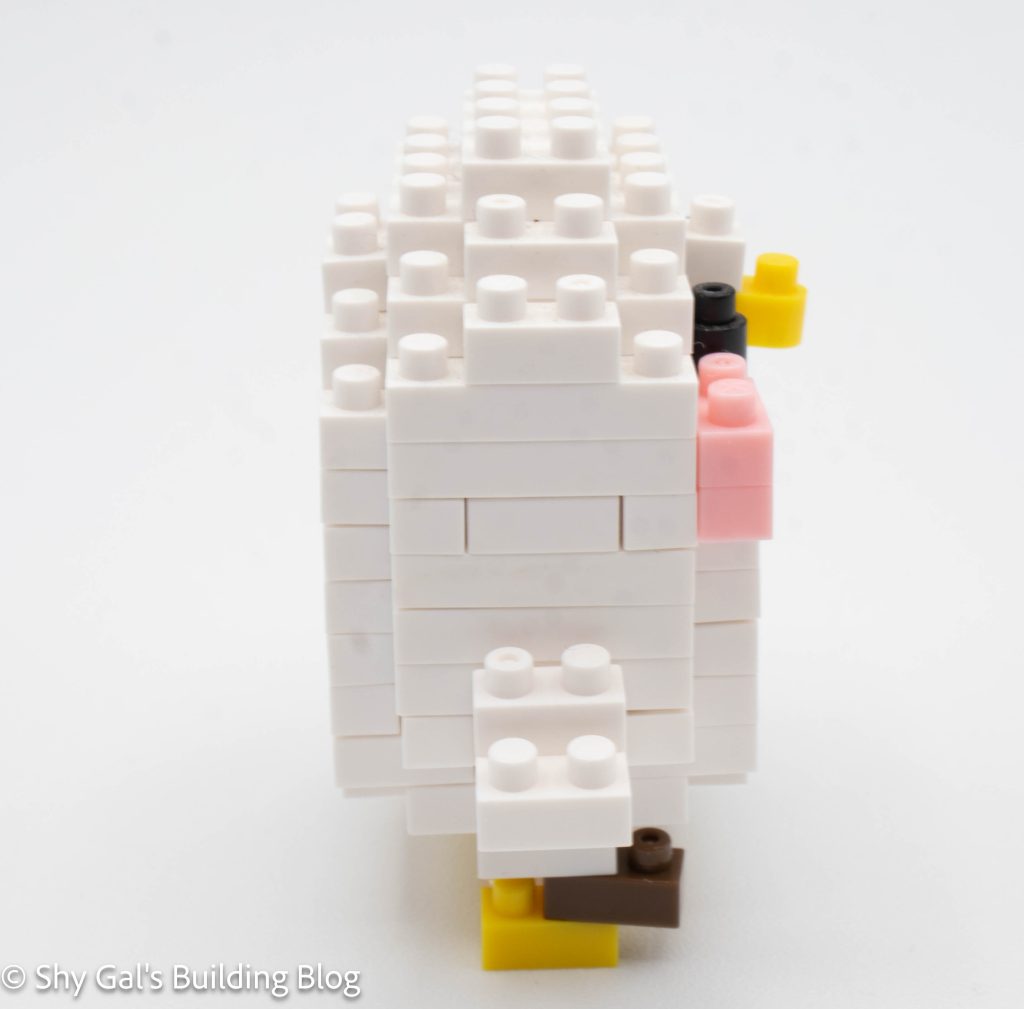
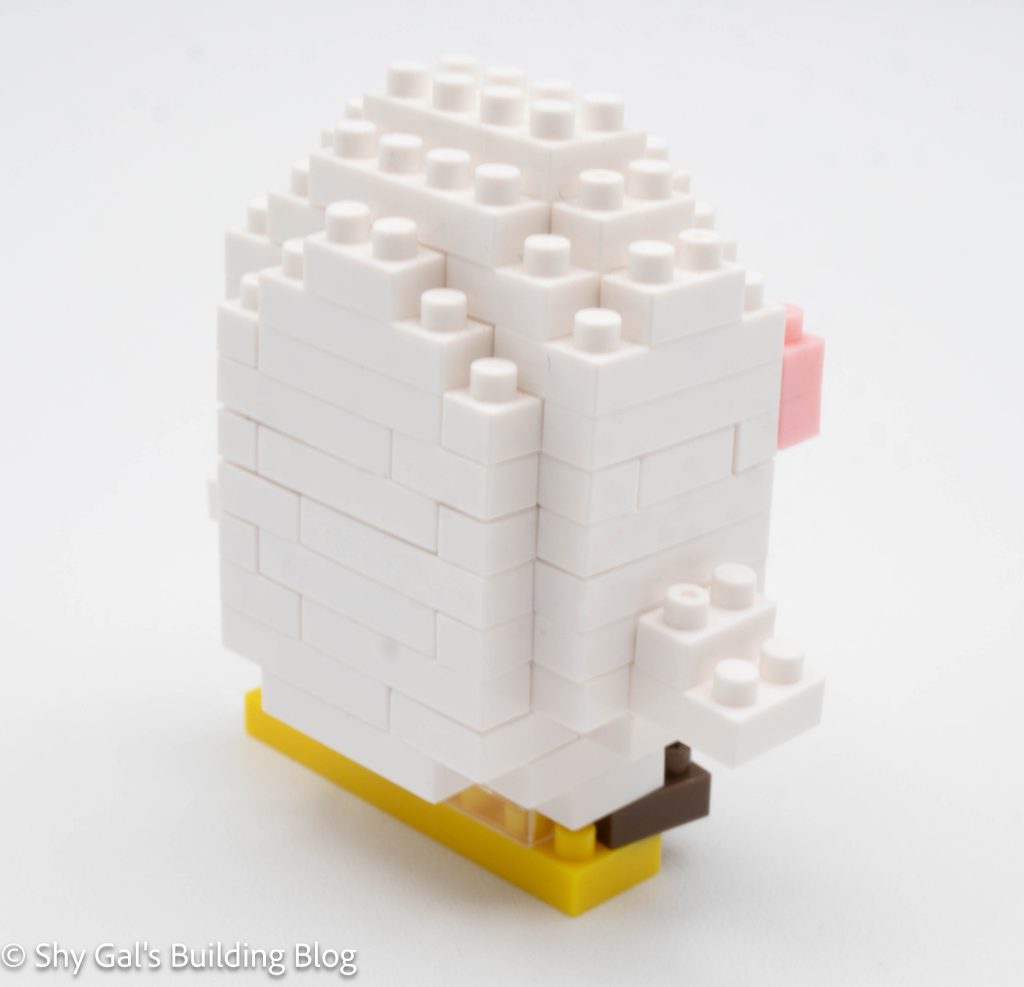
Pesuke has tiny feet. For this reason, the build is built on a 2×10 base. The feet are placed on the front section with a clear brick on the back. However, according to the directions, Pesuke is placed on one end of the base instead of being centered, which is unusual.
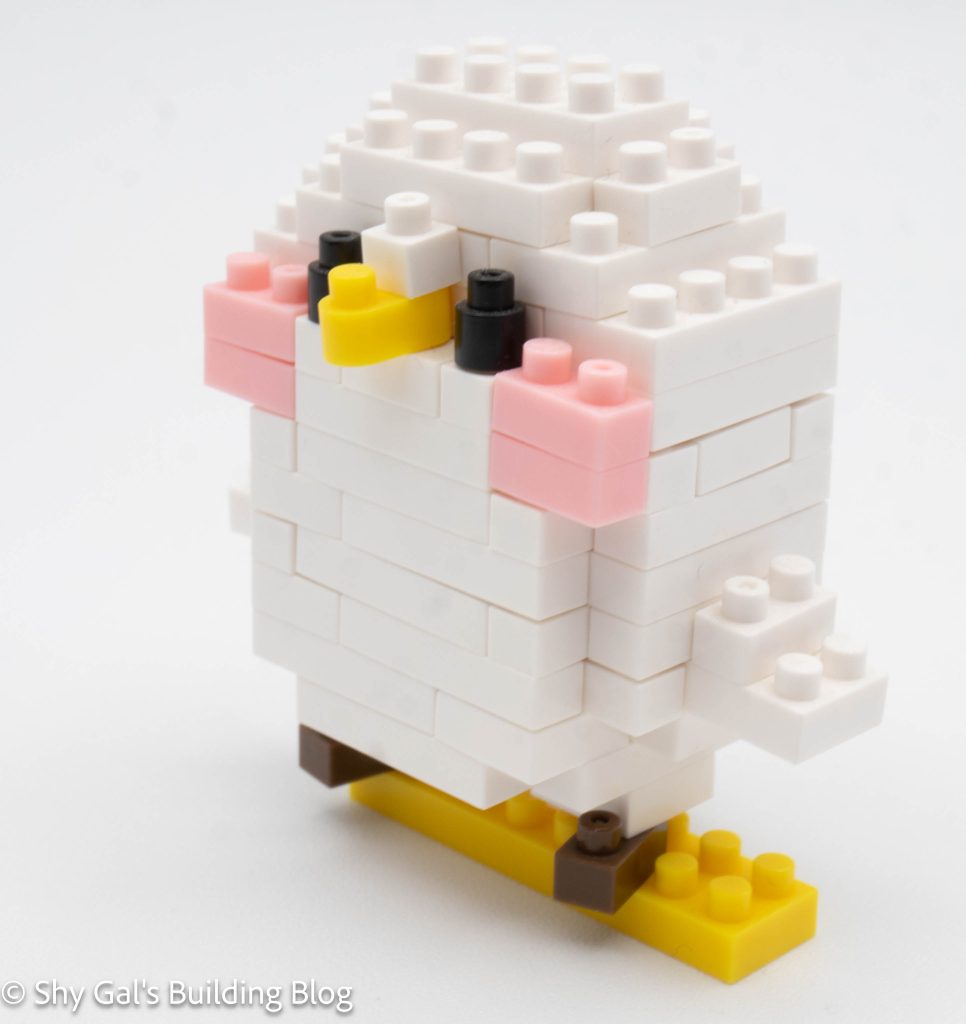
After placing the feet on the base, the rest of the build is built in simple layers. At the beginning of the build, the layers are white. Once you reach the head, colored bricks are used to create cheeks, nose, and eyes.
After building the face, the head is closed up, creating a rounded dome shape.
Things I liked:
I really appreciate that nanoblock keeps his feet small so he looks like the character
Things I didn’t like:
I wish the instructions recommended centering the build on the base brick instead of having it off to one side
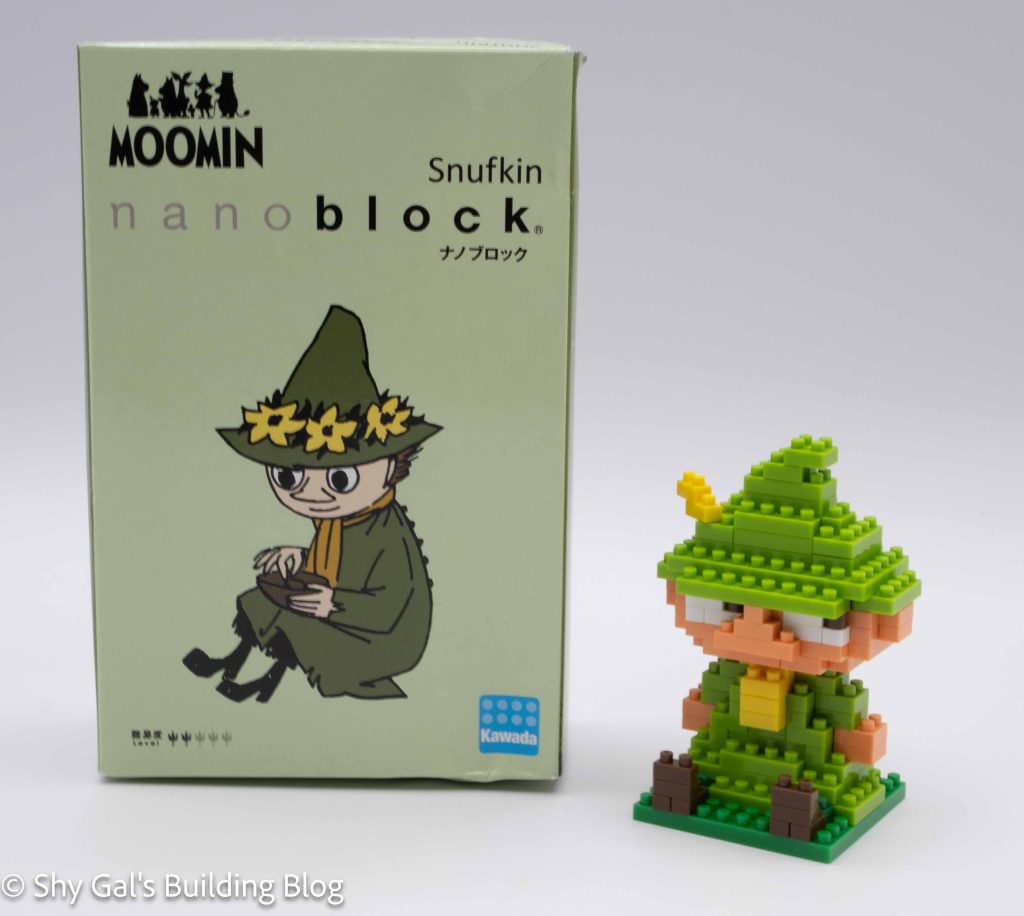
This post is a review of the nanoblock Snufkin build. Snufkin is part of the nanoblock Moomin collection. This kit is also part of the character collection.
Number: MOM-099 / NBCC_272
Number of Pieces: 130
Difficulty Rating: 2/5
This kit was rereleased in April 2026 as part of the Character Collection with a new NBCC number.
Snufkin is a traveler who makes frequent visits to Moominvalley. He is very good friends with Moomintroll, and the two of them go on adventures when he is in Moominvalley.
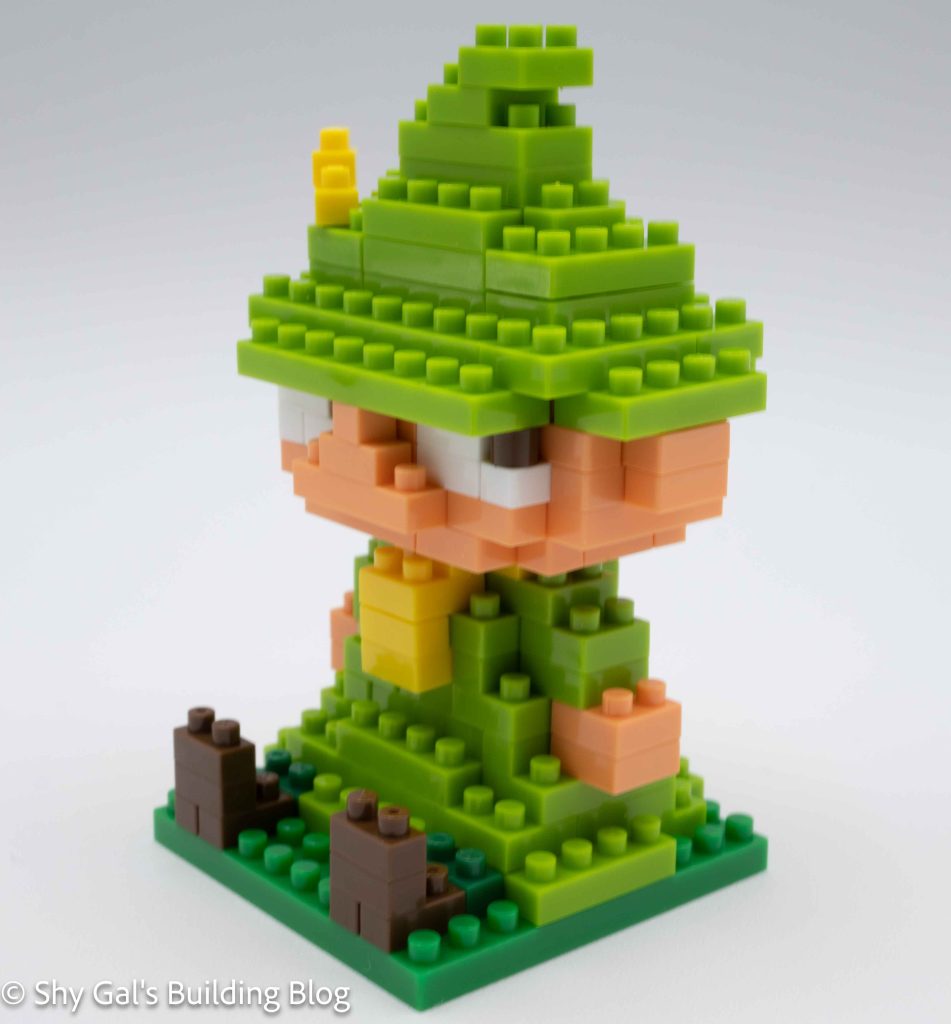
This build has 2 sections. There is the head and the body. Both sections are very straightforward, with good directions.
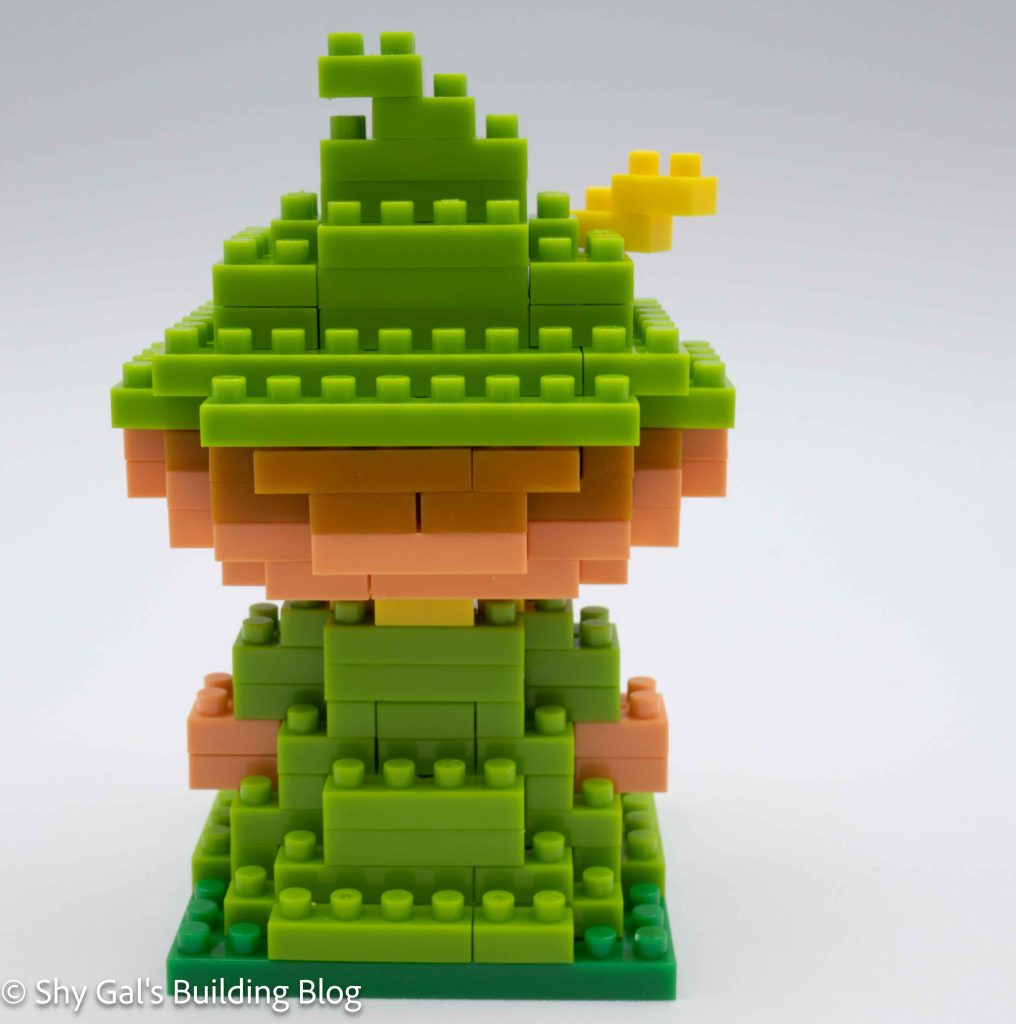
I was able to easily build the head using my pad. The head begins with a base layer of flesh. As the head goes up in layers, you add the hair, nose, and eyes. The head is topped off with Snufkin’s hat. The hat is cone-shaped, so each layer gets more narrow until the hat is closed up.
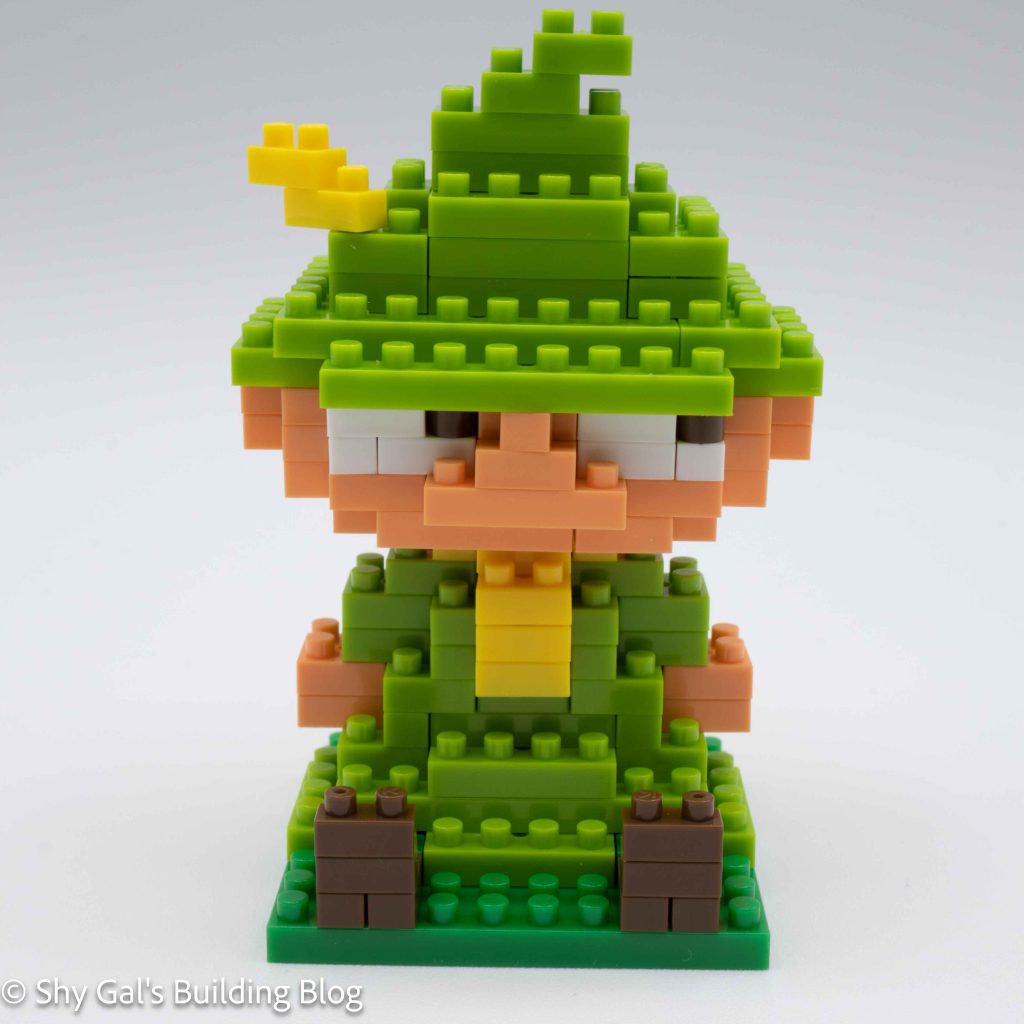
The body builds up on a 10×10 base. It begins with an outline of the body and builds up in layers. The base layer creates Snufkin’s legs and the bottom of his shirt. The rest of the body section creates Snufkin’s shirt. There is a nice detail of a yellow scarf around his neck.
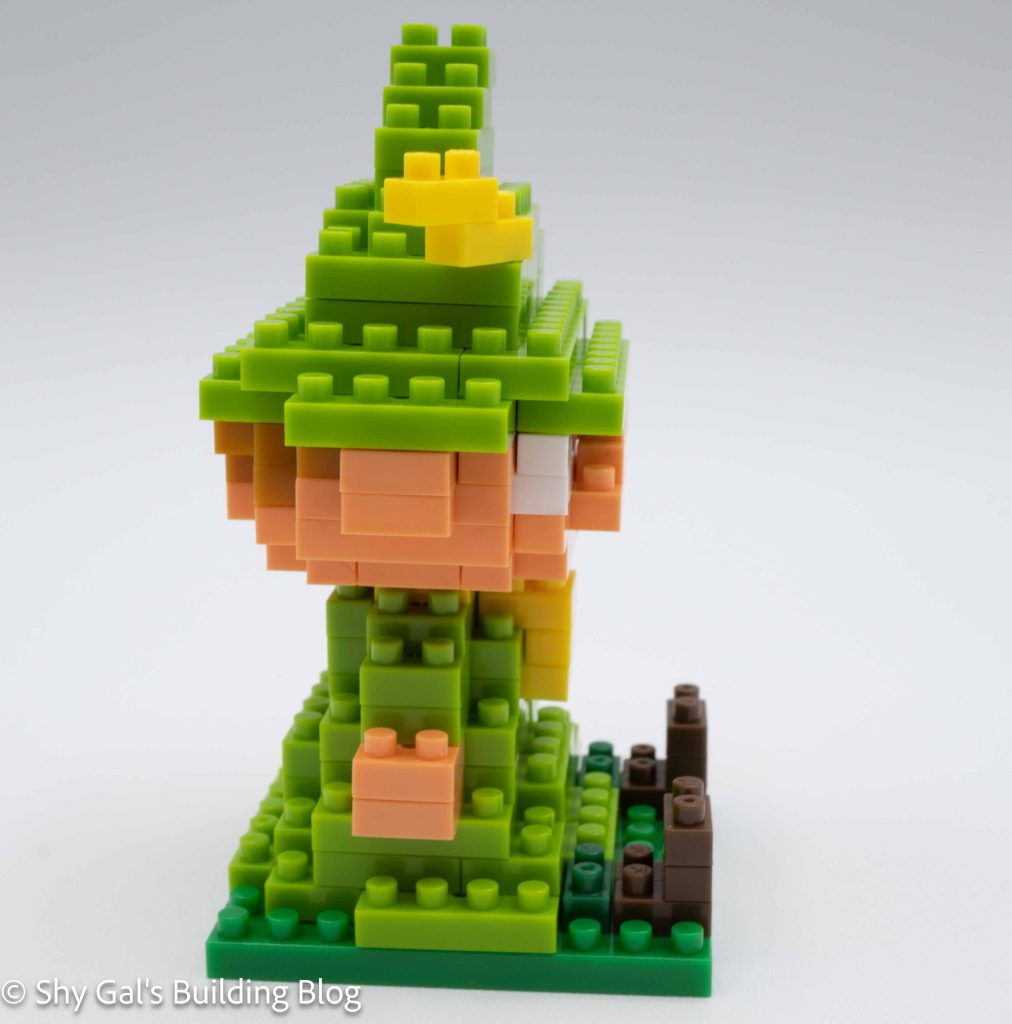
The last step is to combine the head and the body. There is an excellent side view shot that is helpful in getting the head placed correctly.
Things I liked:
The various shades of green used throughout the build to create various body parts
Things I didn’t like:
When I was putting the hat together, there were a few places where I got gaps because the bricks fell into the hat or body
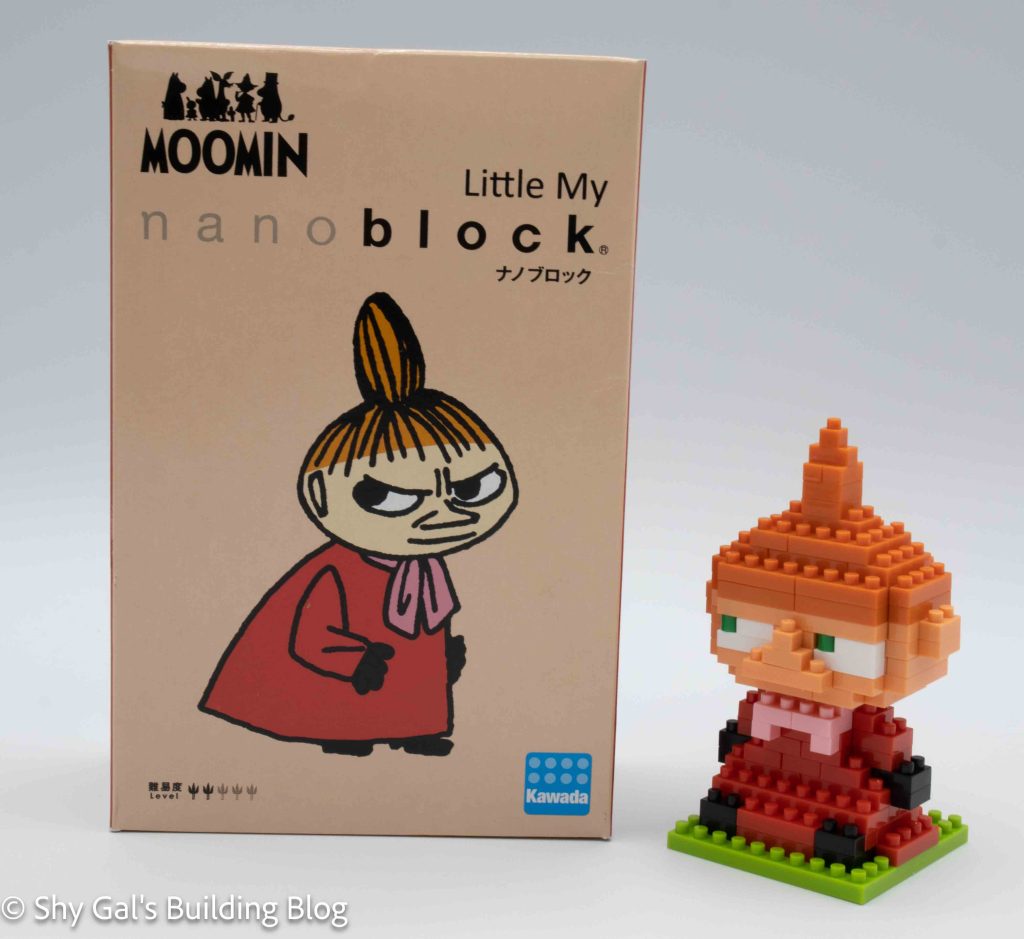
This post is a review of the nanoblock Little My build. Little My is part of the nanoblock Moomin collection. This kit is also part of the character collection.
Number: MOM-044 / NBCC_271
Number of Pieces: 140
Difficulty Rating: 2/5
This kit was rereleased in April 2026 as part of the Character Collection with a new NBCC number.
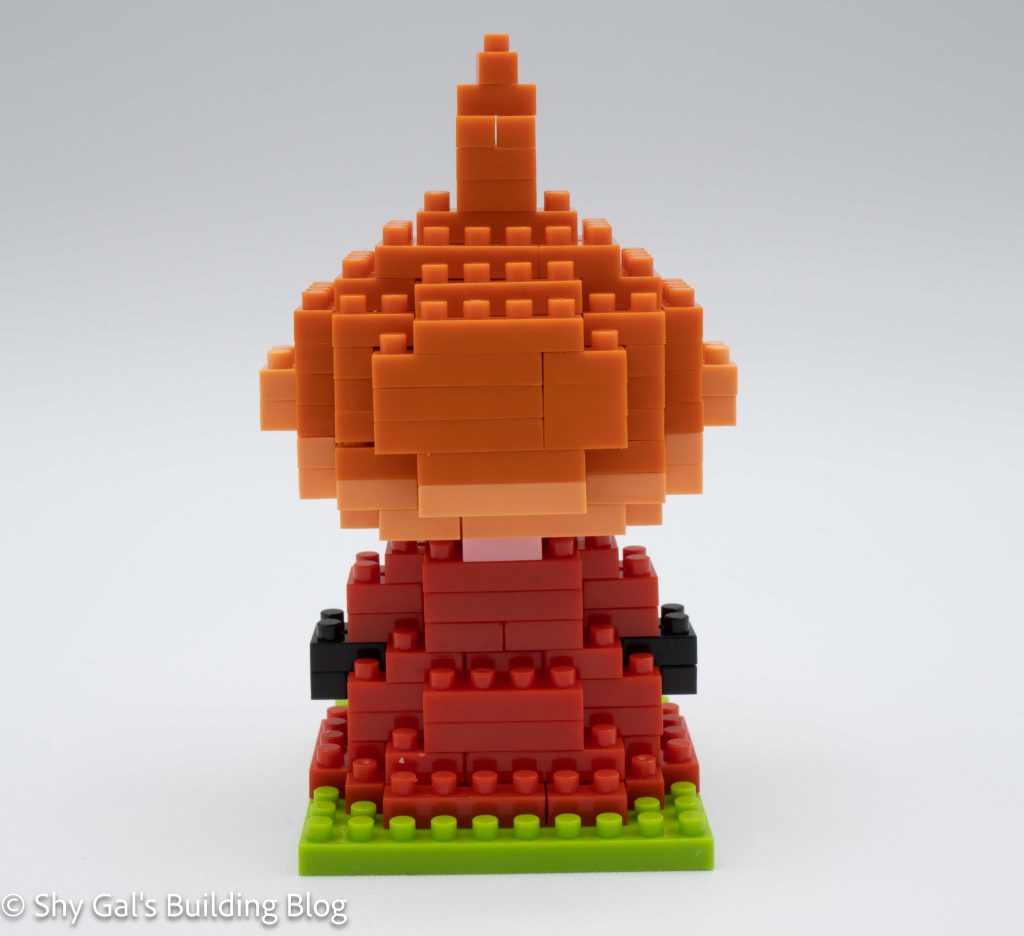
Little My lives in the Moominhouse along with Moominmama, Moominpapa, and Moomintroll. She is small and fearless and likes to go on adventures.
This build has 2 sections. There is the head and the body. Both sections are very straightforward with good directions.
When I opened this kit, I knew there was going to be a challenge to get the build done correctly because of the colors. I built this Little My on my sofa, so I didn’t have my good light. The orange bricks looked very similar to the red and skin tone. The skin tone also looked very similar to the light pink for the bow around the neck. I combated this by ensuring I kept the piles from the bags separate to pull the right color without looking too hard.
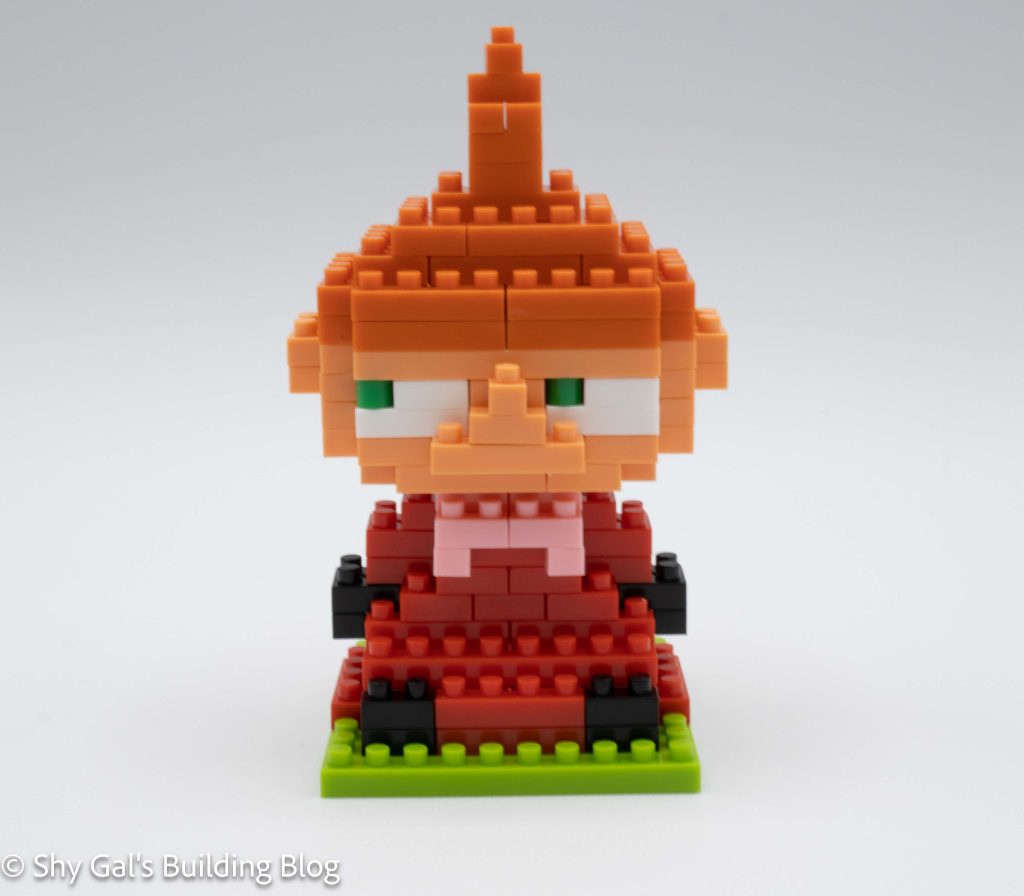
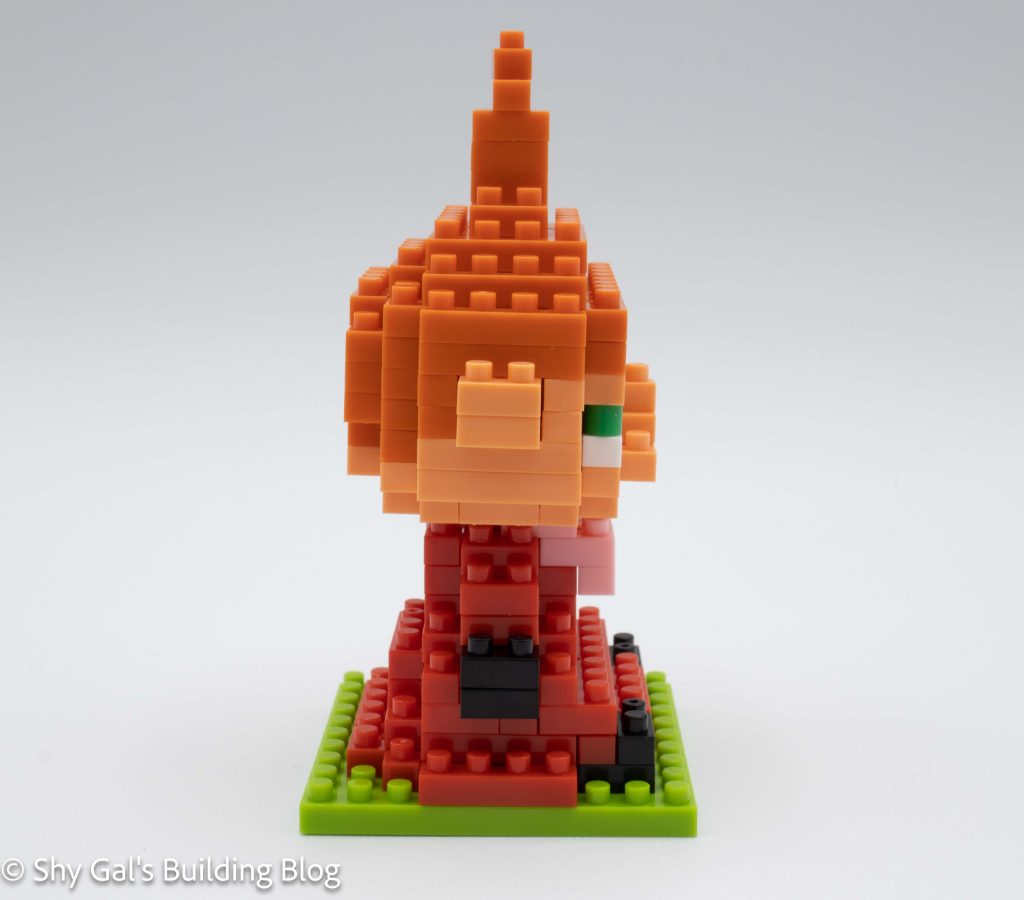
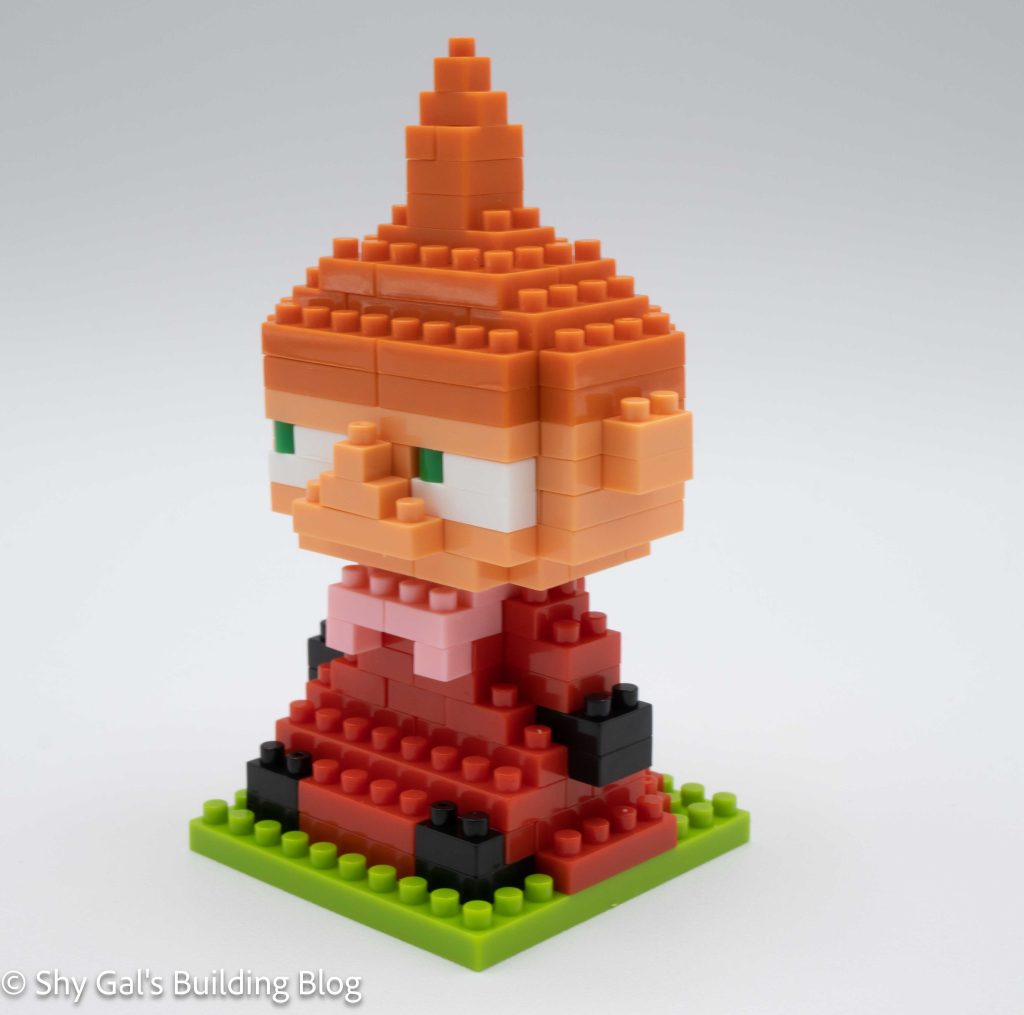
I was able to easily build the head using my pad. The head goes up in layers, adding the details of the nose, eyes, and ears. Little My has very distinctive hair that goes up and comes to a point. I like that the hair does come up to that point.
The body builds up on a 10×10 base. It begins with an outline of the body and builds up in layers. As the layers go up, the body starts to get smaller, creating Little My’s outfit that goes from wider at the bottom to more narrow at the top. The last step is to add the bow that covers her neck and connects the body and the head.
The last step is to combine the head and the body. There is an excellent side view shot that is helpful in getting the head placed correctly.
Things I liked:
I like how much the build looks like, Little My. I really like how she looks like she is up for mischief
Things I didn’t like:
How similar the colors were, which made the build hard
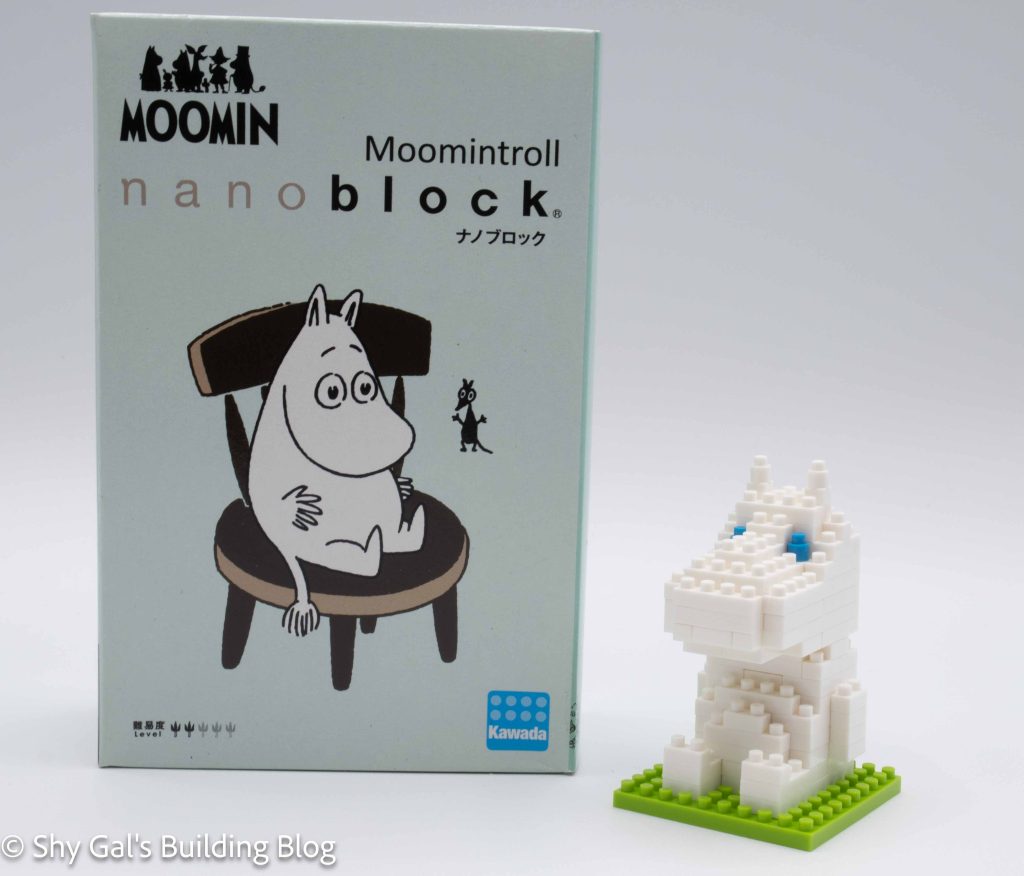
This post is a review of the nanoblock Moomintroll build. Moomintroll is part of the nanoblock Moomin collection. This kit is also part of the character collection.
Number: MOM-043 / NBCC_270
Number of Pieces:110
Difficulty Rating: 2/5
This kit was rereleased in April 2026 as part of the Character Collection with a new NBCC number.
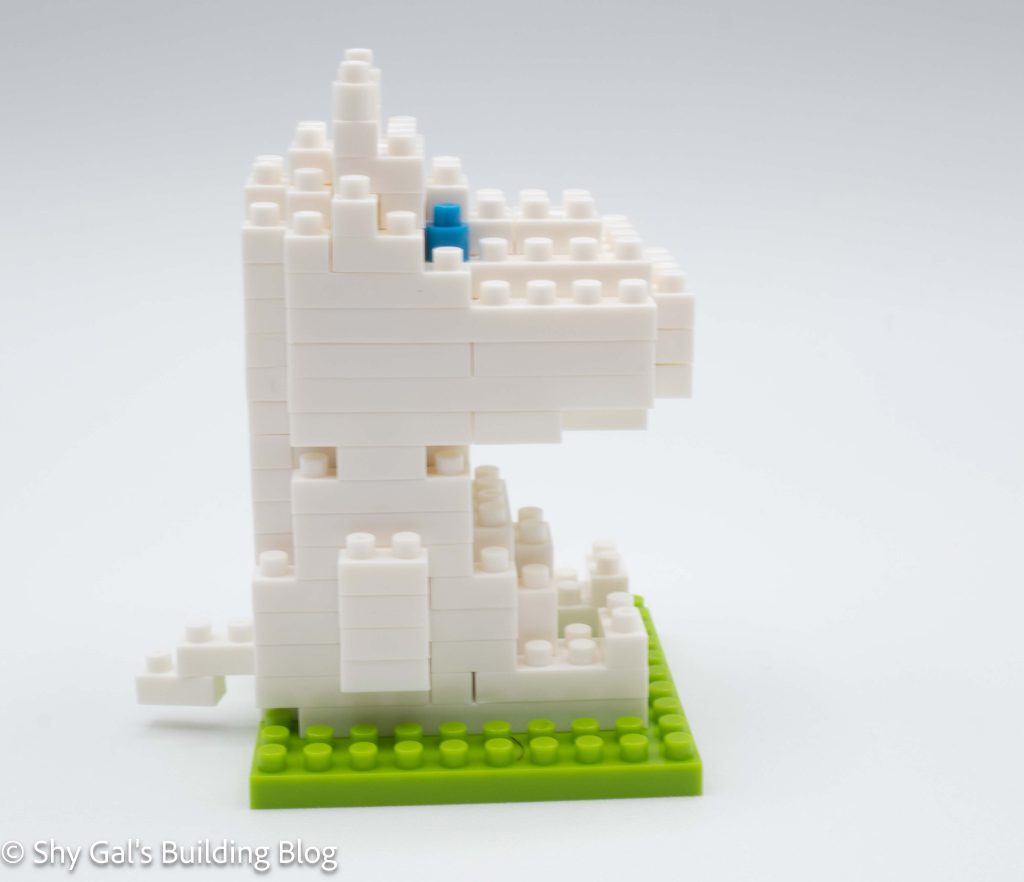
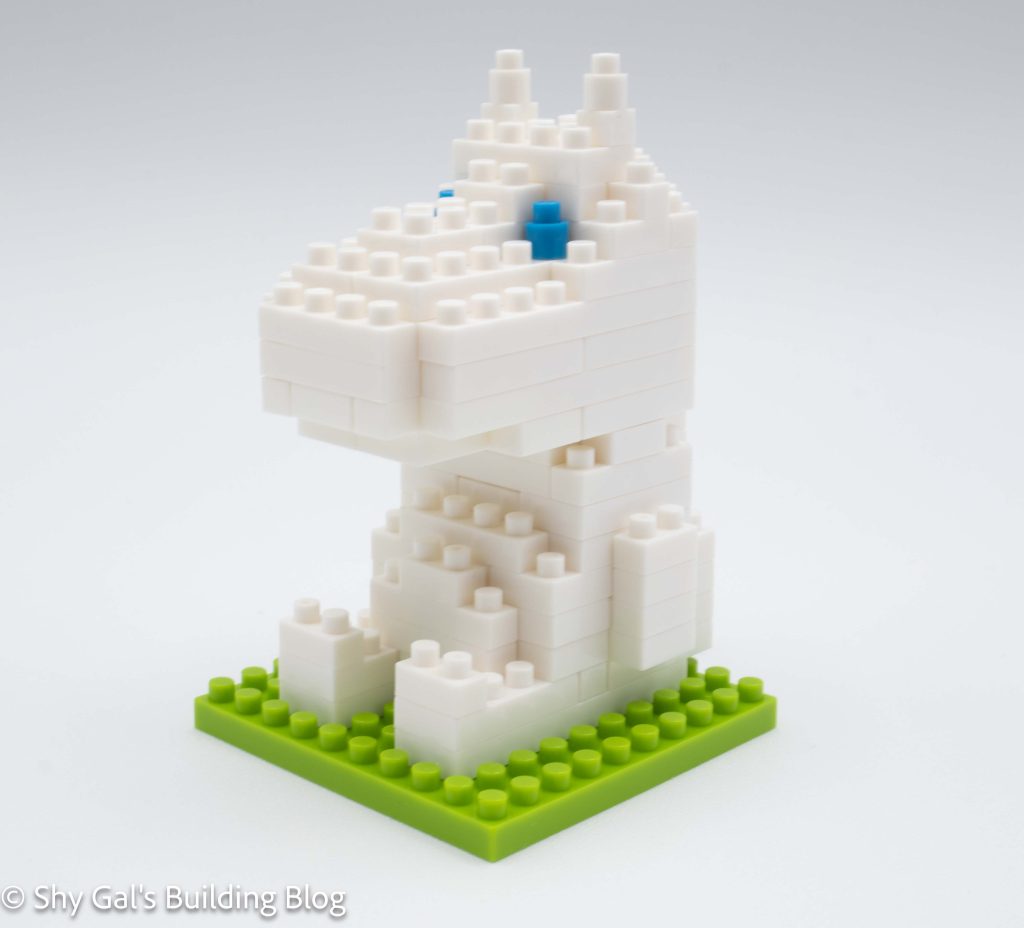
Moomintroll is the main protagonist in the Moomin books and comics. The Moomintroll build is sitting, unlike Moominmama and Moominpapa.
This build has 2 sections. There is the head and the body. Both sections are very straightforward, with good directions.
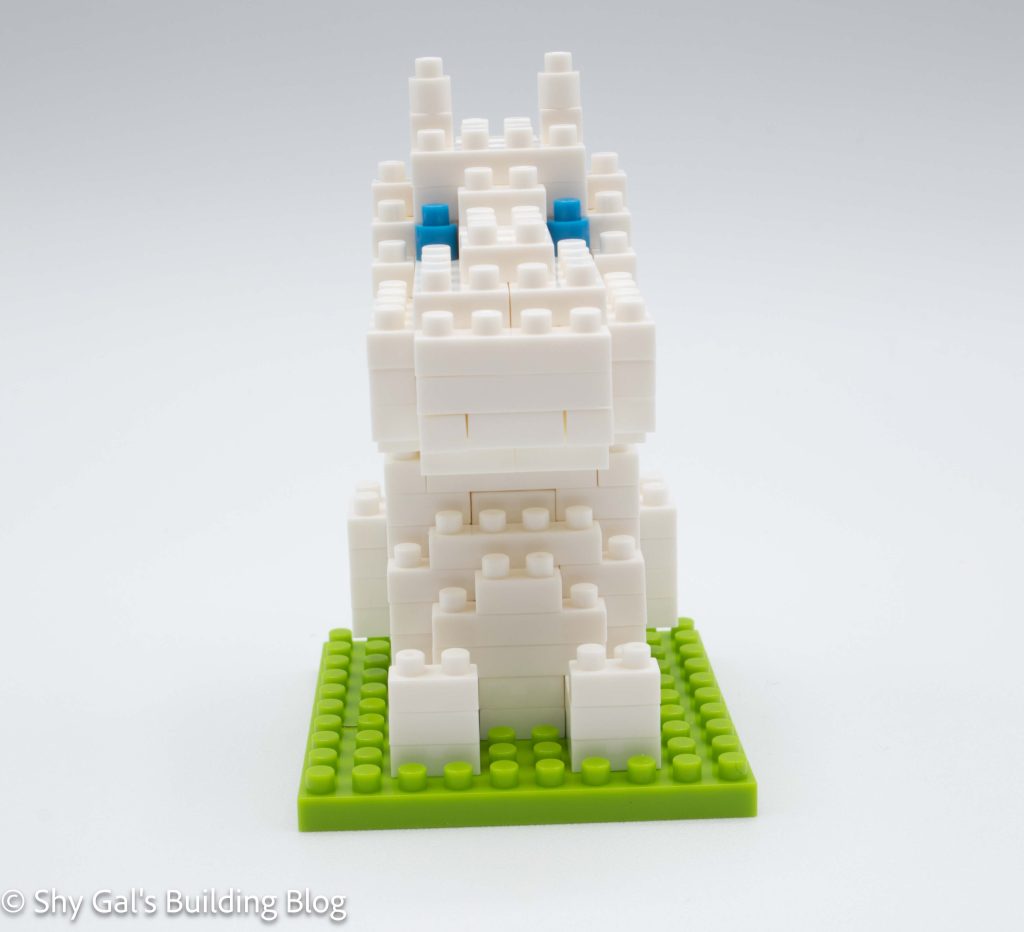
I was able to easily build the head using my pad. Most of the build is creating Moomintroll’s nose. The nose is built up in several layers. Then, the eyes and ears to the head. Since the eyes are blue on a white build, they really stand out.
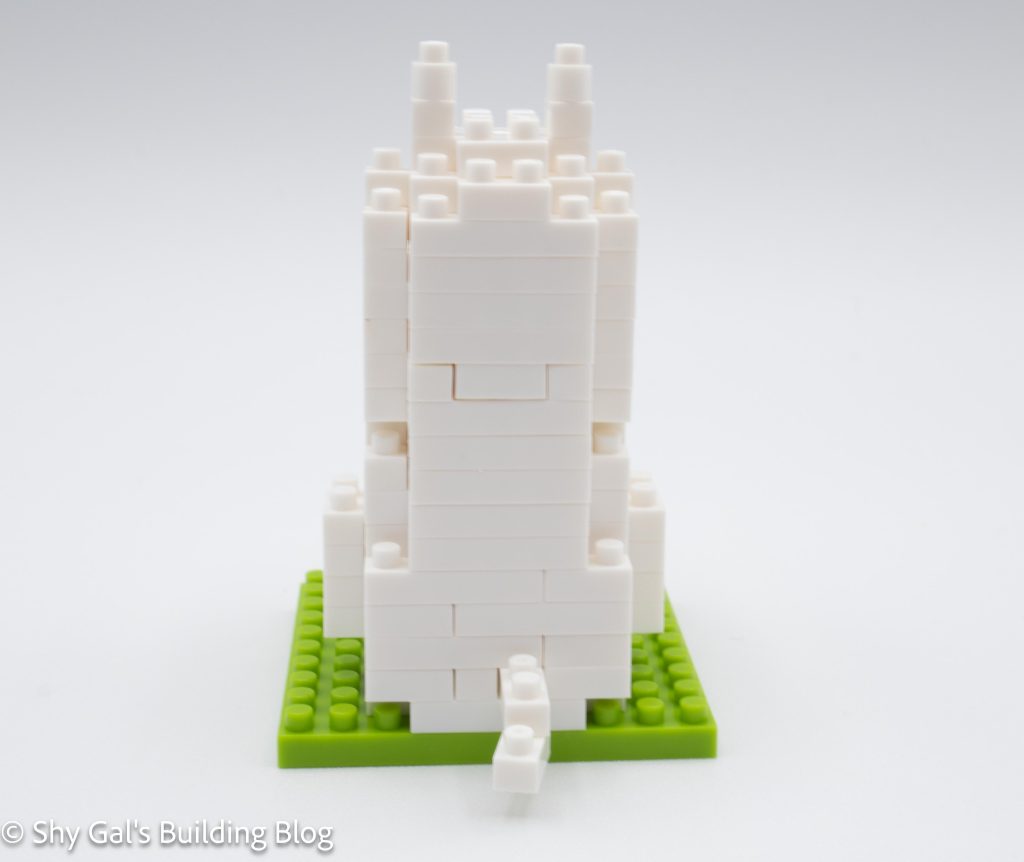
The body builds up on a 10×10 base. It begins with laying out the base layer of white bricks. The second layer adds the tail. the rest of the body goes up in layers. As the layers go up Moomintroll’s tummy gets smaller and heads to his neck. The body is closed up, and you are ready to attach the head.
The last step is to combine the head and the body. There is an excellent side view shot that is helpful in getting the head placed correctly.
Things I liked:
I like that he is sitting, which makes it unique among the Moomins.
Things I didn’t like:
In a couple places on the head, the lines between the bricks are a bit hard to see
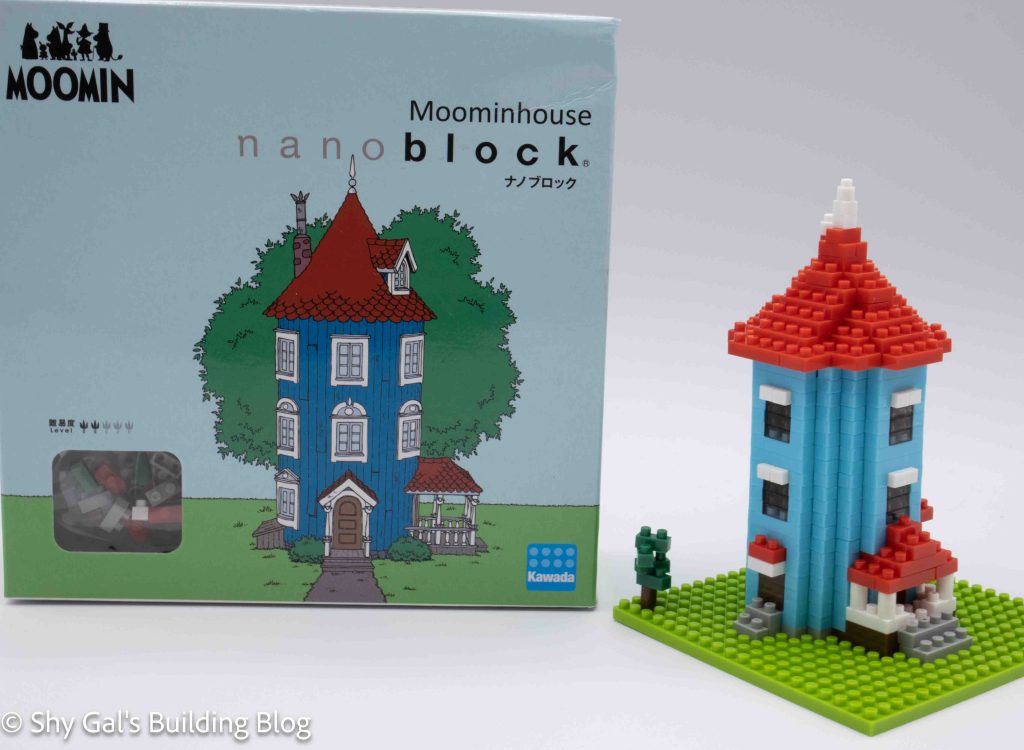
This post is a review of the nanoblock Moominhouse build. Moominhouse is part of the nanoblock Moomin collection. This kit is also part of the character collection.
Number: MOM-042 / NBH_062 / NBCC_273
Number of Pieces: 450
Difficulty Rating: 2/5
This kit was rereleased in April 2026 as part of the Character Collection with a new NBCC number.
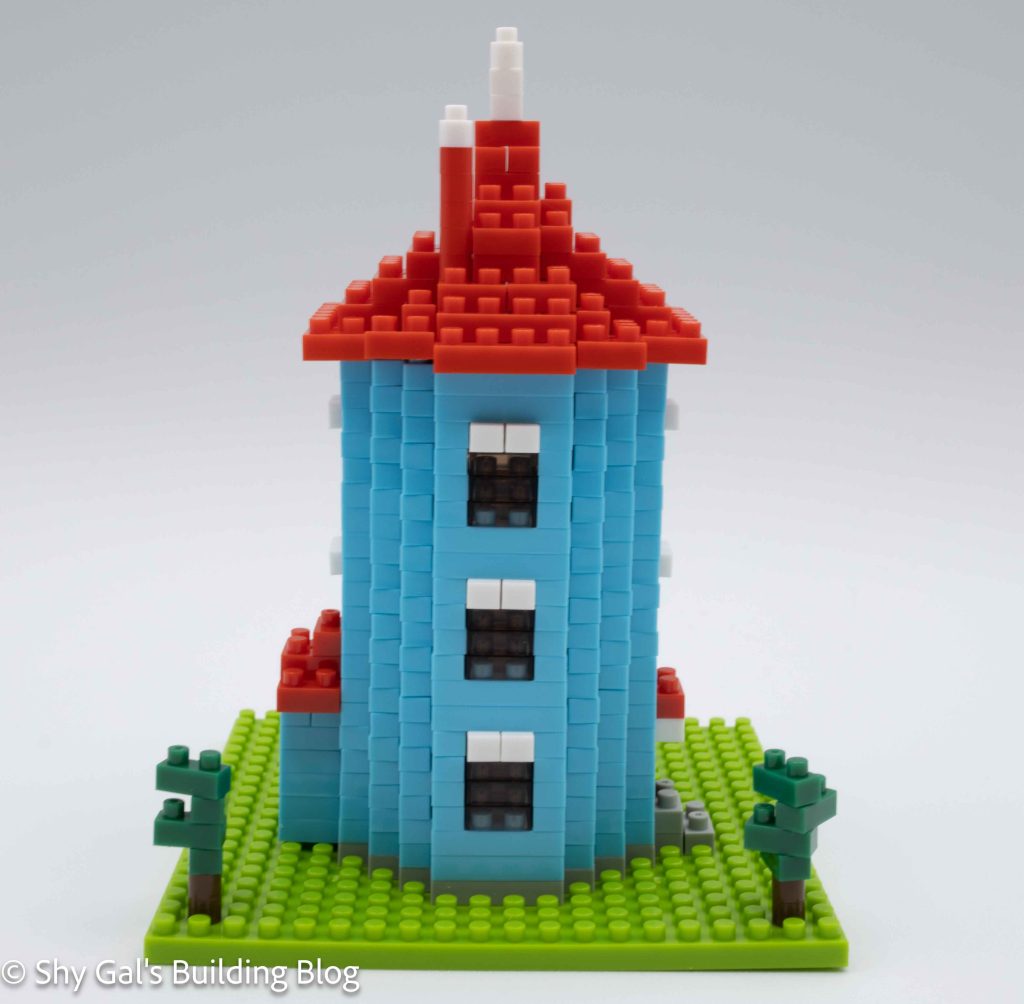
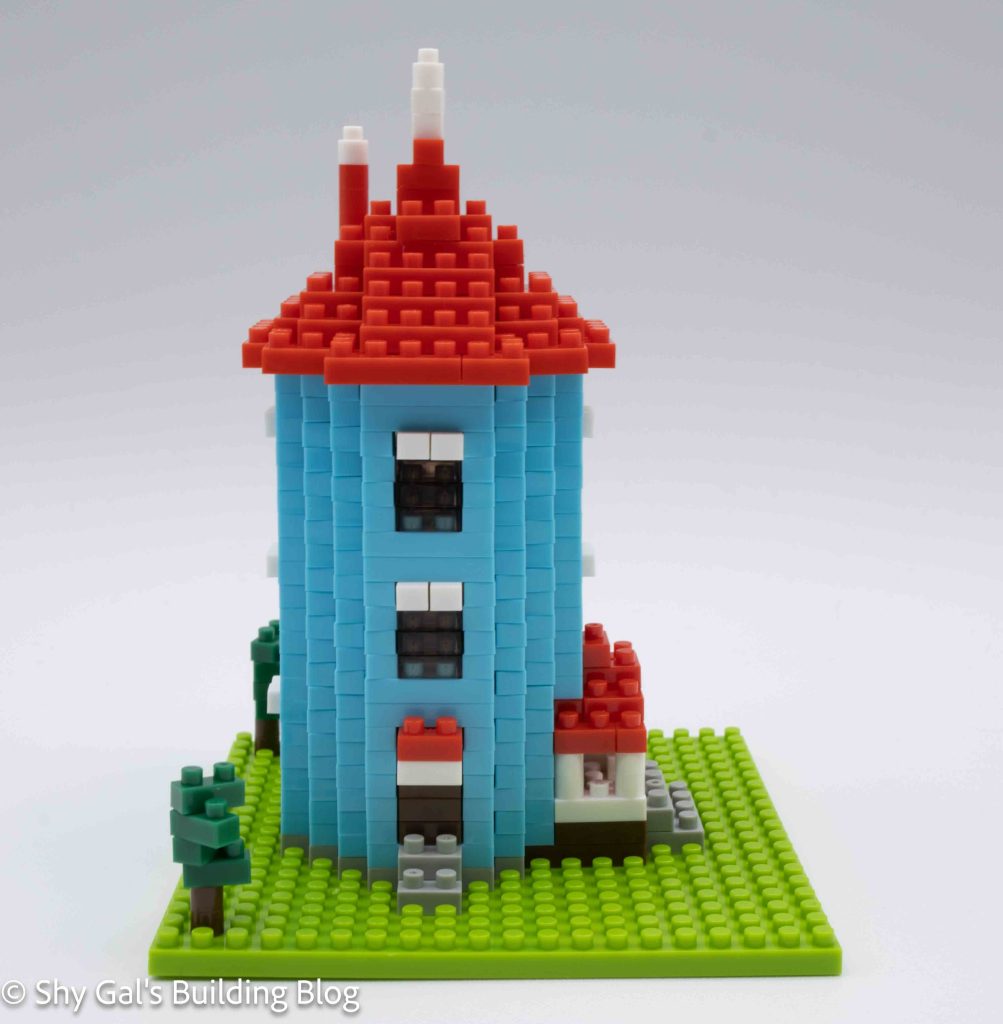
The Moominhouse is the home of Moominmama, Moominpapa, and Moomintroll. It is a multi-story blue cylindrical building with a red cone-shaped roof.
When I opened the kit, I was surprised that there were 2 bags of 1×2 blue pieces. I guessed after seeing that the build would be just building the outline of the house.
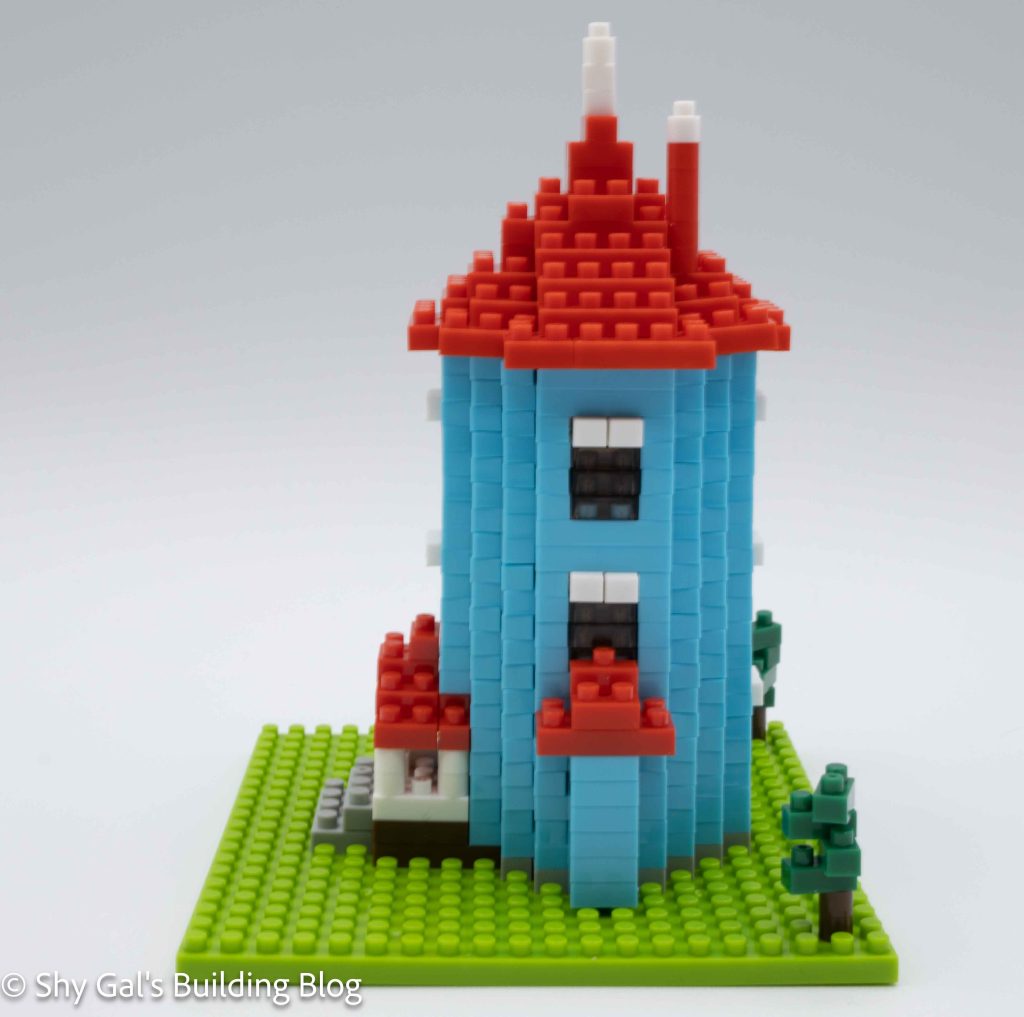
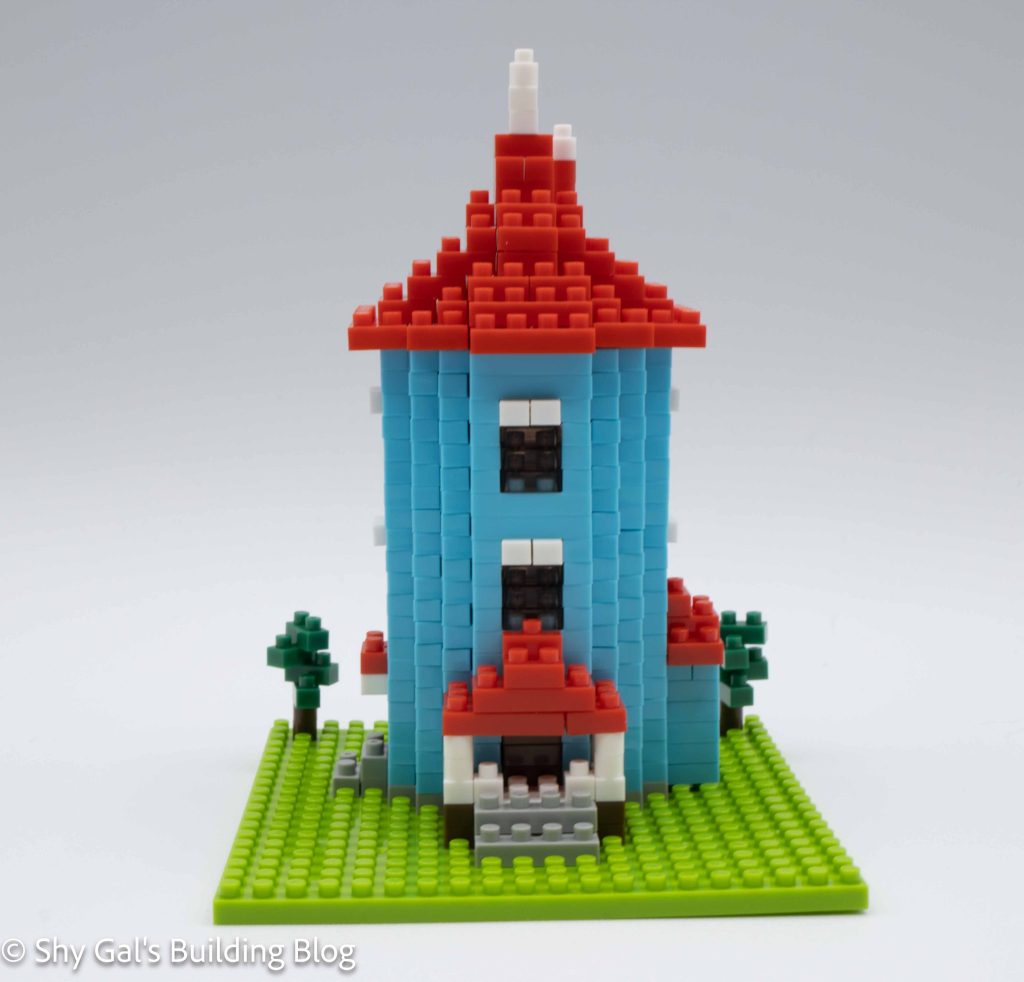
The build begins by laying the outline of the building. This outline includes the porch, which comes off the front of the building.
The building goes up in simple layers. The first few layers include the main body of the house and, the building on the porch, and other details of the house. After adding the details to the base layers of the house, all that is left is to finish building the main section of the house.
For the main house, it is all blue other than the windows. Because the sides are built stacking 1×2 that rotate each, it is hard to keep the build perfectly squared. This made adding the roof a bit tricky.
After adding 3 floors to the house, it’s time to add the roof.
The roof is very straightforward. Each layer makes the roof a bit smaller and creates a cone. Adding the roof is where you can see the cumulative effect of the main tower not being perfectly square. I was able to add on my roof, so I didn’t need to go back and square the main section.
Things I liked:
How many little details are there in the house between the porch and the chimney on the roof
Things I didn’t like:
How hard it was to keep the main tower square between floors