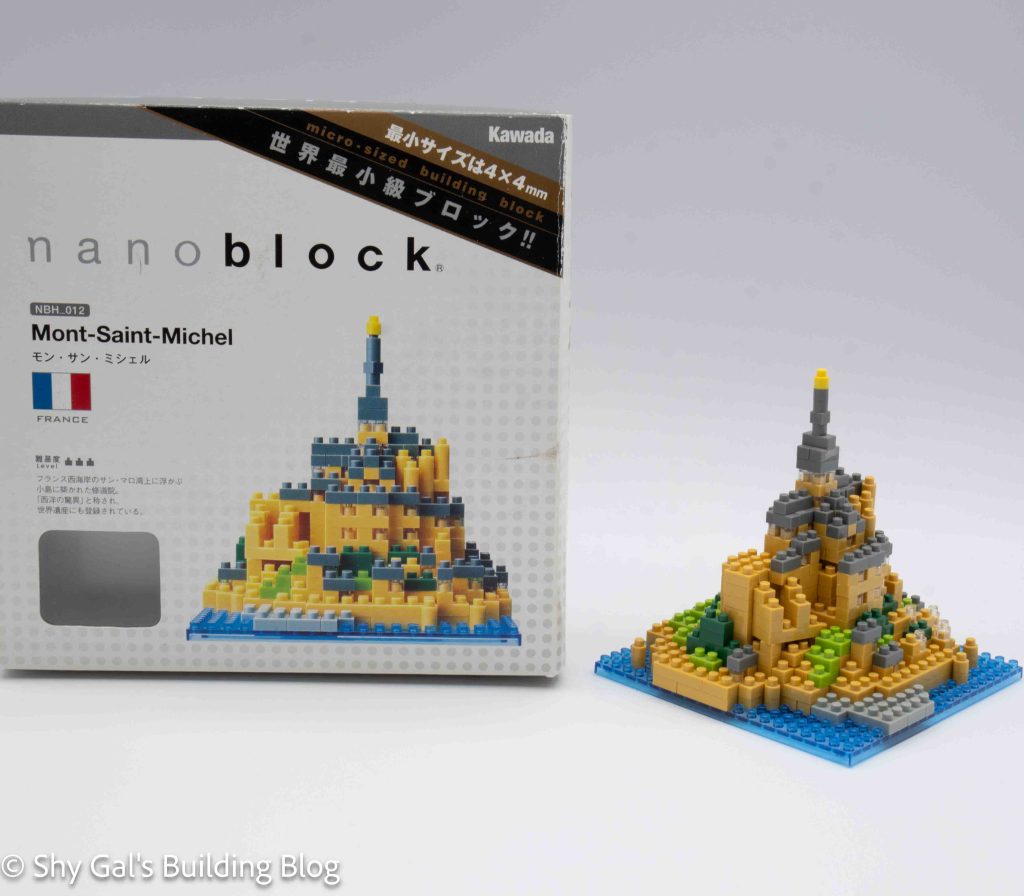
This post is a review of the nanoblock Mont-Saint-Michel build. Mont-Saint-Michel is part of the nanoblock Sights to See collection. Wondering what else is part of the Sights to See collection? Click here for a list.
Number: NBH_012
Country: France
Difficulty Rating: 3
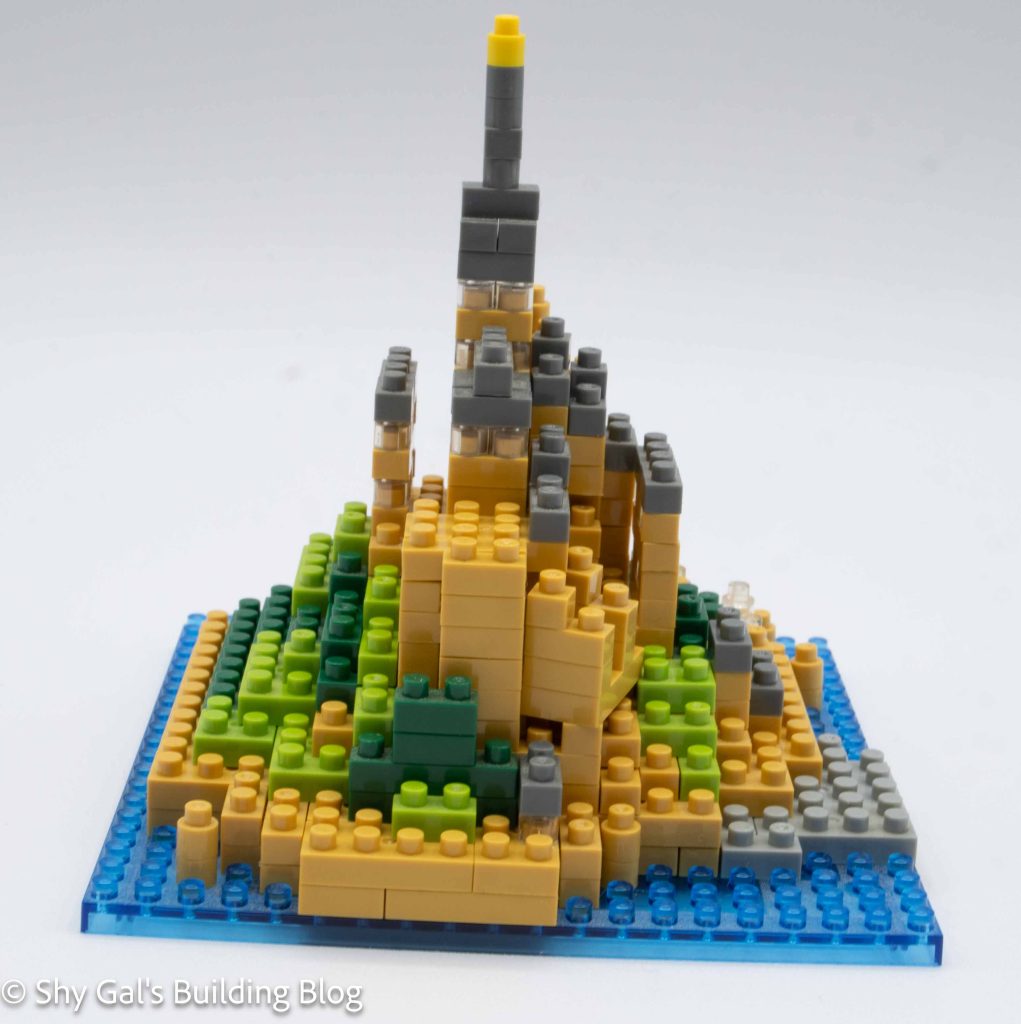
Mont-Saint-Michel is an island off the coast of Normandy, France. It looks like a walled city.
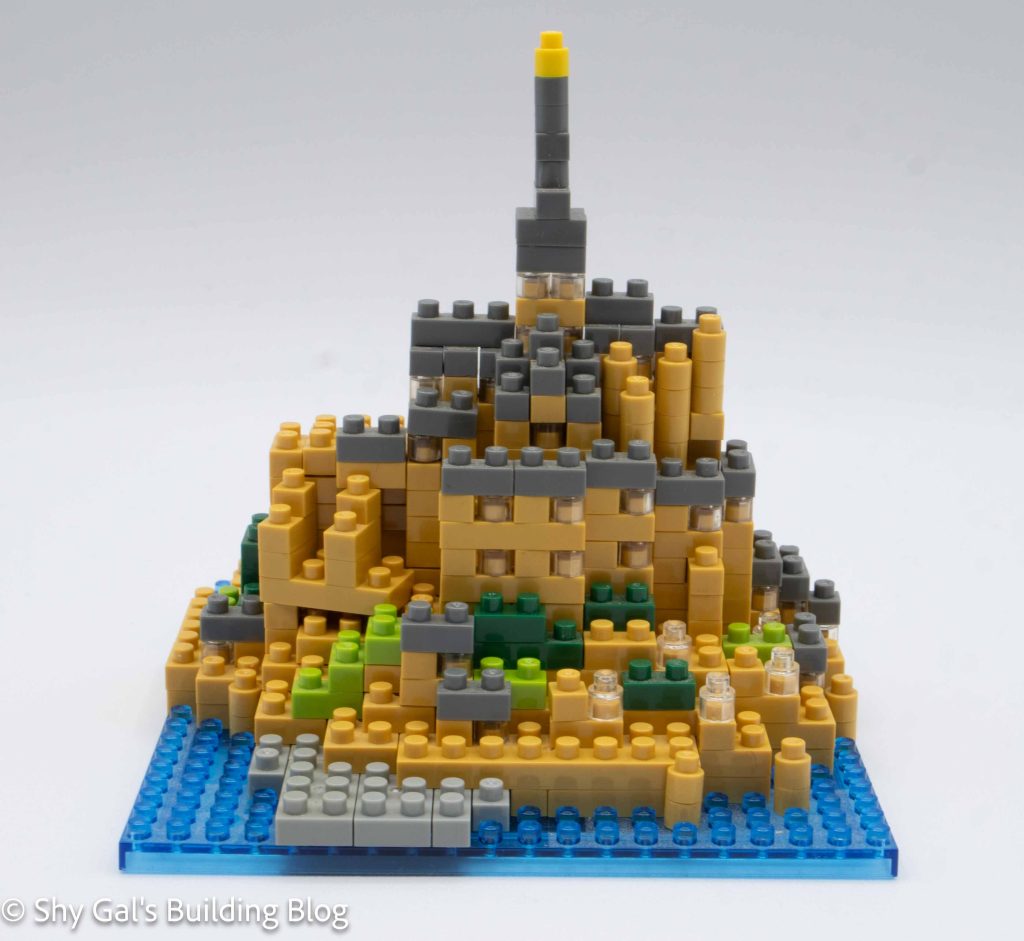
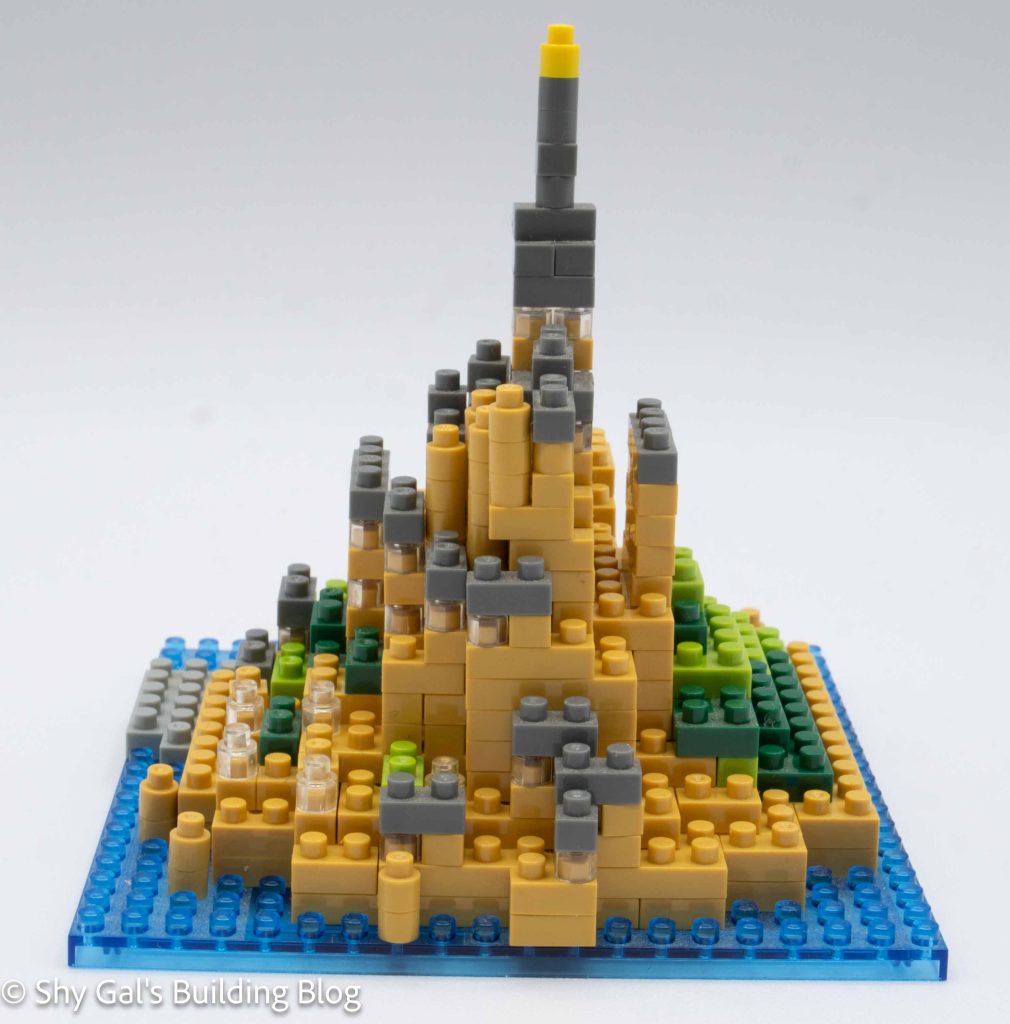
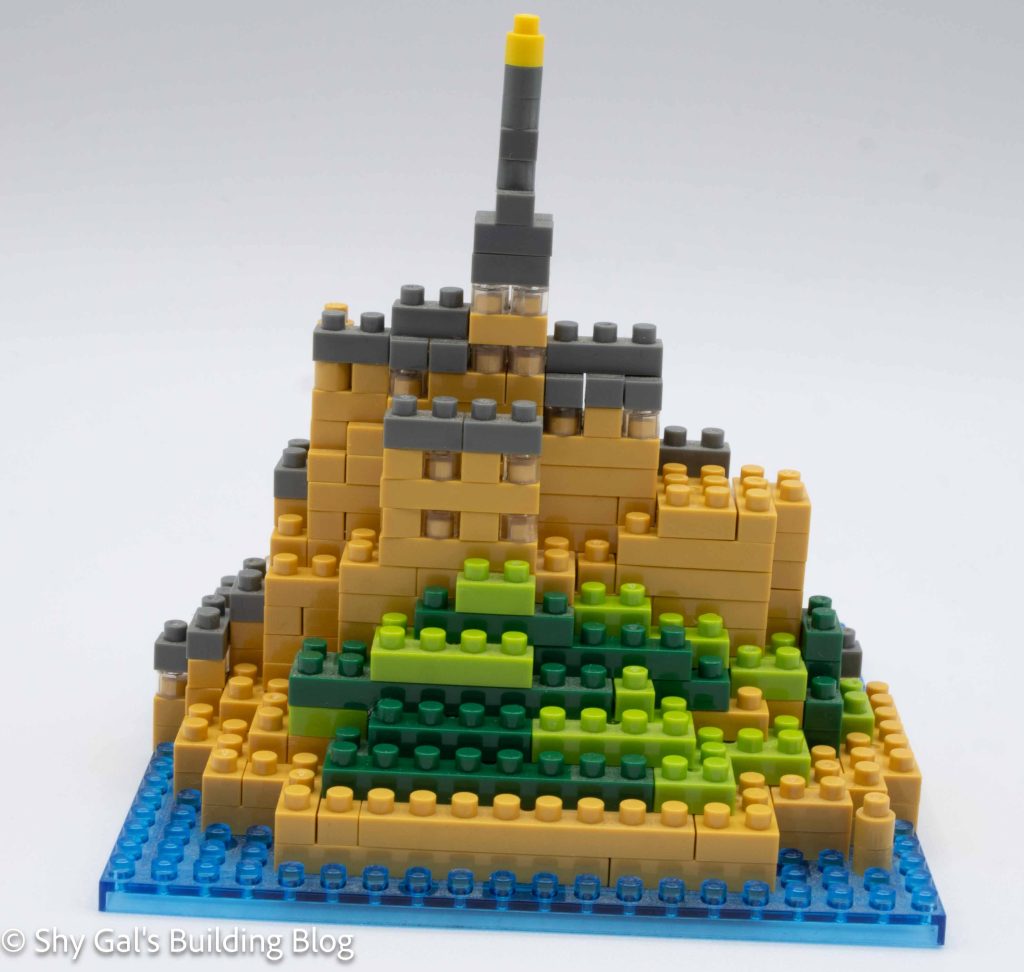
The build begins with outlining the island on a 20×20 clear blue baseplate. The next few layers are rings that make the outline smaller. Then, the ring is closed off by placing a 10×10 plate in the center of the ring.
There are a couple more layers until there is another unique placement. A brick is placed at an angle. The studs on the layer below are properly placed so that when the angled brick is placed, the brick is sturdy.
The rest of the build is very straightforward, going up in layers.
Things I liked:
I like the use of clear blocks creating gaps and windows
Things I didn’t like:
I’m not sure what the one random yellow brick at the top of the spire is supposed to be
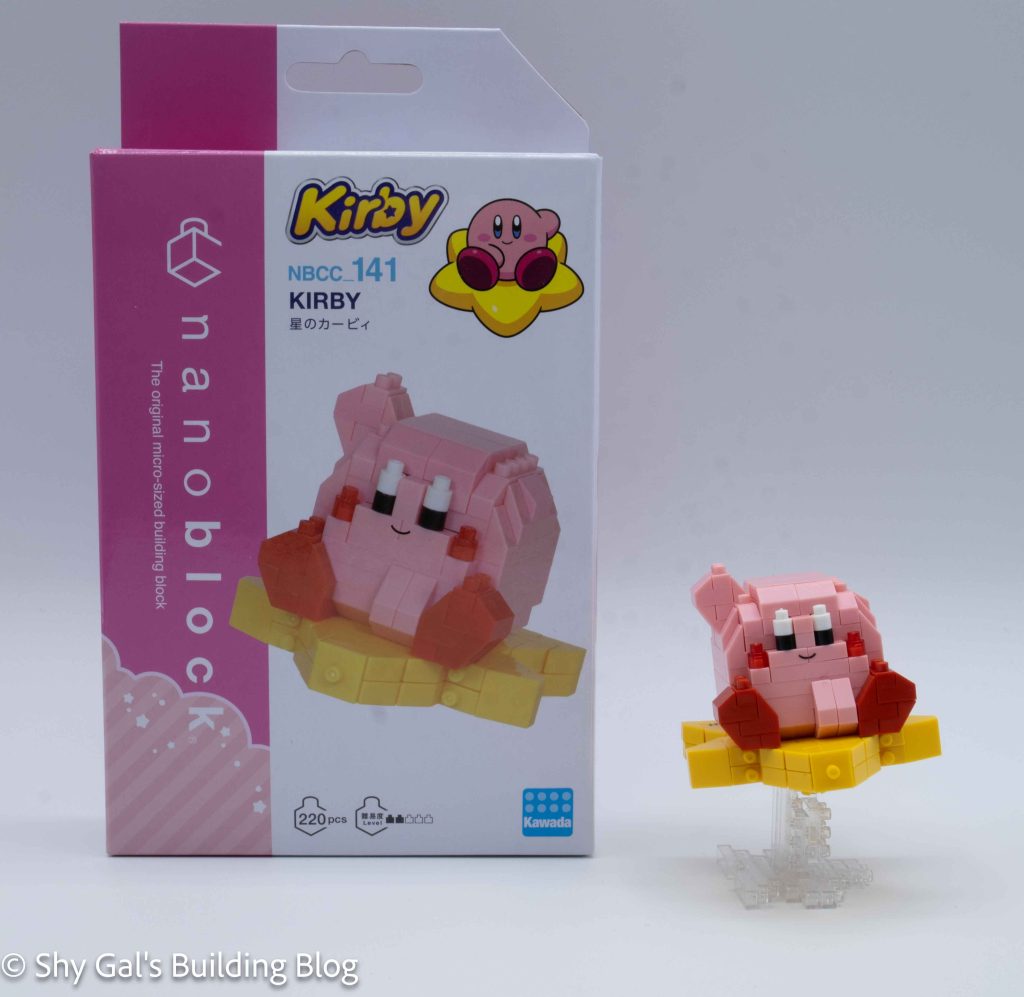
This post is a review of the nanoblock Kirby build. Kirby is part of the nanoblock Character collection. Wondering what else is part of the Character collection? Click here for a list.
Number: NBCC_141
Number of Pieces: 220
Difficulty Rating: 2/5
This kit is identical to NBCC_140 without the 30th sticker. There is also a clear version number, NBCC_160.
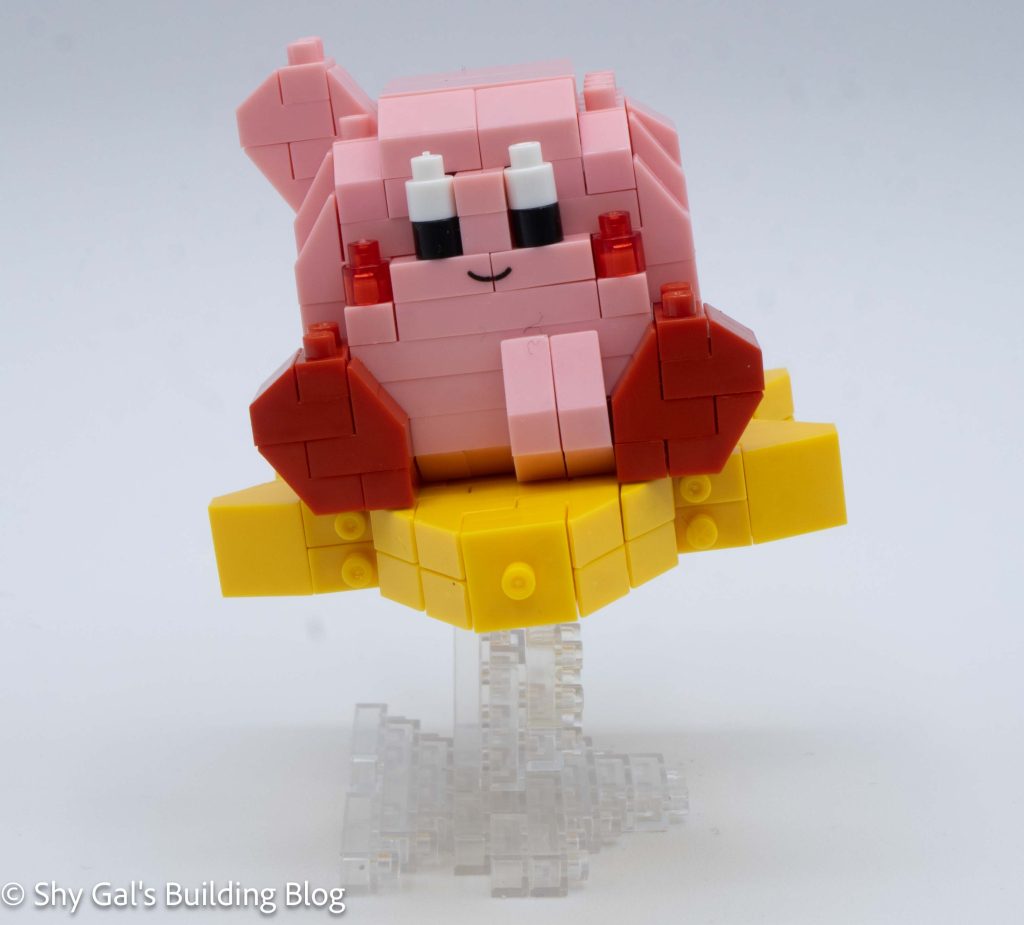
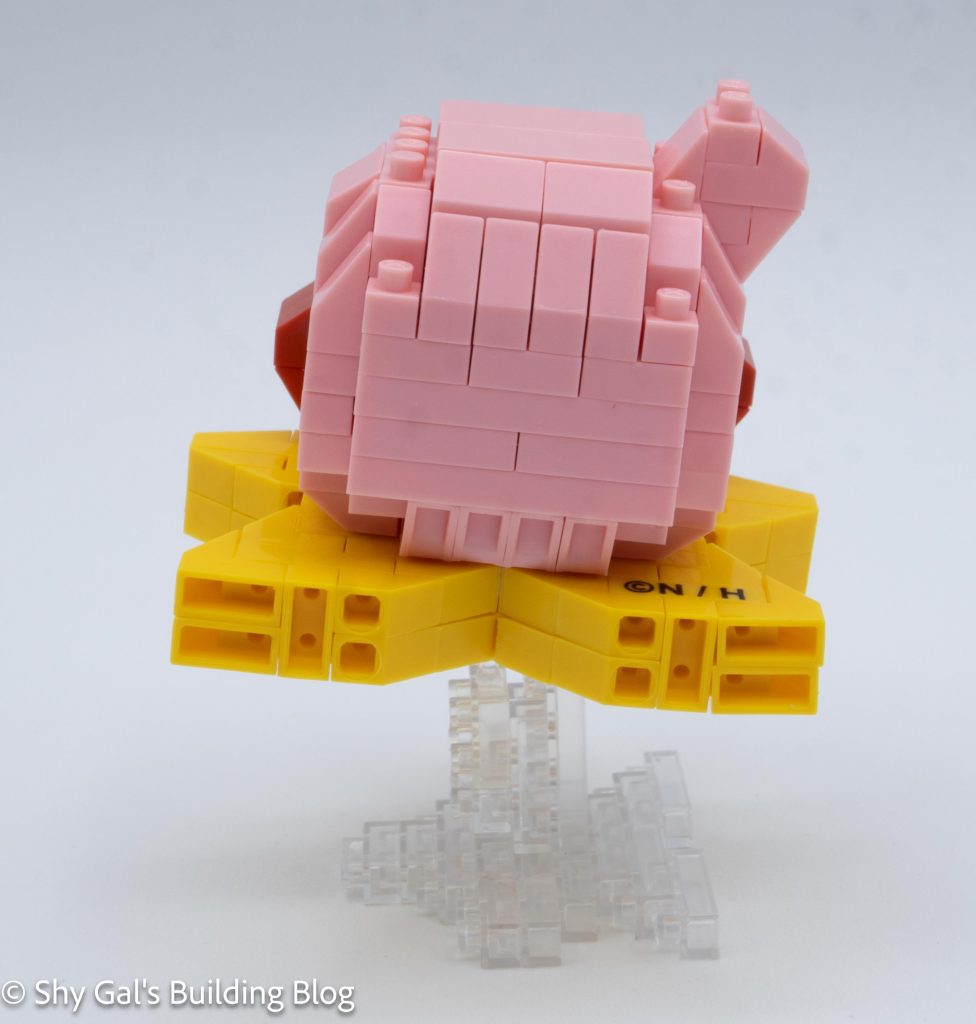
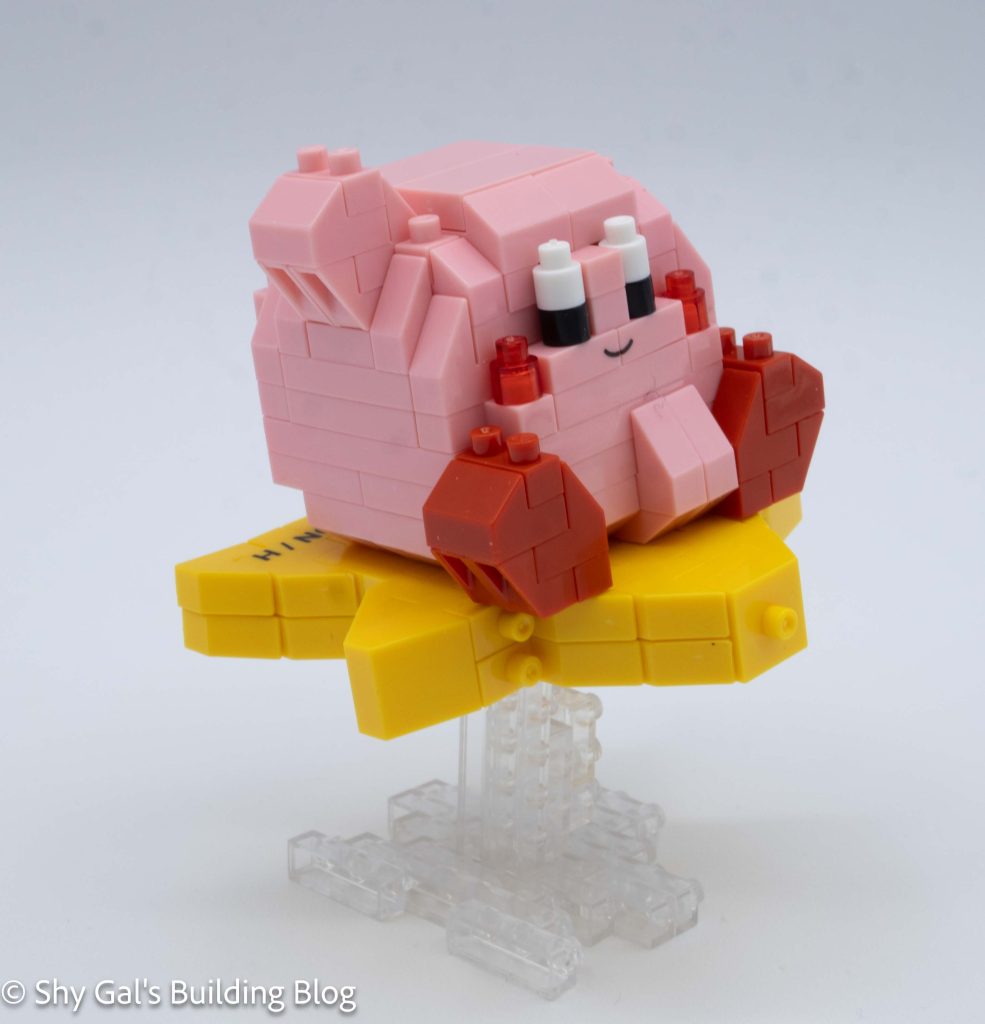
This build is made up of 3 sections. There is Kirby, the star, and the stand.
Kirby begins by making a base in pink bricks. Then, the feet are added to the base. After that, Kirby begins going up in layers. Overall, things are fairly straightforward. In the step that adds Kirby’s mouth, I didn’t understand from the instructions that there was a custom piece with the mouth printed. Once I found the piece, the only other concern was the slanted pieces.
Kirby has 2 different slanted pieces. I appreciated that the colors in the instructions were different enough that it was very clear when to use which slanted piece.
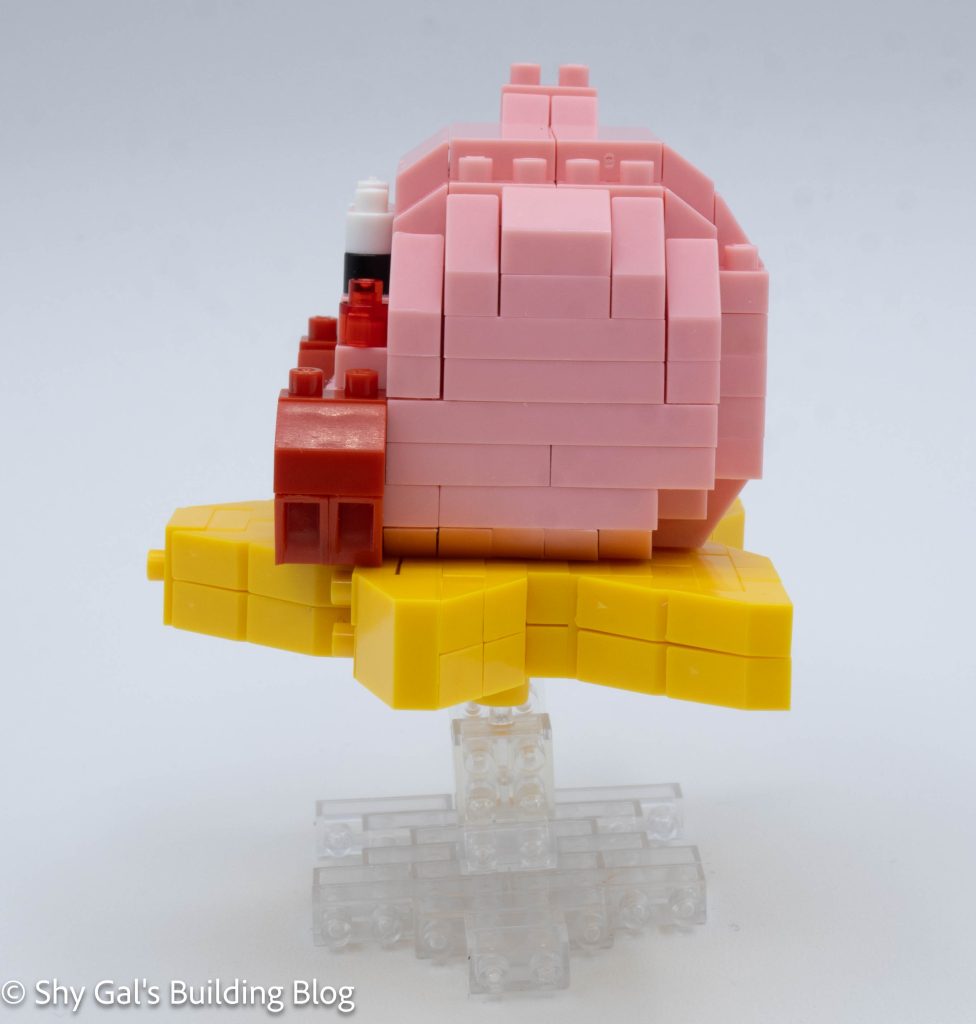
The final step to building Kirby is to finish his hand and smooth out the top of his head.
The star is created by several layers of yellow bricks with a width of 2, so the final build is 2 bricks tall. The first step creates a gap in the 2 depth. I wasn’t sure why there was a gap, but it became clear when I put the sections together. The second step adds the socket of the ball joint, which is needed to connect the star to the stand.
After adding the socket, the rest of the star is fairly straightforward until the final step. There are 2 notable things about the final step. First, there is a custom-printed brick. I think it is for copyright, but I’m not sure for what exactly. Secondly, it wasn’t clear that it mattered what order sections were added. It was pretty easy to fix when I realized the order did matter.
Kirby sits on studs that point out the star, so he is very stable.
The stand is fairly straightforward. It begins by building up several layers of clear bricks. After building the layers, some additional bricks are added to the bottom layer. The stand is then laid on its side so the ball joint is up in the air.
Kirby’s star attaches to the ball joint on the stand. The part sticking up above the joint goes into the hole in the star to allow the star to sit at an angle.
Things I liked:
The custom brick for Kirby’s mouth because it means there isn’t a sticker for the mouth
How Kirby sits at an angle on his star ride
Things I didn’t like:
It was really hard to tell about the special brick that had Kirby’s mouth was a special brick
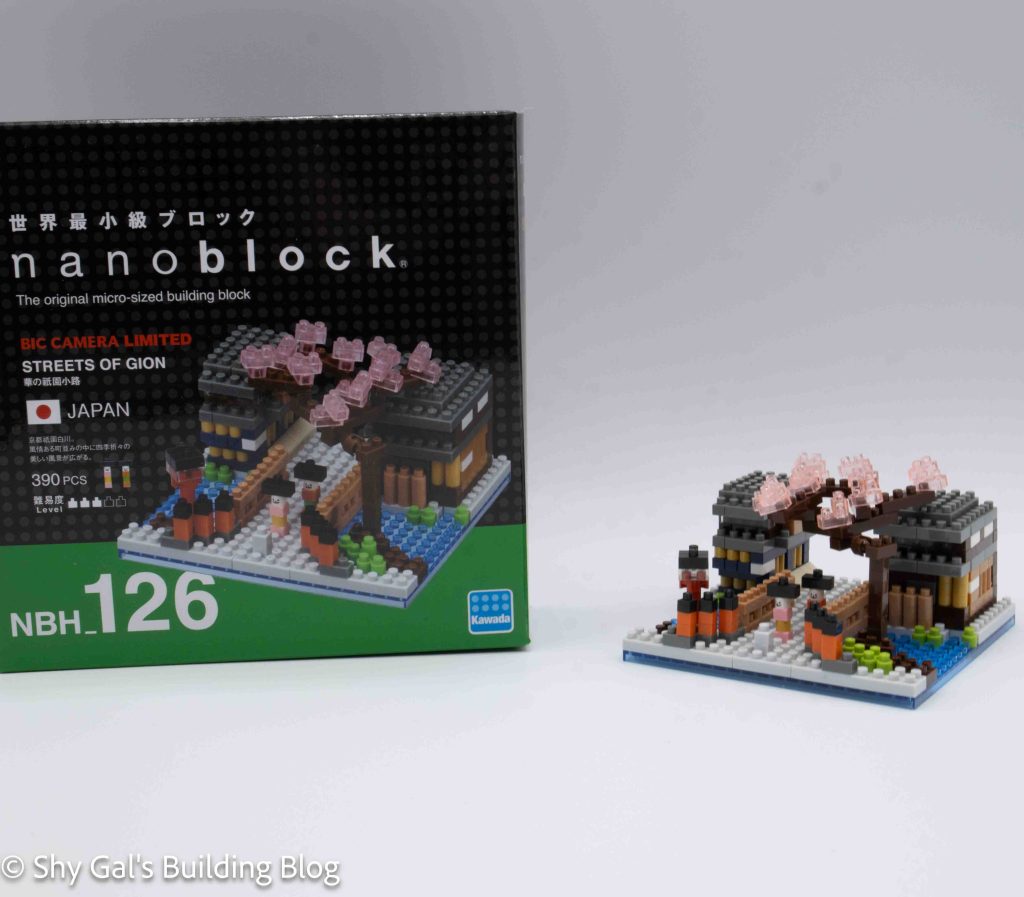
This post is a review of the nanoblock Streets of Gion build. Streets of Gion is part of the nanoblock Sights to See collection. Wondering what else is part of the Sights to See collection? Click here for a list.
Number: NBH_126
Country: Japan
Number of Pieces: 390
Difficulty Rating: 3/5
This kit is labeled as Bic Camera Limited. Bic Camera is a shop in Japan, so I’m guessing the set was only available there.
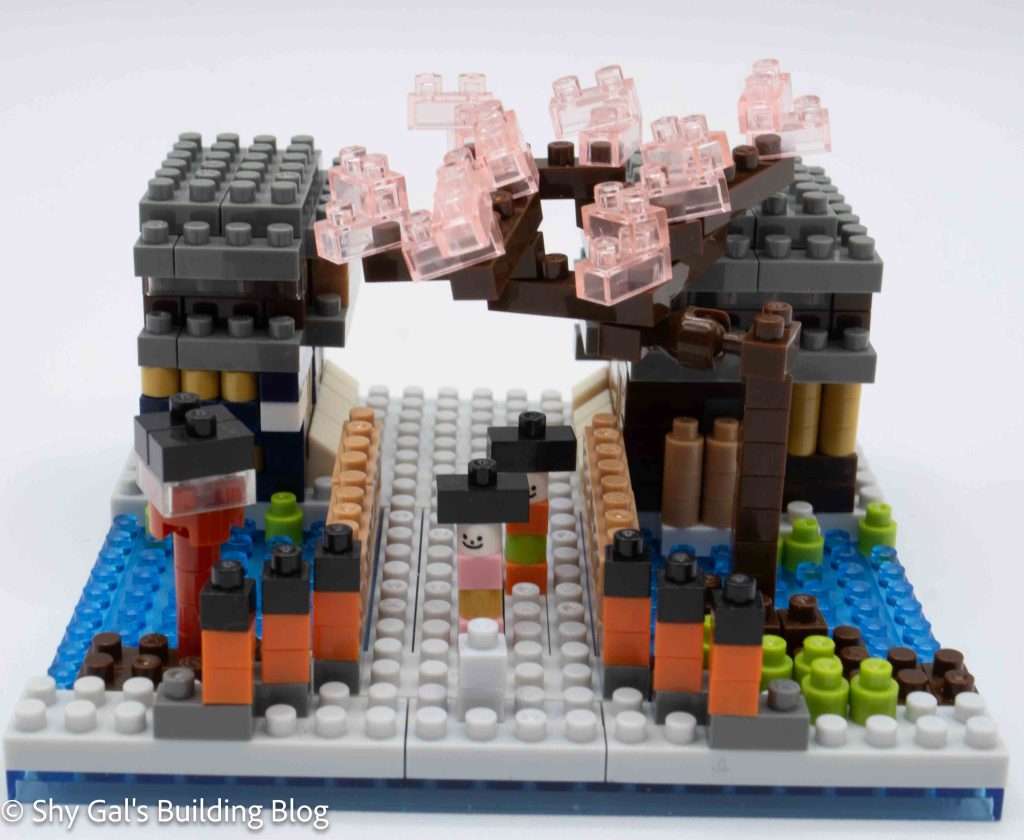
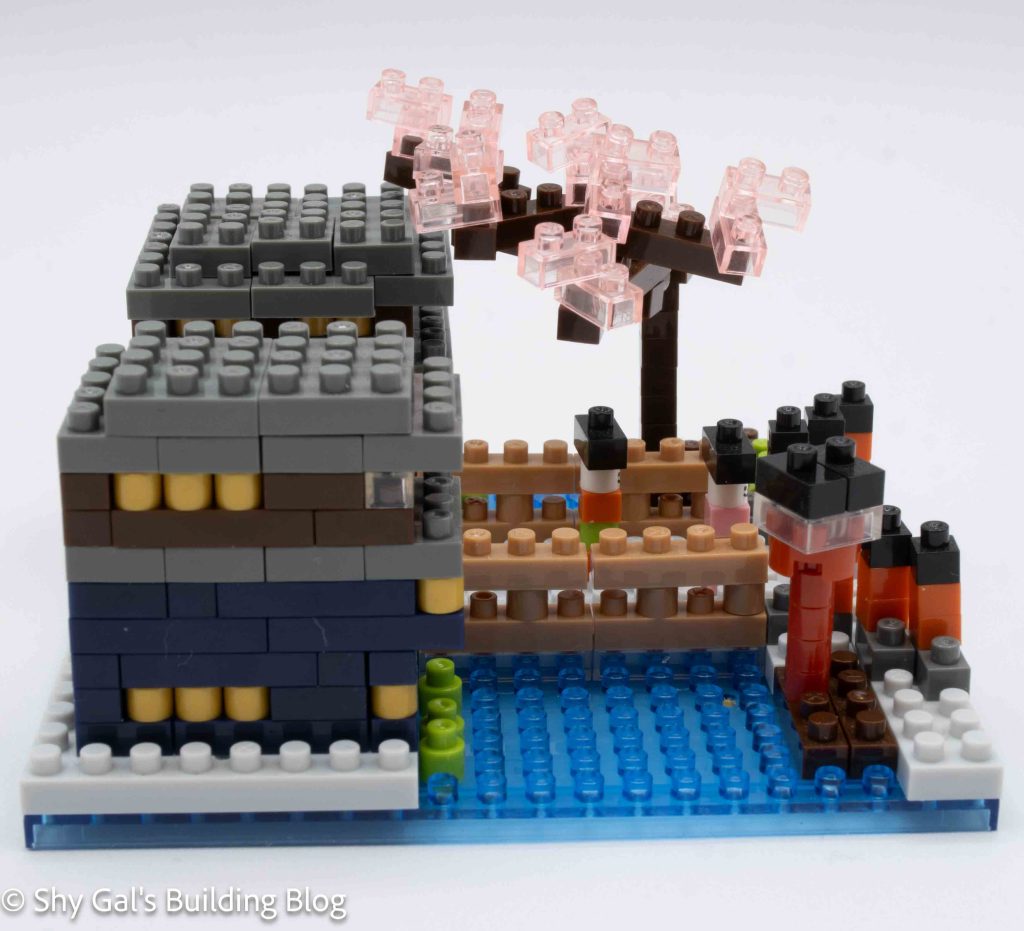
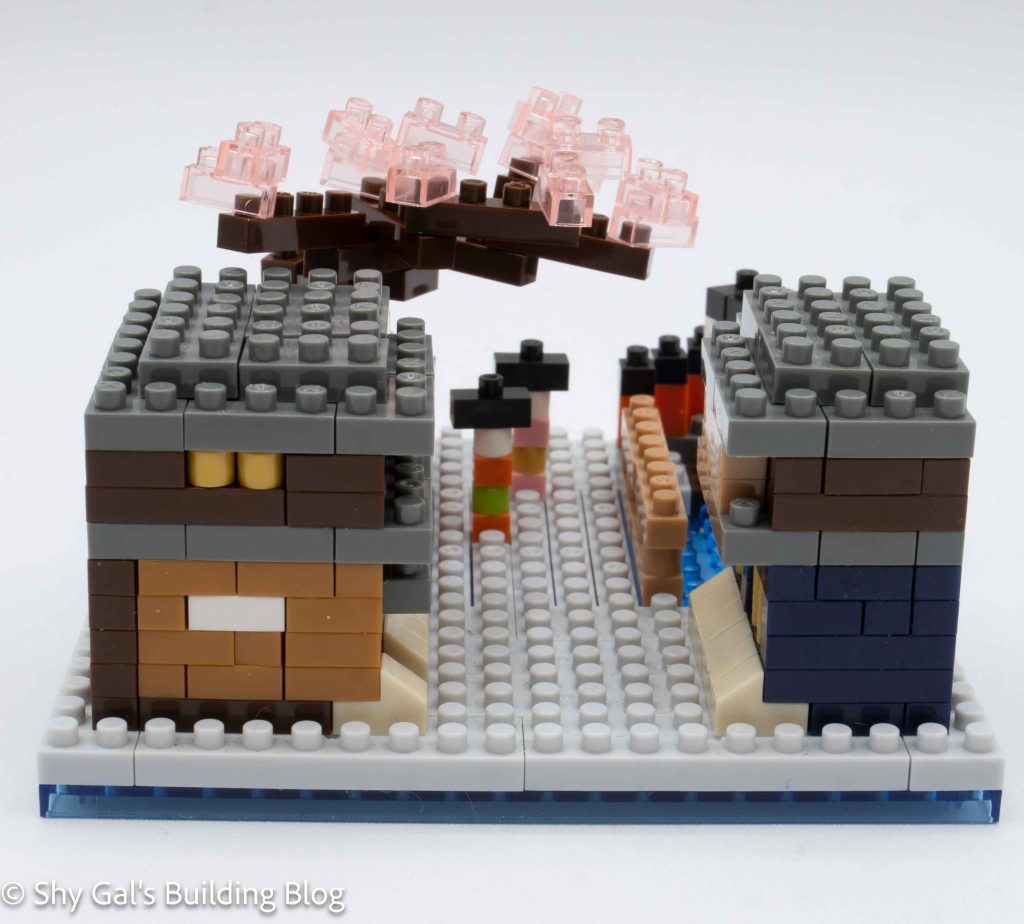
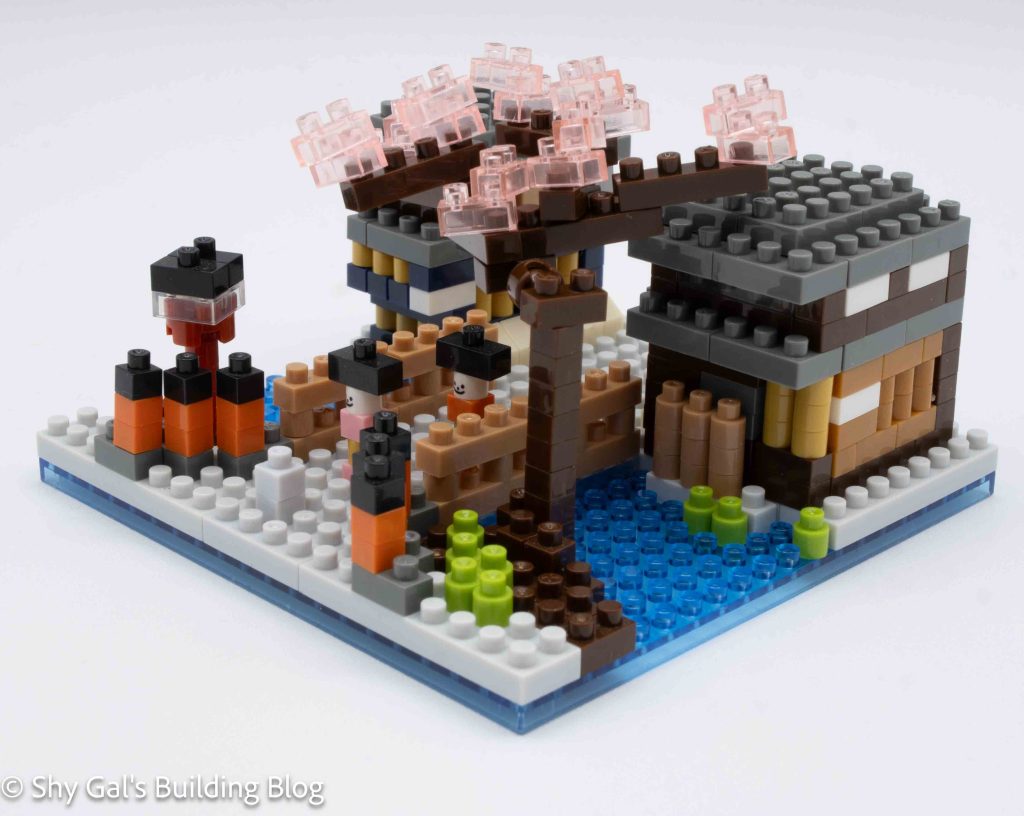
Gion is a region of Kyoto that is famous for having geisha. This build includes 2 nanoids that have white faces like the geisha would have when they go out in public. I did include the nanoids because I could tell they were on a similar scale to the buildings in the background.
I bought this kit used so all the bricks were combined into 1 large ziplock bag. This kit uses several shades of brown, gold, and yellow. It was very difficult to tell which brown to use. I looked at the photos on the box to decide which color to use and when.
The build begins by laying out bricks on the clear blue 20x2o base plate. The next few layers add bricks all around the base, creating the nanoids, the bridge, and the foundation of the buildings.
The next step is to build the building. The two buildings are built in parallel and go up in layers. One building is blue and gold. The other building is brown and gold, and it was difficult to figure out the right colors.
Then, some details are added to the front of the build, including the trunk of the tree.
The final step is to build the top of the tree. There are 2 options for coloring. There is a spring version and a fall version. I built the spring version. I had a hard time following the directions and getting the branches correct. I did get a tree top that looked approximately correct, so I attached it to the top of the tree.
Things I liked:
I really like that the nanoids have white faces like geisha
I like that the trees can match the seasons
Things I didn’t like:
I wish the directions for the clear had been clearer for colors and the tree top
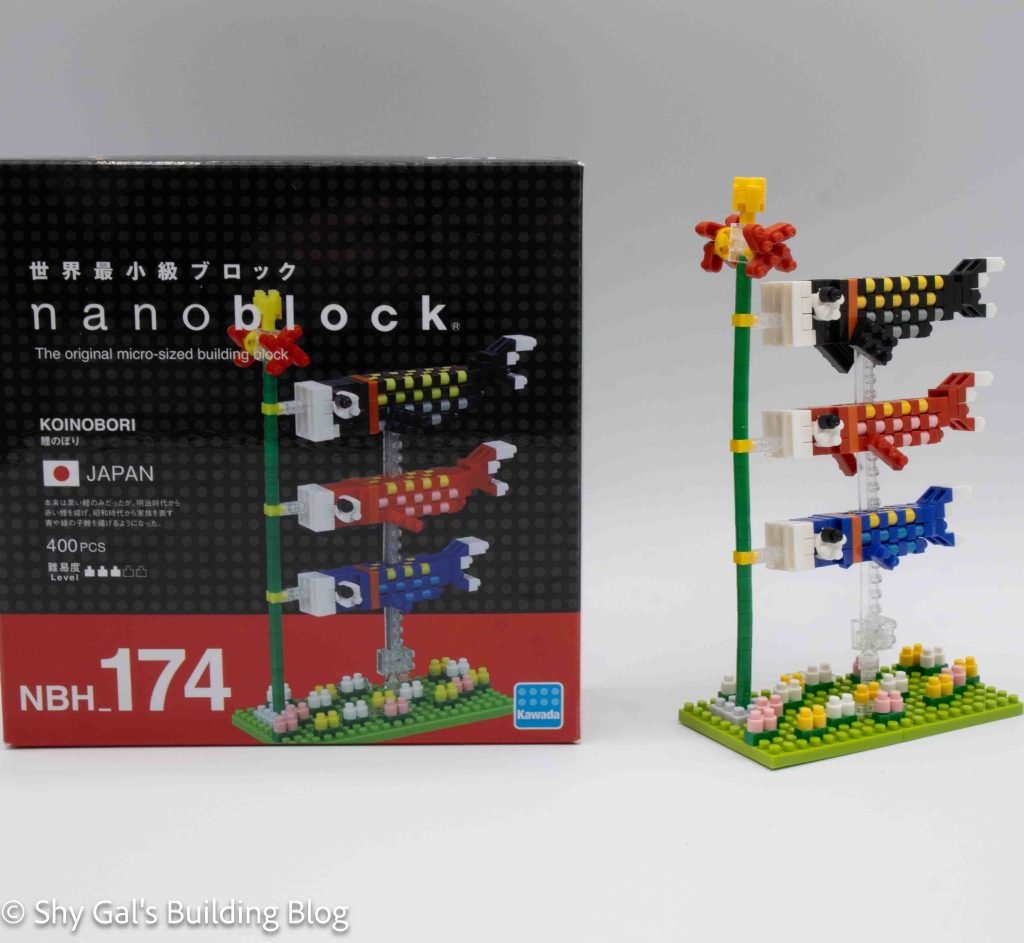
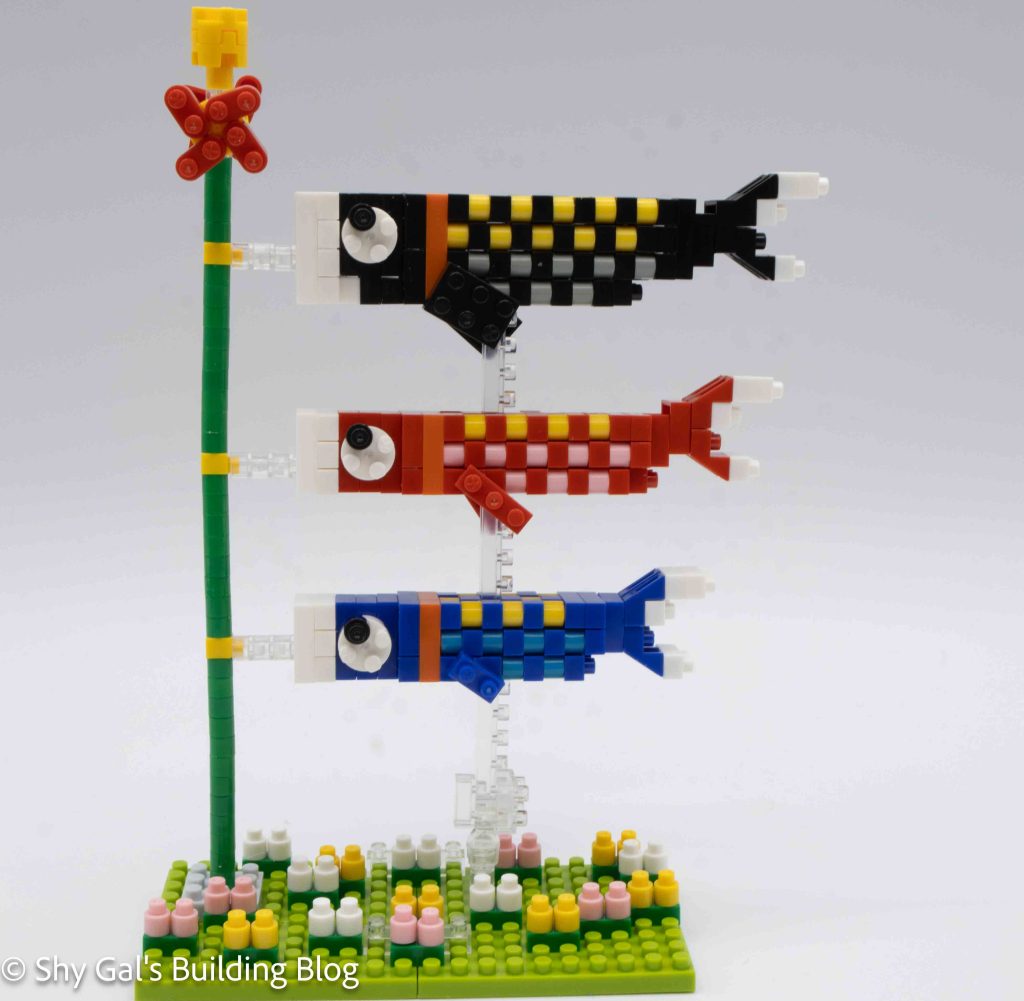
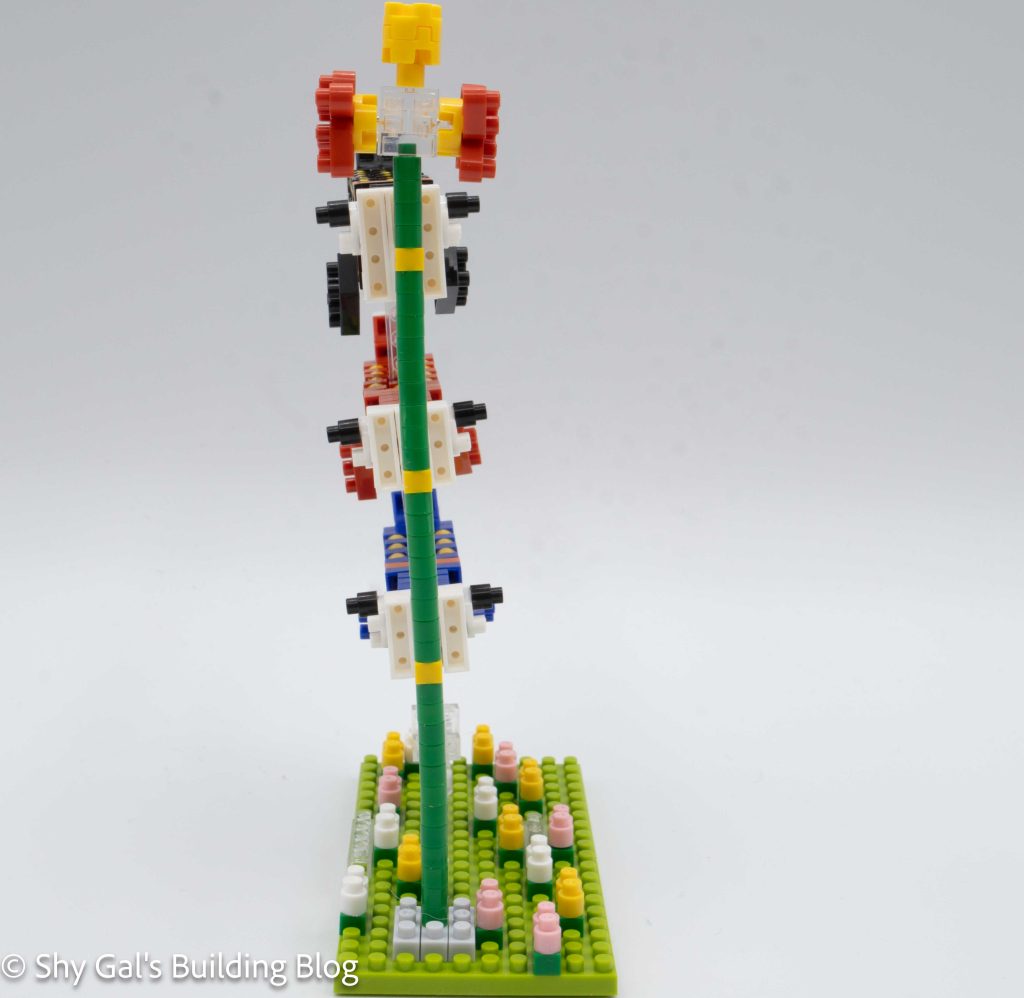
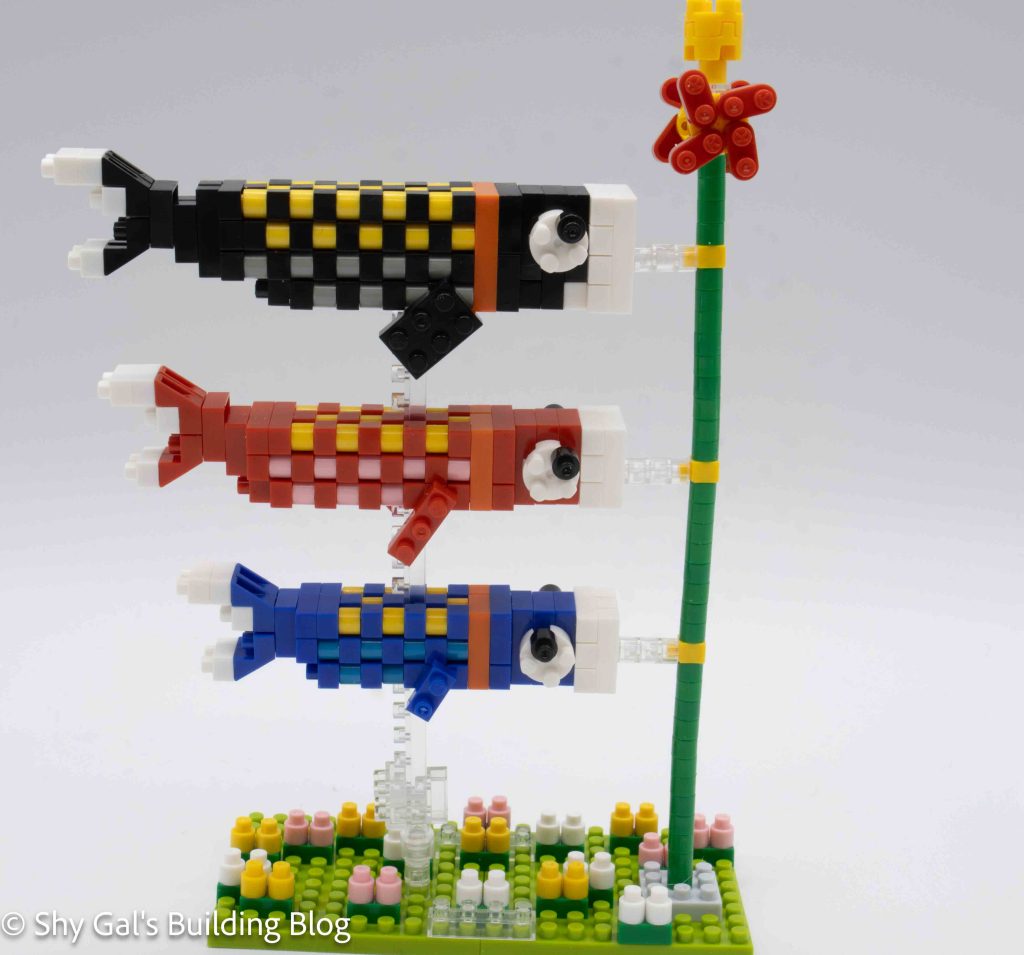
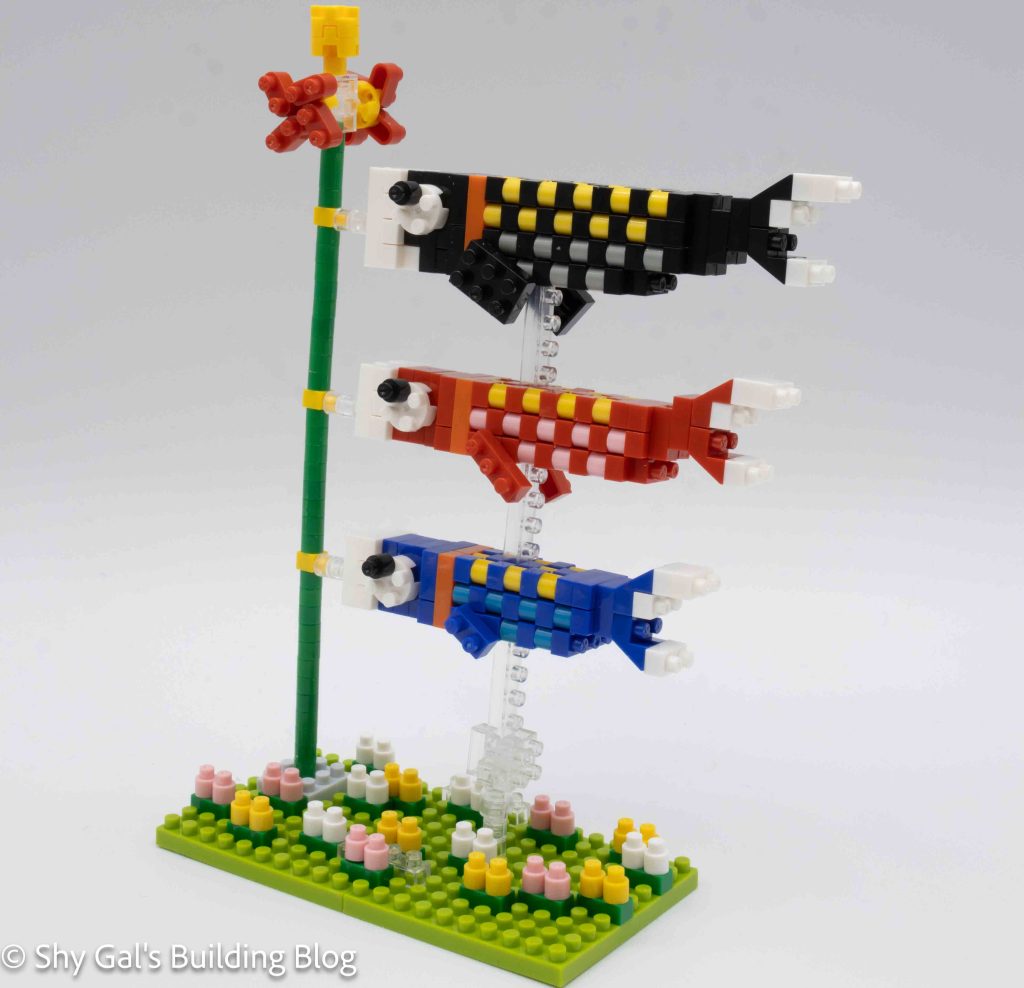
This post is a review of the nanoblock Koinobori build. Koinobori is part of the nanoblock Sights to See collection. Wondering what else is part of the Sights to See collection? Click here for a list.
Number: NBH_174
Country: Japan
Number of Pieces: 400
Difficulty Rating: 3/5
This kit was a lot more difficult to build than I had originally suspected. This is because of how the koi kites are built.
The kit begins with the black fish on top. After building the head, a connecter brick is added to the bottom of the fish. Then there are a bunch of steps creating the body of the fish flipping around where the scales are. It was tricky to keep track of which exact step I was on while building the body of the fish since lots of the steps were nearly identical. (It may have been easier if I had used a counter to keep track of which step I was on. Finally, the tail is added.
Then, the next 2 fish are added and chained together using the connection pieces. Overall, each of the fish is built in the same manner to create the scale patterns on the side of the fish.
The next step is to built the base. This was fairly straightforward since other than the pole base, the lone round clear brick, and the bricks holding the plates together it didn’t really matter where grass was added. I do like how the grass hides the other things on the baseplate so it appears the kites are floating.
The next step is to attach the fish to the base plate. I missed there is a 3rd clear brick originally so I needed to add that after adding the pole. Then the pole is attached to the base and the fish are attached to the pole.
Then, the fins on the sides of the fish are added. I needed to be really gentle so that the fish stayed centered.
The final step is to add the pinwheels on the top of the pole.
Things I liked:
I like how the grass hides things on the baseplates, so it looks more like the kites are floating
I like how the finished scales look on the fish. I feel that it catches the effect of the real kites
Things I didn’t like:
I wish the instructions for building the fish had been less cramped. I think it would be easier to keep track of where I was
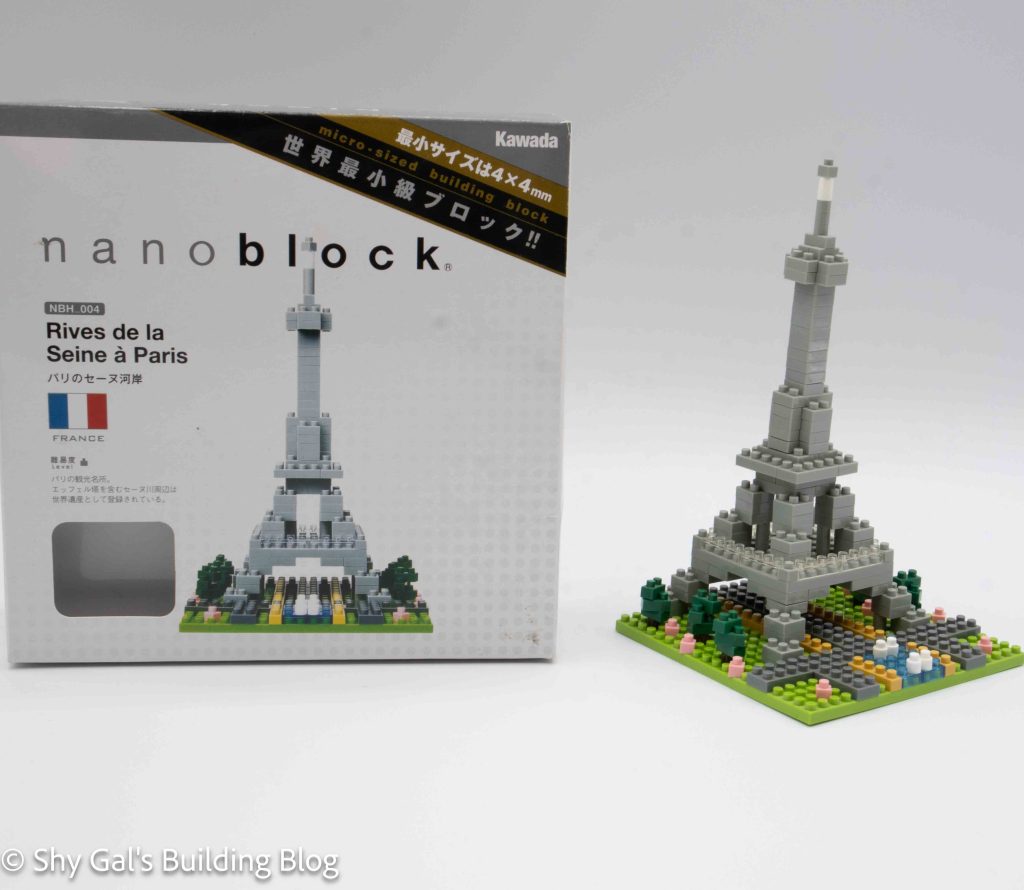
This post is a review of the nanoblock Rives de la Seine a Paris build. Rives de la Seine a Paris is part of the nanoblock Sights to See collection. Wondering what else is part of the Sights to See collection? Click here for a list.
Number: NBH_004
Country: France
Difficulty Rating: 1
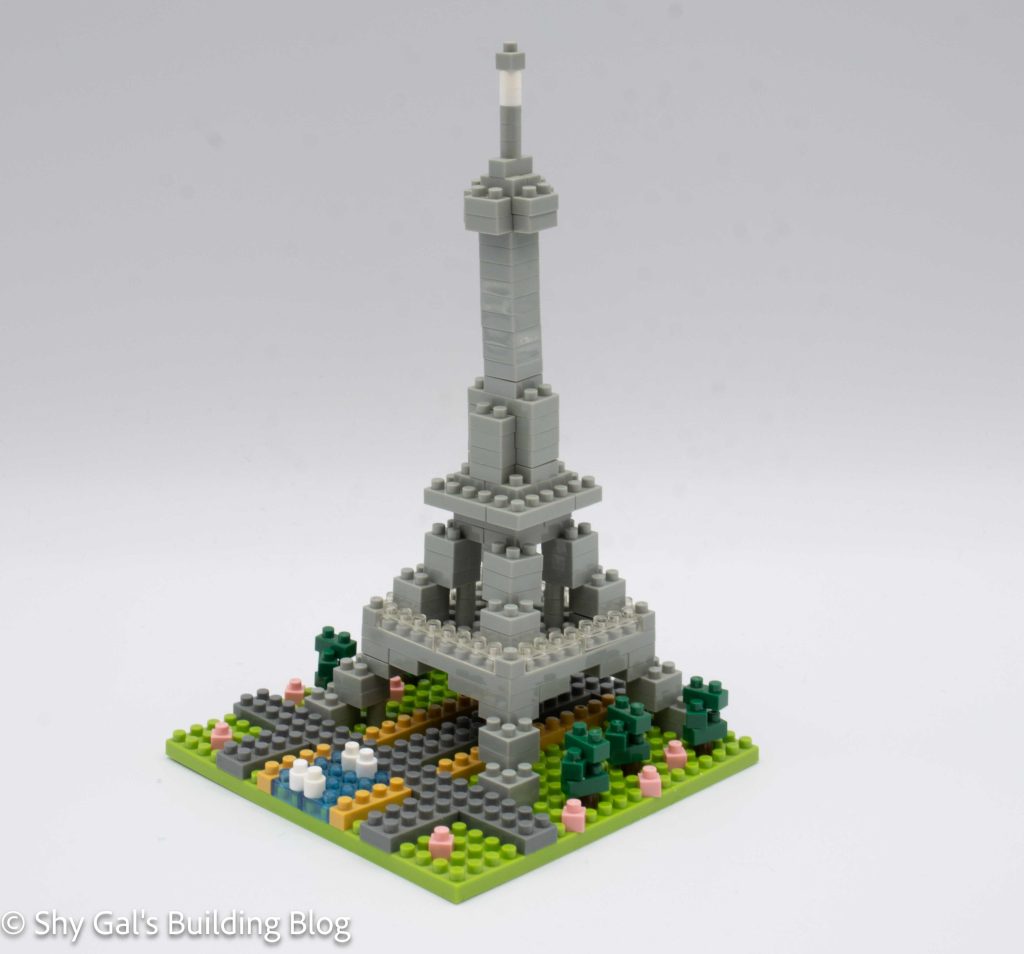
Rives de la Seine a Paris translates to Banks of the Seine in Paris. This build is actually of the Eiffel Tower which is on the Seine.
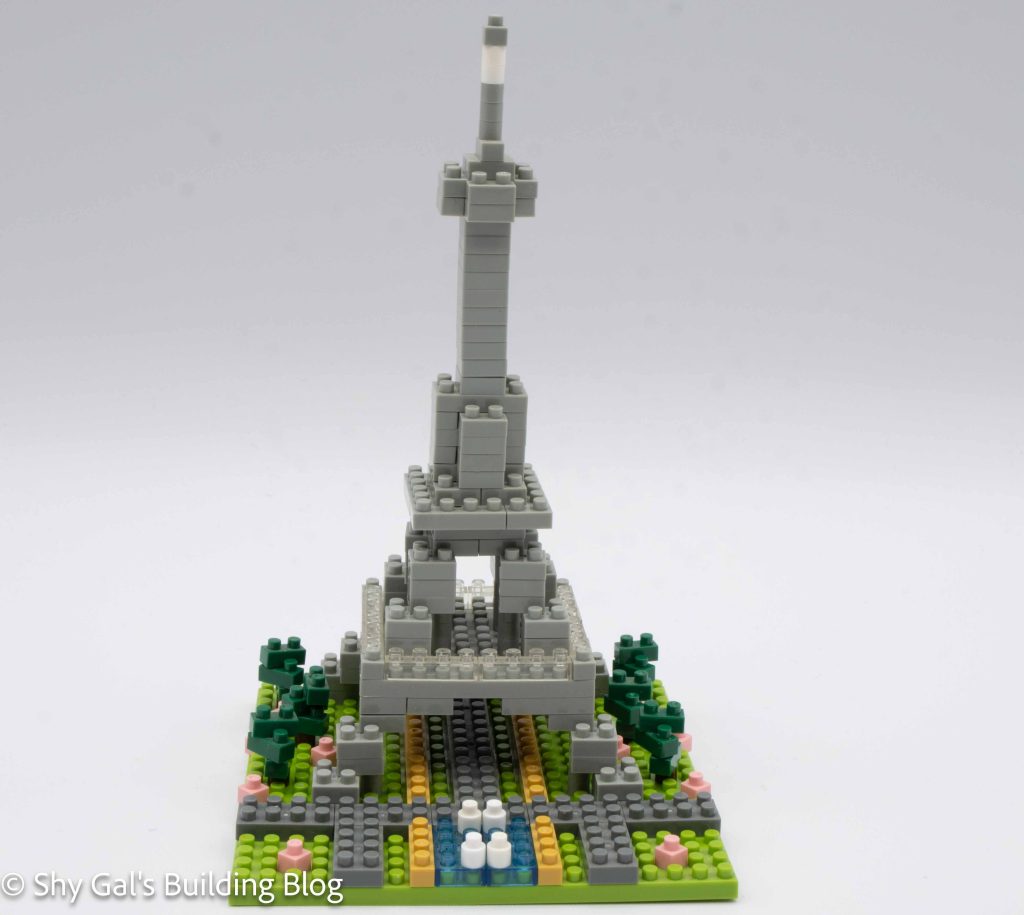
The build begins with laying out the foundation bricks on the base plate. There are 2 images for how the baseplate should look after step one, which makes me confident I had the scattered bricks placed correctly.
The second step adds the trees and the second layer of bricks to the tower. I wish the trees had been added at the end because I kept knocking the trees as I added to the tower.
Then a smaller base plate is added to the tower to create the first viewing platform. I don’t really notice or see the clear the bricks on the outside of the tower so I’m not sure they add much to the build.
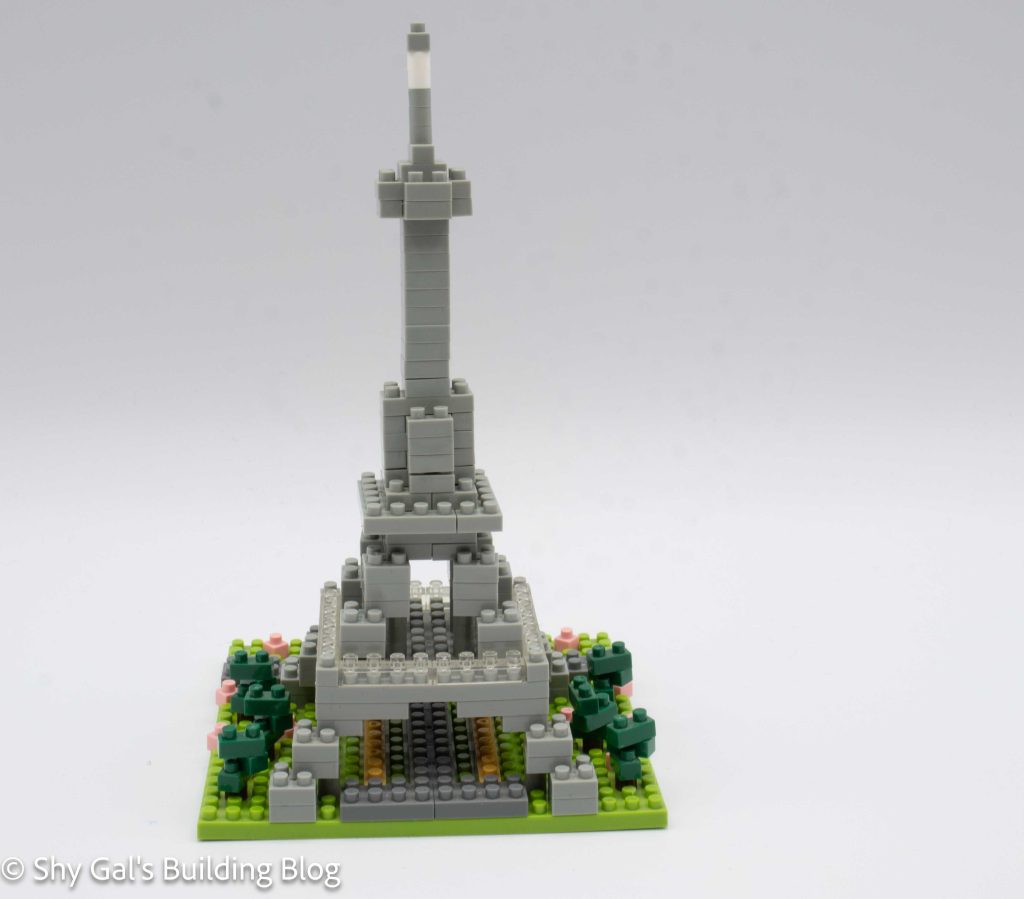
The rest of the tower goes up in very straightforward layers. The layers add the 2 additional viewing platforms and the radio antenna on the top of the tower.
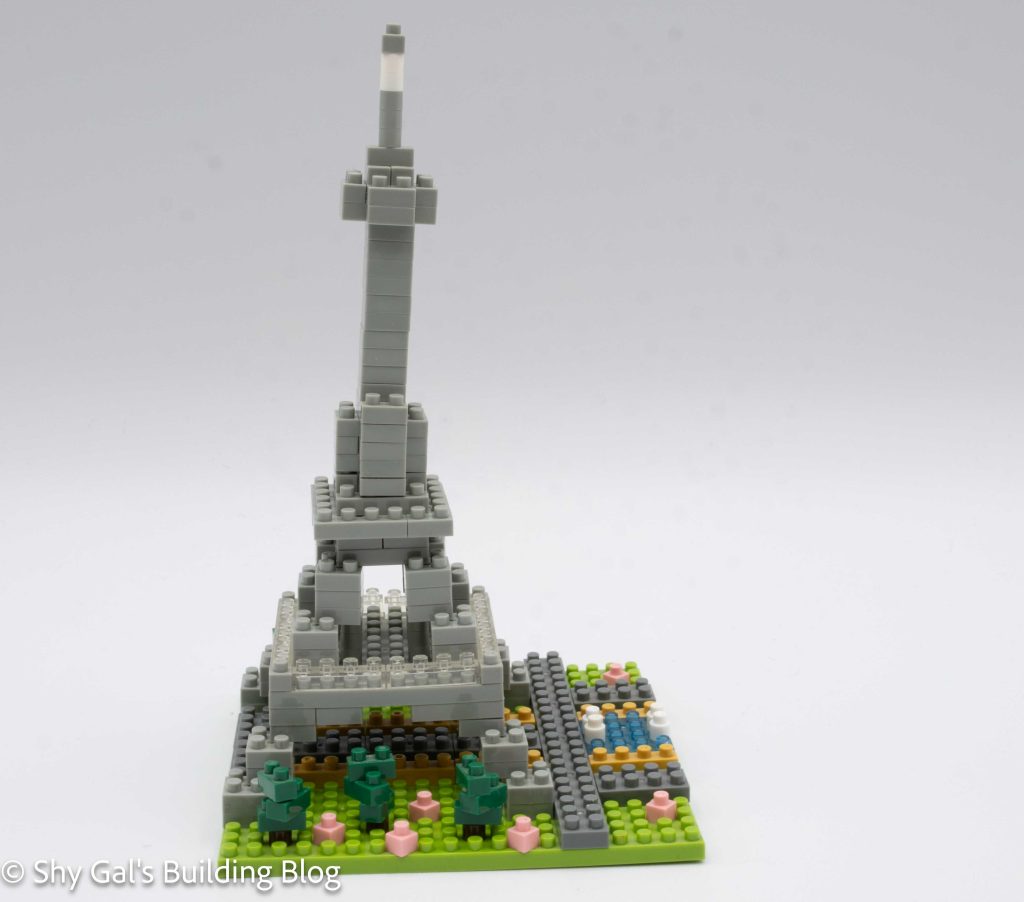
Things I liked:
I like that the base platform appears to be a complete scene instead of having random things as an afterthought because the base is bare
Things I didn’t like:
I wish the trees had been added at the end instead of the beginning because I kept bumping them as I built the tower
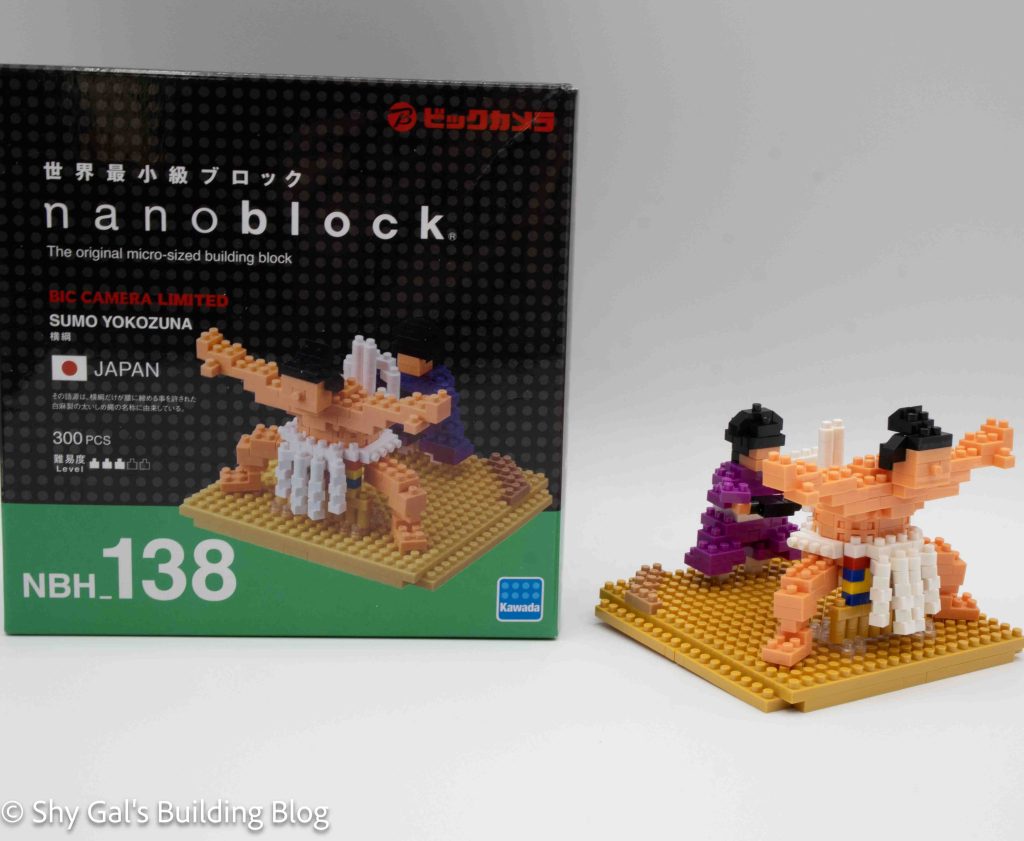
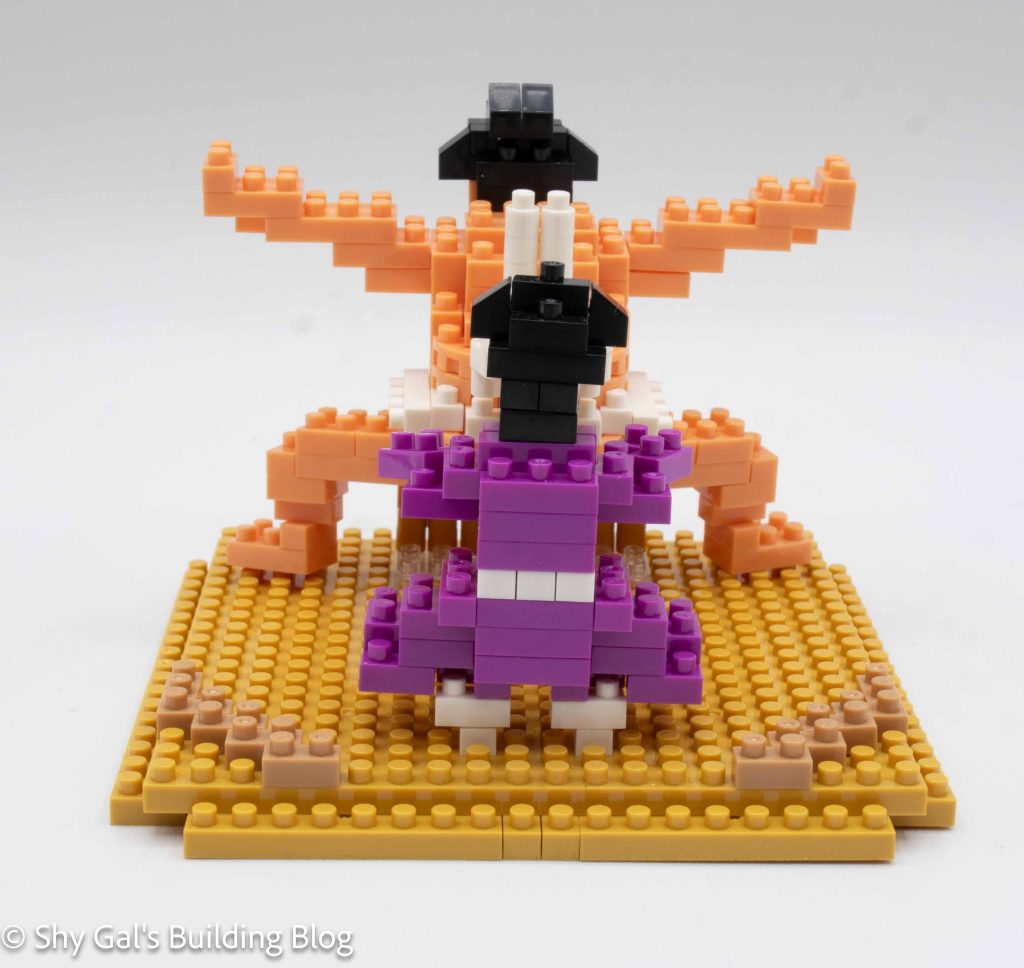
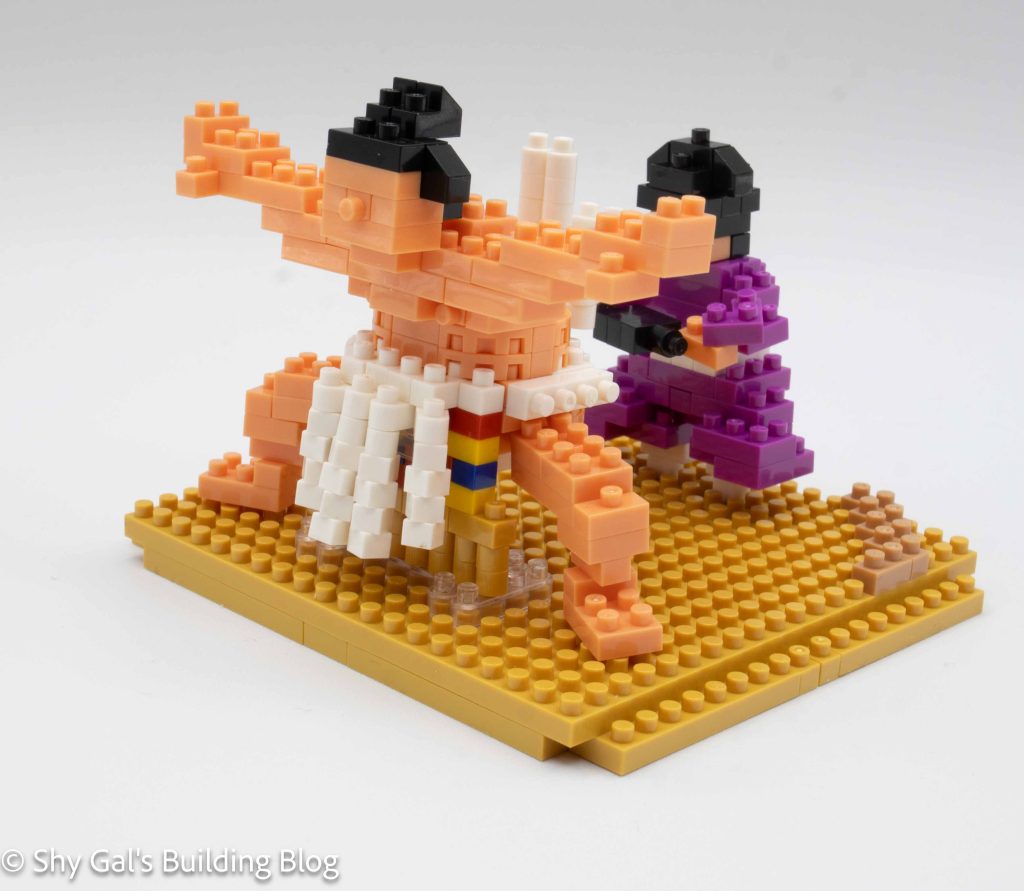
This post is a review of the nanoblock Sumo Yokozuna build. Sumo Yokozuna is part of the nanoblock Sights to See collection. Wondering what else is part of the Sights to See collection? Click here for a list.
Number: NBH 138
Country: Japan
Number of Pieces: 300
Difficulty Rating: 3/5
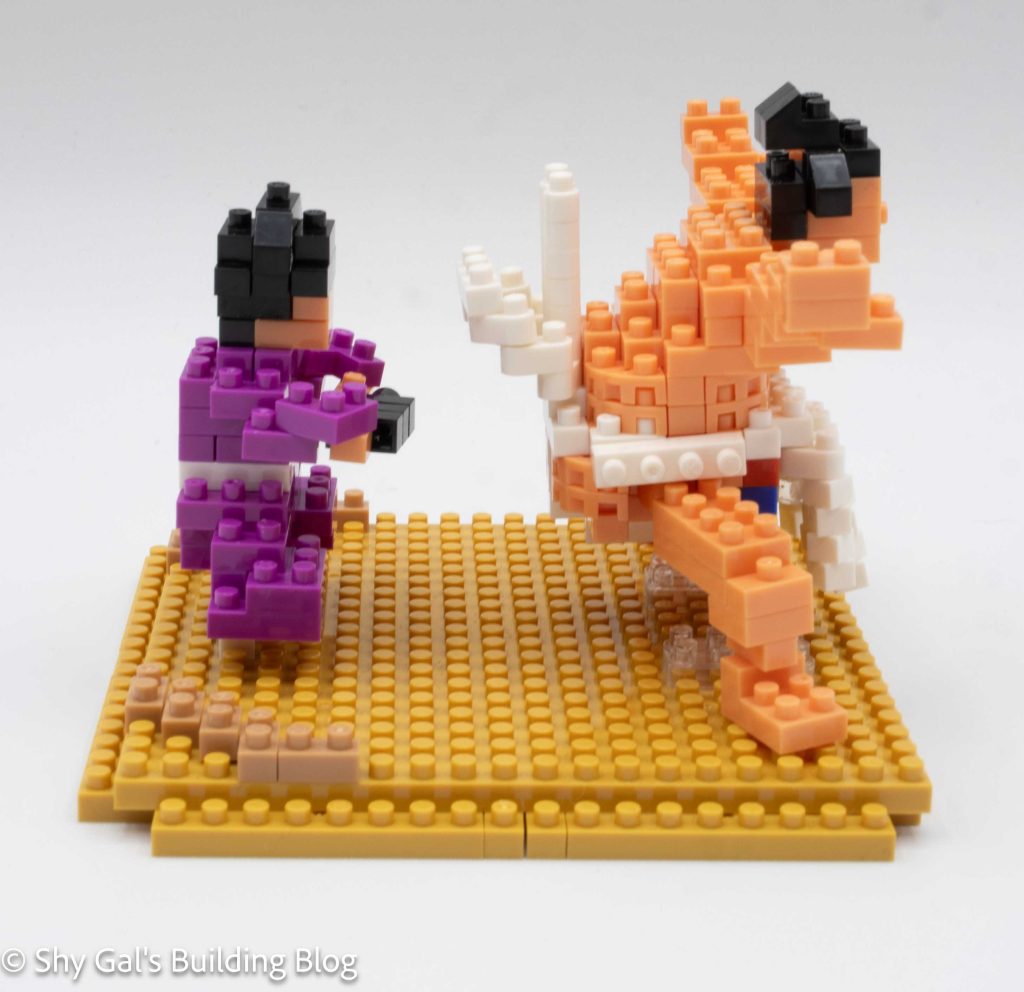
Yokozuna is the highest obtainable rank for Sumo wrestlers. I’m not sure why there are 2 people on this build, but I’m guessing the guy in purple is an aide or an assistant.
This kit is labeled as Bic Camera Limited. Bic Camera is a shop in Japan so I’m guessing the set was only available there.
This kit has 3 different sections. There is the base, what I am calling the assistant and the sumo wrestler.
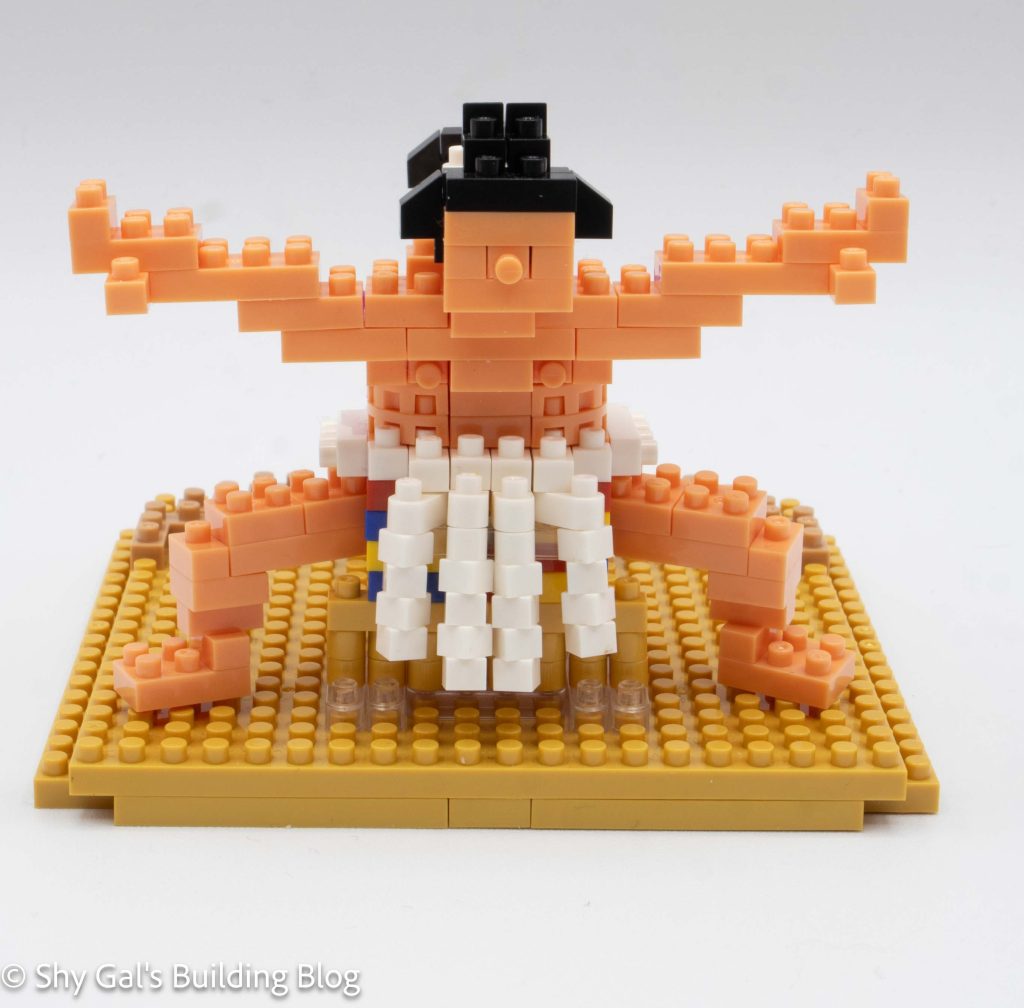
The base is very straightforward. I simply layered bricks around the outside of the 20×20 base plate to create the idea of a stage instead of just having a flat base. I also added the detail bricks to the top, along with bricks that would eventually hold the people in place.
The second section is the assistant. He begins with a layer of purple bricks. Overall he is very straightforward to build. There is some very unusual brick usage to create the idea that his arms are bent. This is achieved by using corner pieces and attaching bricks to just the ends of the corners. This creates a lot of movement in the arms.
The next step is to build the front of the mawashi (the traditional Sumo outfit). It begins with a simple stack of red, blue, and yellow bricks. Then, white ribbons are added in front of the rainbow stack, covering most of the colors.
Next is the actual sumo wrestler. He begins with a single white brick for the bottom of the mawashi. Then, skin tone and white bricks are added to the build to create the body. The body has some unique bricks, which are quarter circles I have never seen before. These unique bricks do a great job of creating curves for the stomach and back of the sumo wrestler.
Once the body and mawashi are completed, the head is built and attached. Then, the legs are attached. The legs are somewhat posable because they are attached to the body with ball and socket joints.
Once the legs are attached, the Sumo wrestler is attached to the front of the mawashi on the base.
The final step is to build the arms. When I was looking at the instructions I was a bit confused because it wasn’t super clear that there are 3 different ways to finish the build depending on how the arms are placed. All three poses are shown on the box but I had completely missed that until I was trying to figure out the instructions. I went with the first option for how to pose the arms.
Things I liked:
I really like how the unique bricks look and how they create the curve of the body
Things I didn’t like:
I’m not sure why the assistant is there, so I think I would rather it was just the sumo wrestler