Review of nanoblock Violin NBC_018

Violin build and package

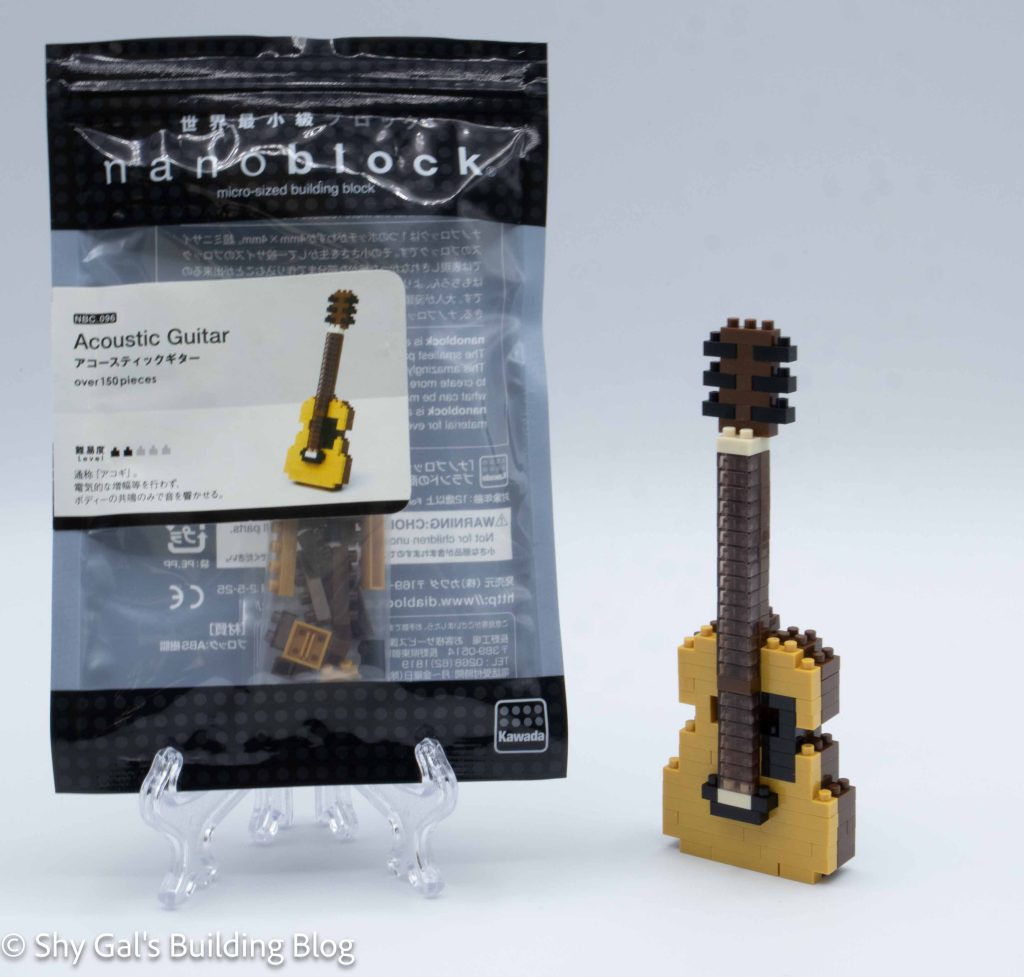
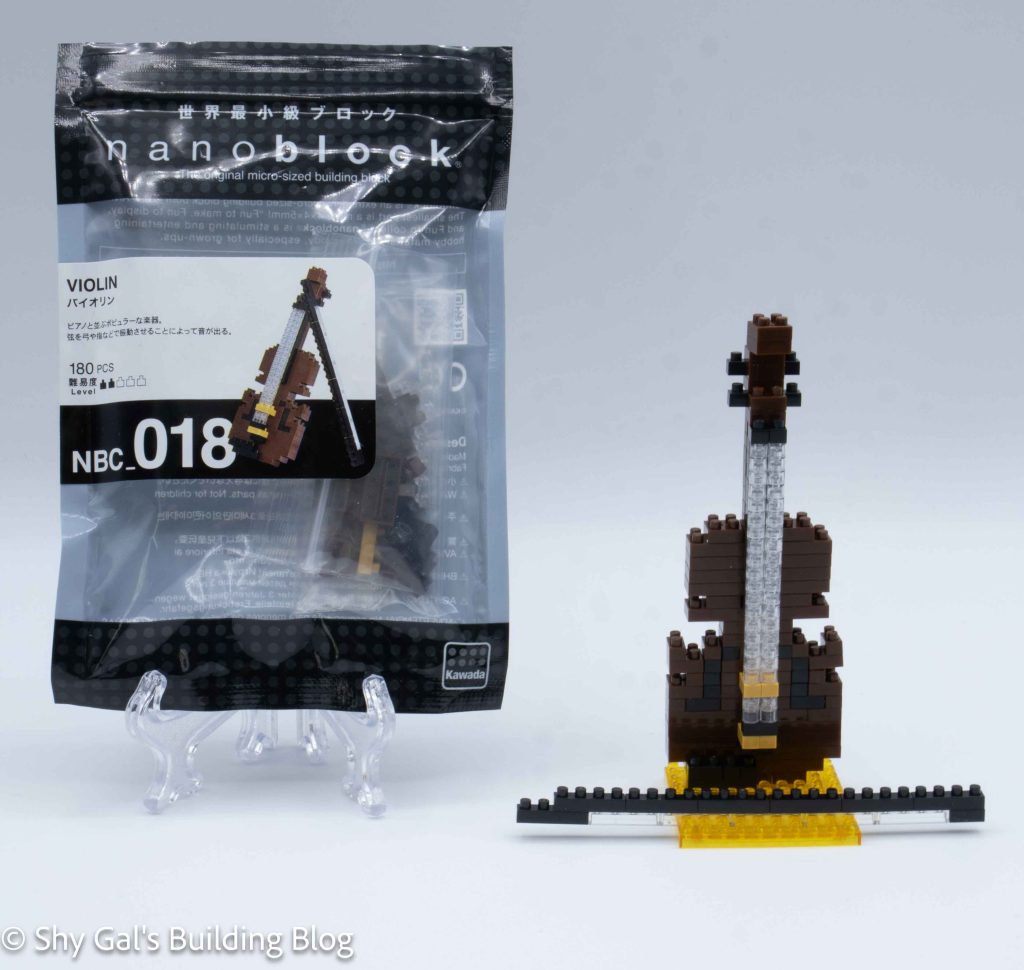
This post is a review of the nanoblock Violin build. Violin is part of the nanoblock Mini Collection Series. Wondering what else is part of the Mini Collection? Click here for a list.

Number: NBC_018

Number of Pieces: 180

Difficulty Rating: 2/5

Violin build front view

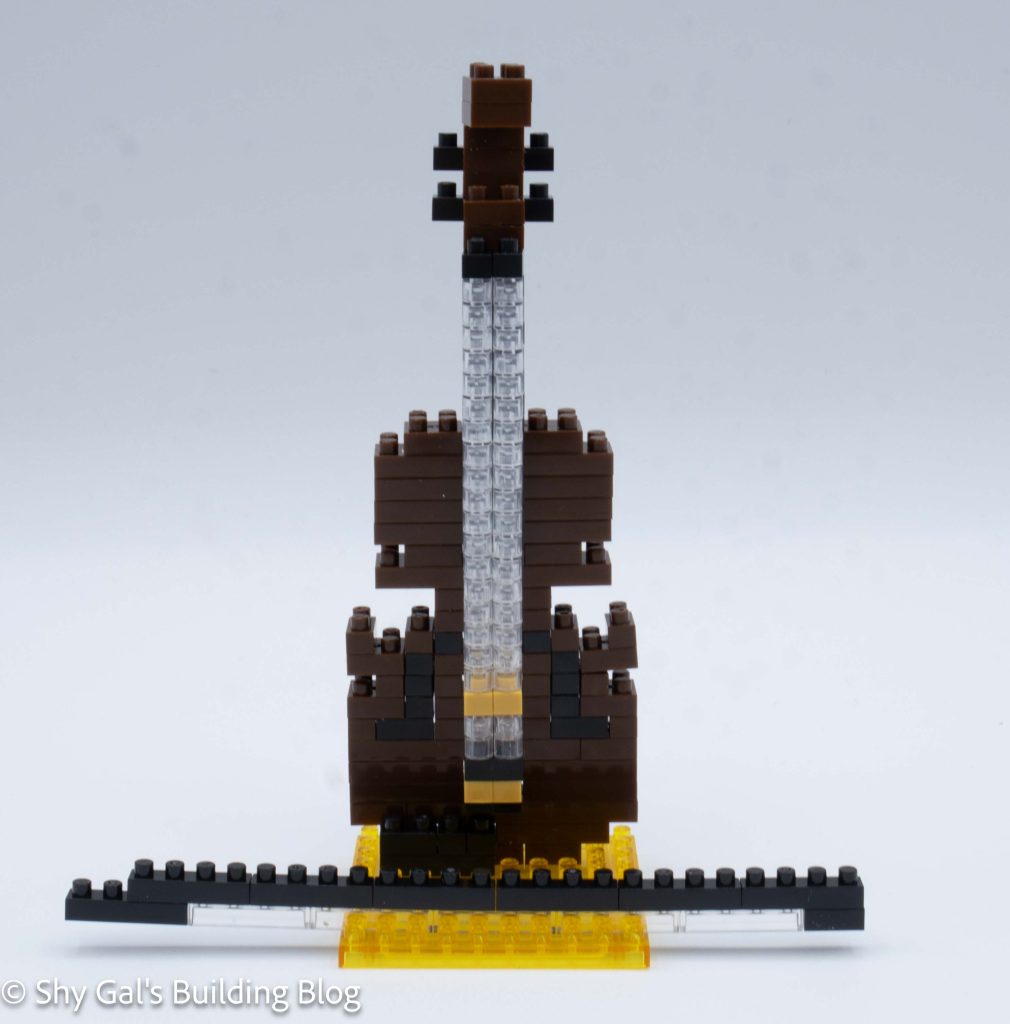
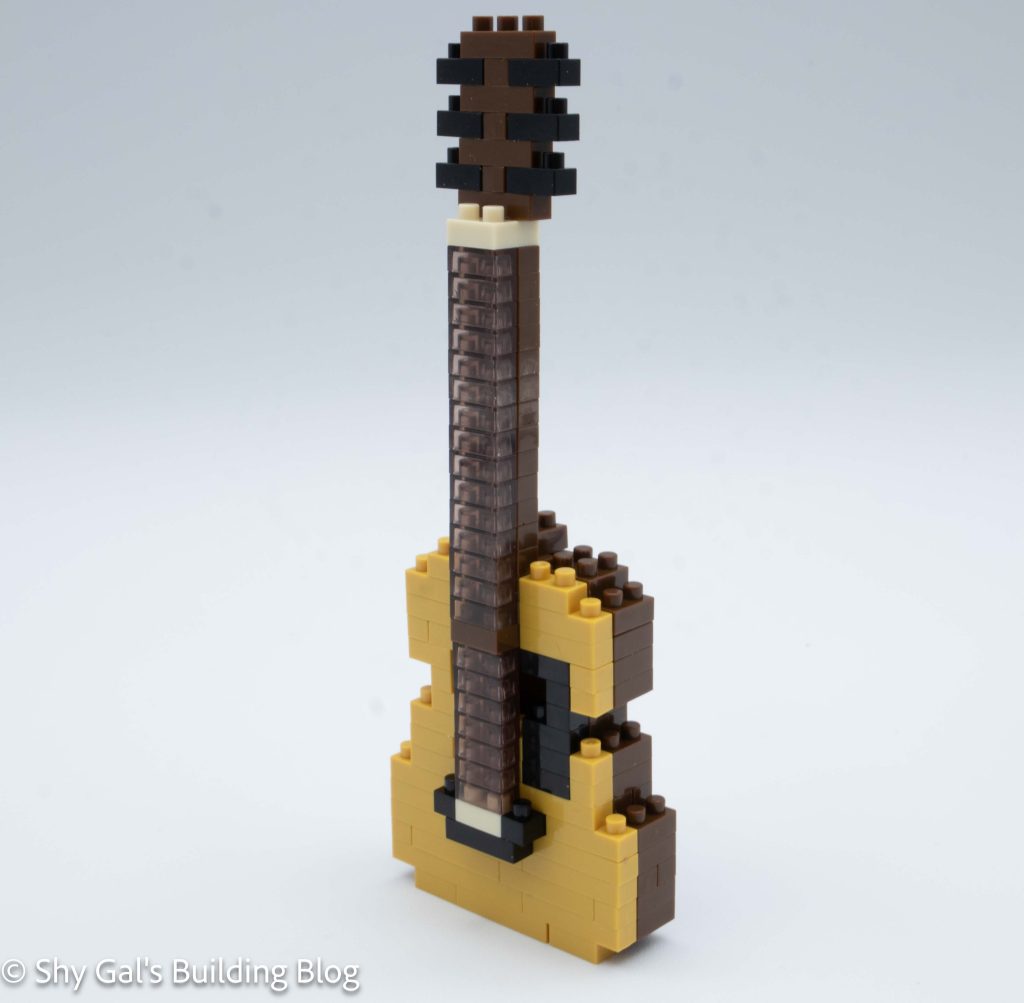
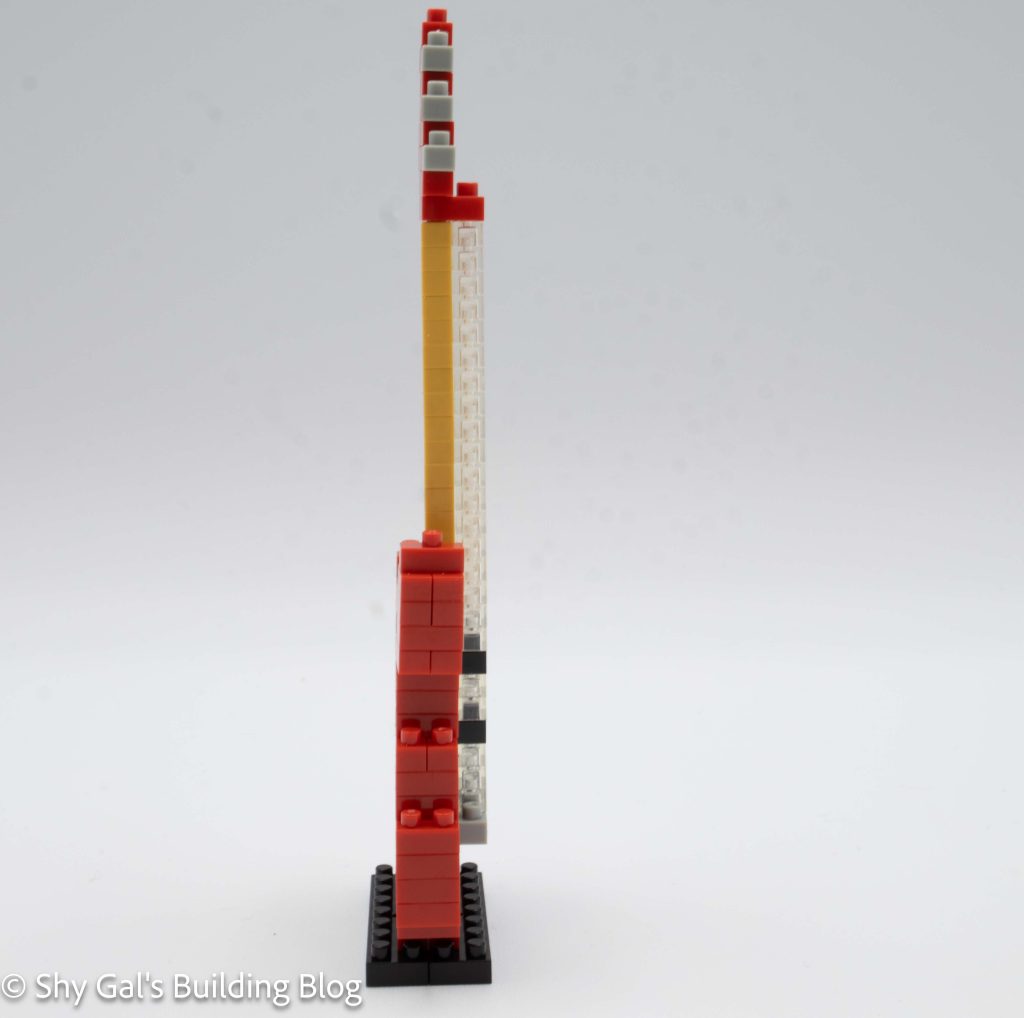
I began building the violin from the base of the instrument. I didn’t pay much attention and goofed up lining up studs in the first step. I needed to redo the step, carefully following the arrows as the bottom of the violin grew larger.

The next couple of steps are straightforward layers that were simple to follow. The hardest part is there are a few bricks that aren’t pinned between layers, so they can easily fall off.

Violin build side view

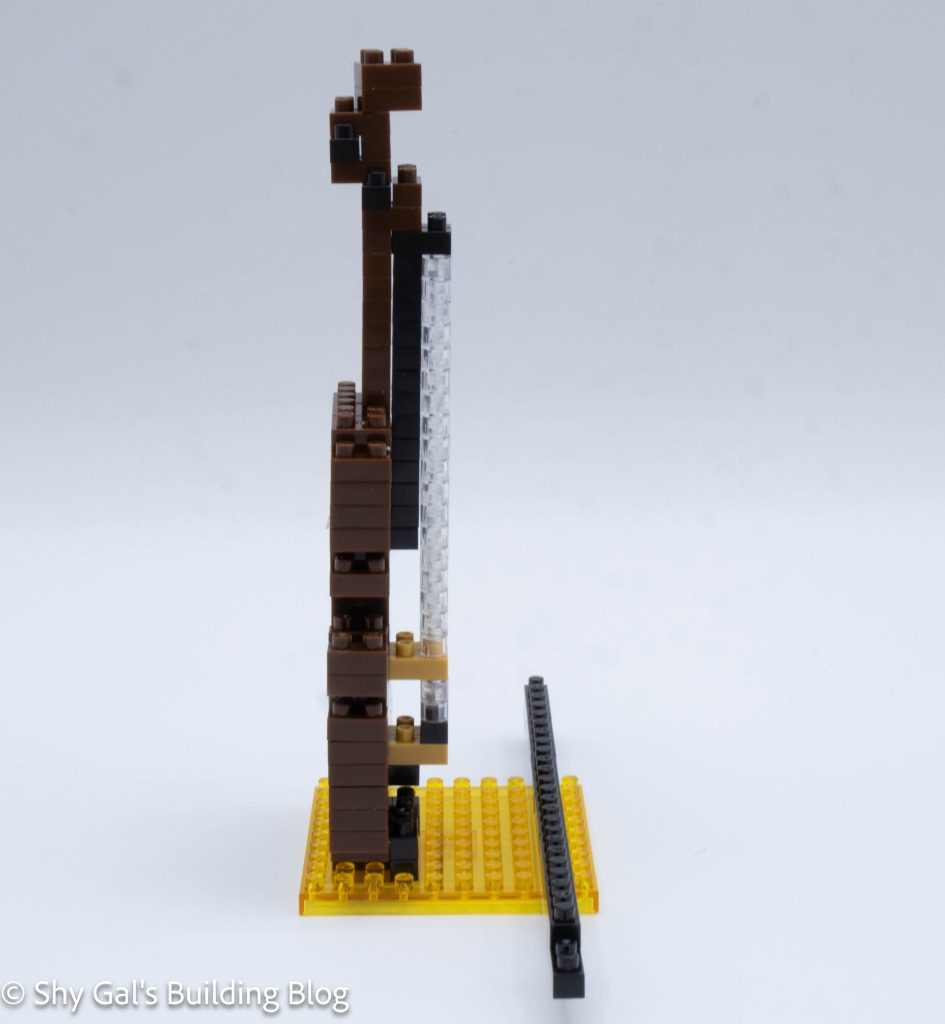
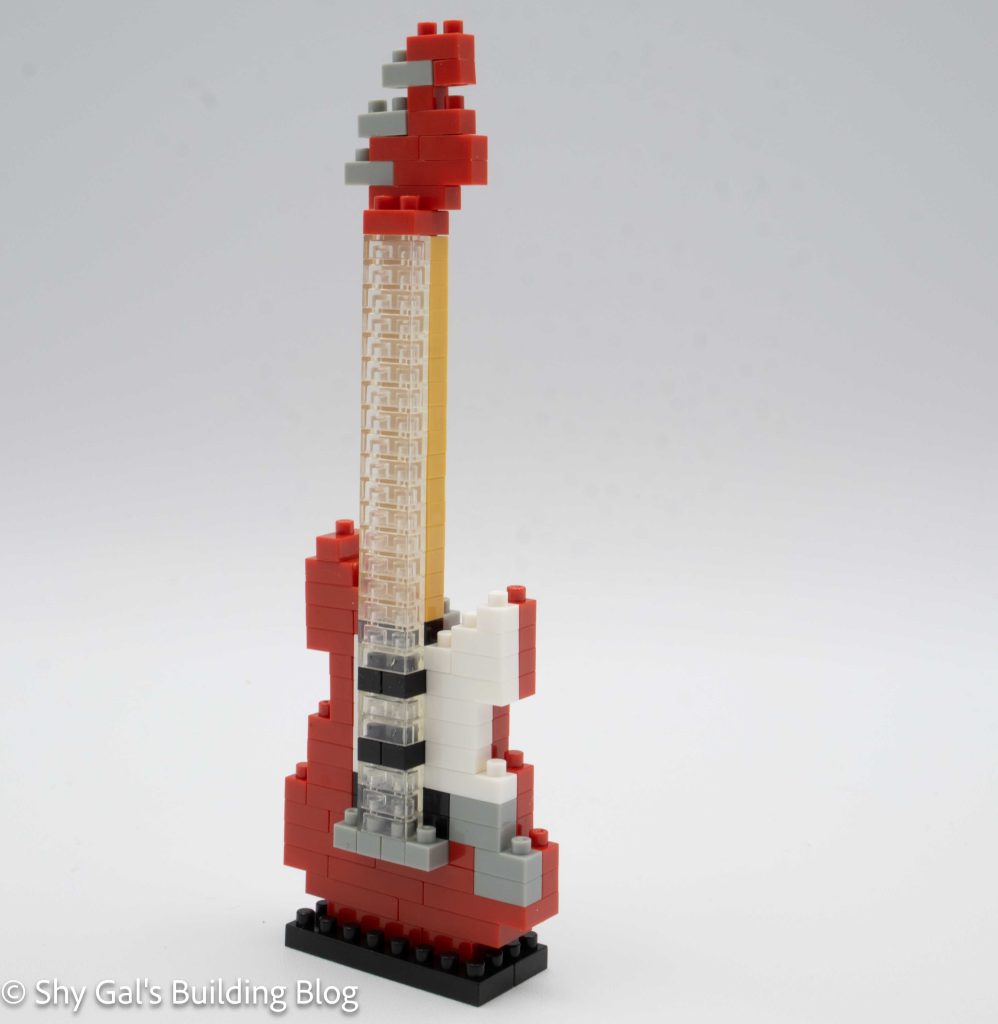
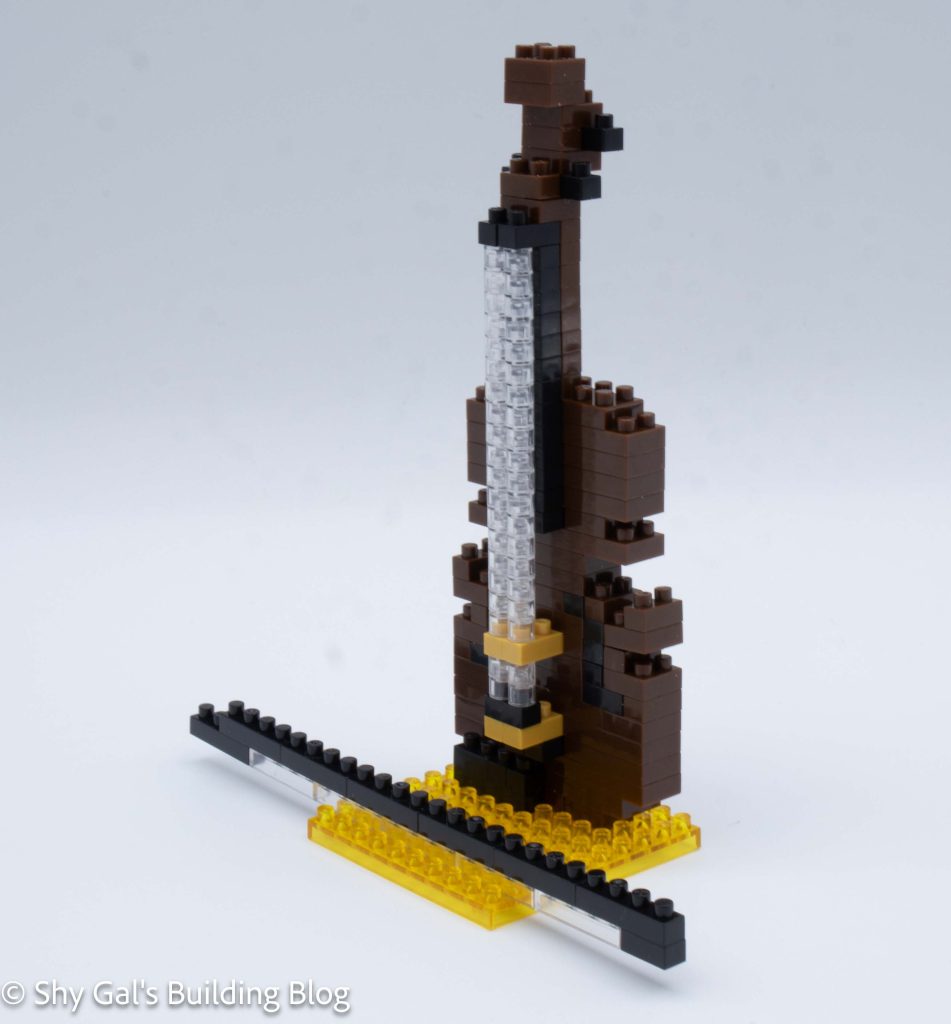
The next step is to build the black neck and the strings of the violin. These are tall stacks of bricks in either black or clear. Since each is a multiple of 3, I built sections of 3 and connected the sections together to make sure I had tall enough stacks.

The next step is to build and attach the scroll of the violin.

Violin build back view

The final step is to build the bow. This is a basic 2 layers of bricks and is very straightforward.

Next, I attached the violin to the base. It isn’t possible to connect the bow to the base how the instructions show the bow connected to the base. I wish nanoblock didn’t show builds on bases in impossible formats.

Violin build front 3/4 view

Things I liked:

  • I like how the scroll looks. I feel like it is the most accurate part of the build

Things I didn’t like:

  • I don’t like how the bow is “attached” to the base in the instructions since I can’t connect my bow to the base that way
  • The sides of the build are very blocky, and it makes the violin look like it has random sections popping out

Review of nanoblock Acoustic Guitar NBC_096

Acoustic Guitar build and package

This post is a review of the nanoblock Acoustic Guitar build. Acoustic Guitar is part of the nanoblock Mini Collection series. Wondering what else is part of the Mini Collection? Click here for a list.

Number: NBC_096 

Number of Pieces: 150

Difficulty Rating: 2/5

Acoustic Guitar build front view

I began by laying the may layer of bricks on my nanoblock pad. It had a light brown front and a dark brown back.

Acoustic Guitar build side view

I built the body of the guitar in layers. The layers added more details to make the guitar very recognizable. I was surprised that the sound hole in the center of the garage was hollow because it didn’t look that way in the pictures.

The next step was to add the neck. I really like the use of clear bricks to create strings because it adds depth to the strings.

Acoustic Guitar build back view

The final step was to build the head of the guitar. I found these instructions slightly confusing for some reason, but I was able to build the head.

Acoustic Guitar build front 3/4 view

Things I liked:

  • I liked the use of clear bricks to represent the strings
  • I liked the fact that the guitar is hollow with a hole in the main body

Things I didn’t like:

  • I don’t love the random brown brick in the middle of the strings. In my head, the strings go all the way along without being interrupted

Review nanoblock Alto Saxophone NBC_106

Alto Saxophone build and package

This post is a review of the nanoblock Alto Saxophone build. Alto Saxophone is part of the nanoblock Mini Collection series. Wondering what else is part of the Mini Collection? Click here for a list.

Number: NBC_106

Number of Pieces: 120

Difficulty Rating: 1

Alto Saxophone build front view

I’m not sure I agree this is a level 1 difficulty. I found it more difficult than several of the 2/5 that I have completed.

The Alto Saxophone is built in several steps to create large chunks that are all connected in the end to finish the build.

Alto Saxophone build side view

The first section that is built is the body of the Alto Saxophone. A bunch of round bricks created the body. It was a bit tricky because the body rotates, but there isn’t a note in the instructions that says it gets rotated.

The next step is to build the neck and mouthpieces of the instrument. These steps were very straightforward and simple to build.

The next step is to build the bell in 2 sections. The first section is to build very straightforward. In the second section, I had difficulty figuring out what step one was. It was marked, but I still had difficulty figuring it out.

Alto Saxophone build back view

The next step is to build the stand for the Alto Saxophone. This was very straightforward.

Finally, I connected all the pieces to create a finished Alto Saxophone. I liked how the instrument is on an angle so it looks like it can be played.

Alto Saxophone build front 3/4 view

Things I liked:

  • I like how the finished build is at an angle

Things I didn’t like:

  • I didn’t like how unclear step 12 was when I was building the instrument.

Review of nanoblock Grand Piano White NBC_053

Grand Piano White build and package

This post is a review of the nanoblock Grand Piano White build. Grand Piano White is part of the nanoblock Mini Collection series. Wondering what else is part of the Mini Collection? Click here for a list.

Number: NBC_053 

Number of Pieces: 130

Difficulty Rating: 2

Grand Piano White build front view

This build is identical to the Grand Piano (NBC_017) build. The only difference is that in NBC_017, the main color is black. In this build, the black bricks are white. However, the instructions are identical.

Grand Piano White build side view

The build begins with creating the main body of the piano. It is a simple three-layer brick structure that can easily be built on the nanoblock pad.

Next, the legs are added. It is a little hard to see where exactly to connect the bricks to the main body. Getting things lined up is important because the main piano can be connected to a 10×10 base that is provided with the kit.

Grand Piano White build back view

The next part is the trickiest part of the build. It is building the piano cover. It is tricky because it isn’t actually connected to the main body of the piano. The large section can be built on the nanoblock pad. It was straightforward, but getting a clean line at the edge of the top section was a bit tricky. The top section lays at angles on the top of the piano. It creates the image that the Grand Piano is open.

The final step is to build the stool for the piano. It is very straightforward.

Grand Piano White build front 3/4 view

Things I liked:

  • I like how the piano appears to be open even though it is created by just laying a section on top of another section

Things I didn’t like:

  • I don’t like how there is a base for the piano but not the stool, so the matching set is at different heights

Review of nanoblock Electric Bass NBC_051

Electric Bass build and package

This post is a review of the nanoblock Electric Bass build. Electric Bass is part of the nanoblock Mini Collection series. Wondering what else is part of the Mini Collection? Click here for a list.

Number: NBC_051

Number of Pieces: 140

Difficulty Rating: 2

Electric Bass build front view

This build is simply a tower of bricks that are 2-3 bricks deep. This allows there to be some depth and detail but still has the trim body of an electric bass.

Electric Bass build side view

The build begins with the base of the guitar. The build then goes up in layers to create the bass’s body. I needed to be careful to make sure I completed each layer correctly. It was a bit tricky to tell exactly which brick to use.

Electric Bass build back view

After building the body, the neck is added. The neck is two brick towers, one clear and one golden yellow.

The last step is to build the head of the bass. It was fairly straightforward and simple to build. I don’t really like how the finished neck looks on the finished guitar.

Electric Bass build front 3/4 view

Things I liked:

  • I really like that the build came with a pair of bricks to create a base for the bass

Things I didn’t like:

  • I don’t really like how the head of the bass looks

Review of nanoblock Electric Guitar Red NBC_037

Electric Guitar Red build and package

This post is a review of the nanoblock Electric Guitar Red build. Electric Guitar Red is part of the nanoblock Mini Collection series. Wondering what else is part of the Mini Collection? Click here for a list.

Number: NBC_037

Number of Pieces: 130

Difficulty Rating: 2

Electric Guitar Red build front view

This build is simply a tower of bricks that are 2-3 bricks deep. This allows there to be some depth and detail but to still have the trim body of an electric guitar.

Electric Guitar Red build side view

The build begins with the base of the guitar. The build then goes up in layers to create the body of the guitar. I needed to be careful to make sure I completed each layer correctly. It was a bit tricky to tell exactly which brick to use.

Electric Guitar Red build back view

After building the body, the neck is added. The neck is two 16 brick towers, one clear and one golden yellow.

The last step is to build the head of the guitar. It was fairly straightforward and simple to build. I don’t really like how the finished neck looks on the finished guitar.

Electric Guitar Red build front 3/4 view

Things I liked:

  • I really like that the build came with a pair of bricks to create a base for the guitar

Things I didn’t like:

  • I don’t really like how the head of the guitar looks

Review of nanoblock Grand Piano NBC_017

Grand Piano build and package

This post is a review of the nanoblock Grand Piano build. Grand Piano is part of the nanoblock Mini Collection series. Wondering what else is part of the Mini Collection? Click here for a list.

Number: NBC_017

Number of Pieces: 150

Difficulty Rating: 2

Grand Piano build front view

The build begins with creating the main body of the piano. It is a simple 3 layers of bricks that can easily be built on the nanoblock pad.

Next, the legs are added. It is a little hard to see where exactly to connect the bricks to the main body. Getting things lined up is important because the main piano can be connected to a 10×10 base that is provided with the kit.

Grand Piano build front 3/4 view

The next part is the trickiest part of the build. It is building the piano cover. It is tricky because it isn’t actually connected to the main body of the piano. The large section can be built on the nanoblock pad. It was straightforward, but getting a clean line at the edge of the top section was a bit tricky. The top section lays at angles on the top of the piano. It creates the image that the Grand Piano is open.

Grand Piano bench detail

The final step is to build the stool for the piano. It is very straightforward.

Grand Piano build back 3/4 view

Things I liked:

  • I like how the piano appears to be open even though it is created by just laying a section on top of another section

Things I didn’t like:

  • I don’t like how there is a base for the piano but not the stool, so the matching set is at different heights